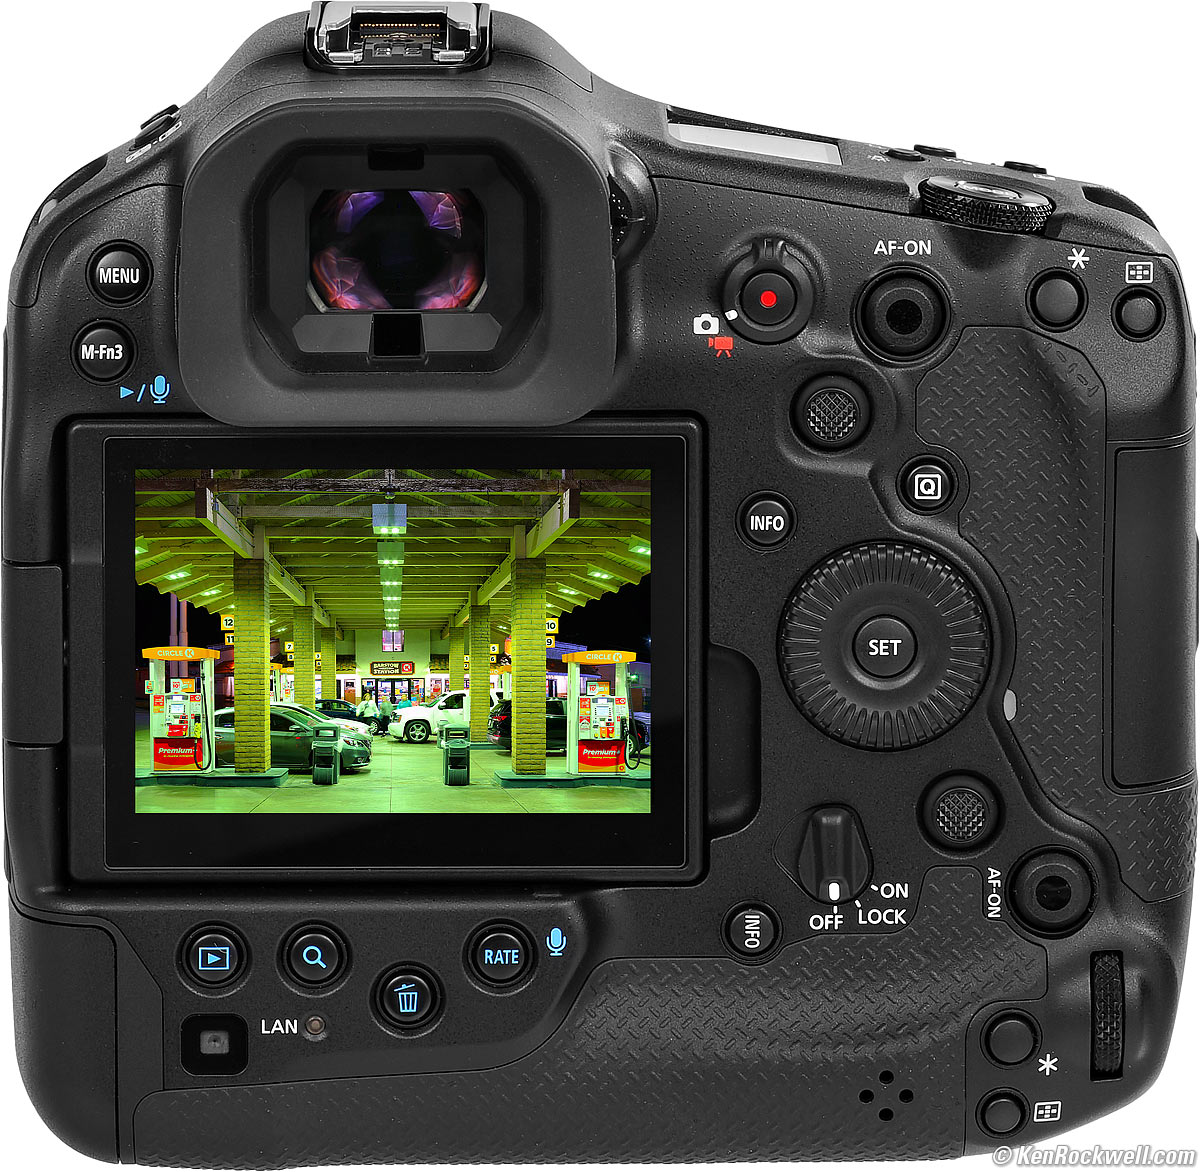
Canon EOS R1 Pro Tips & User's Guide
EOS R1 Review
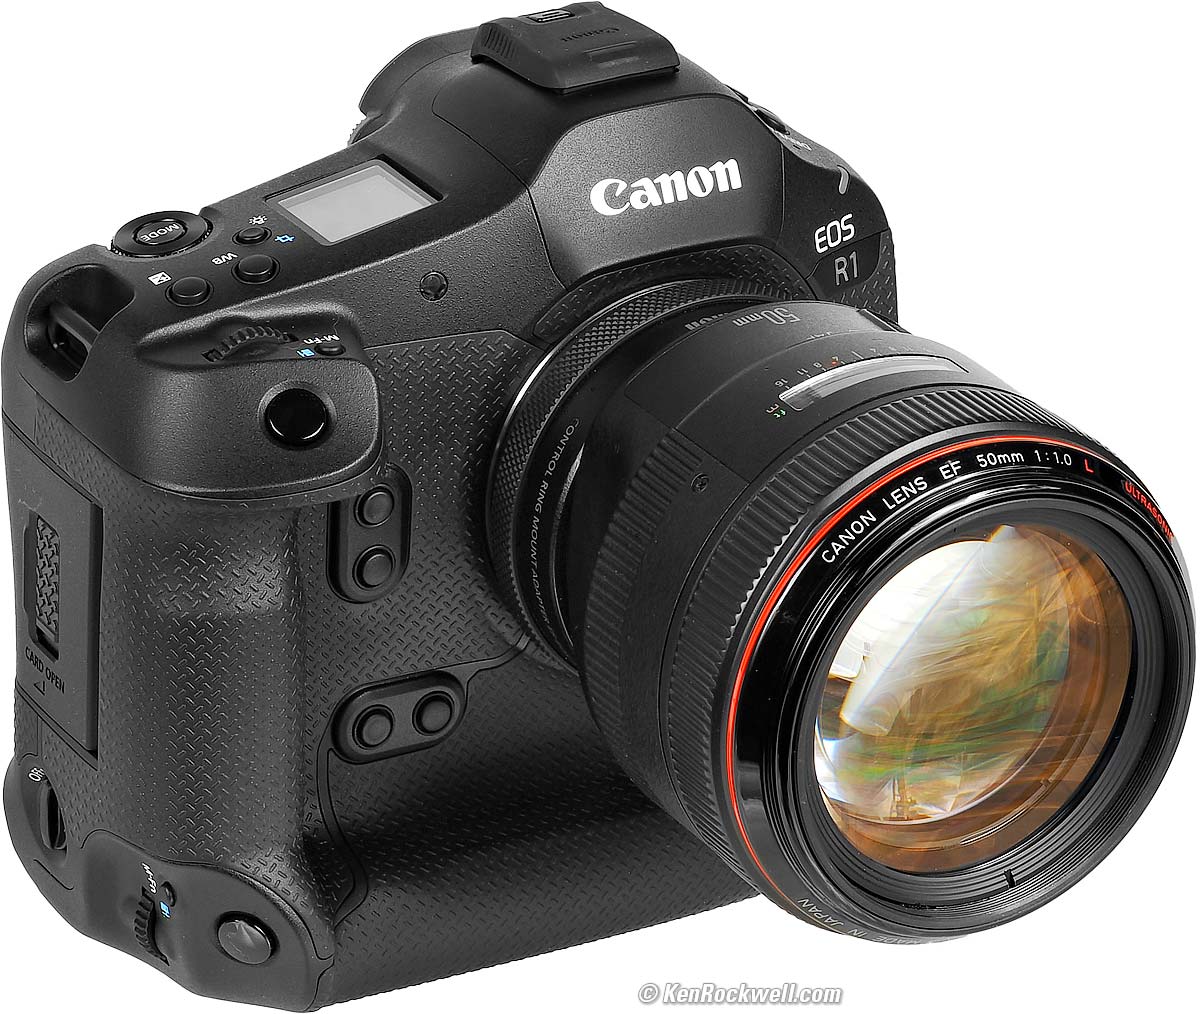
Canon EOS R1 (39.3 oz./1,115g with battery and one CFexpress type B card, has two CFexpress type B slots, $6,799) and EF 50mm f/1.0L USM on an EF to RF adapter. bigger. I got mine at B&H. I'd also get it at Crutchfield, at Adorama or at Amazon, or get it used if you know How to Win at eBay, or get it used at KEH.
This all-content, junk-free website's biggest source of support is when you use those or any of these links to my personally-approved sources when you get anything. Thanks for helping me help you! Ken.
If you find this guide as helpful as a book you might have had to buy or a workshop you may have had to take, consider helping me write more of these with a gift of $5.00 — especially if you intend to make a printout of this copyrighted work.
Custom Buttons Calibrating Eye Control
ThumbGlide Controls Stabilization
Getting 40 FPS Fine-Tune Frame Rates
Vertical Exposure Compensation Bar Graph
C2 & C3 Modes Auto White Balance Exposure
Focus Bracketing & Depth Compositing
Long Exposures One-Click Play & Magnify
96 MP Upscaling Simplify Playback Options
Color Histograms Everywhere for Playback
Best Burst Image Selection Voice Recorder
Canon's own EOS R1 User's Guide PDF
R1 R3 R5 II R5 R5C R6 III R6 II R6 R R8 RP R7 R10 R50 R50V R100
Bodies Compared RF Lenses EF Lenses Flash
November 2025 Better Pictures Canon Reviews Mirrorless RF Lenses EF Lenses Flash All Reviews

Introduction R1 review index top of guide

I buy only from these approved sources. I can't vouch for ads below. |


This is a plain-English guide about how I use my Canon EOS R1.
If you want all the excruciating details, see also Canon's own EOS R1 User's Guide PDF.
This will make you an expert on the EOS R1's controls and menus. It also includes a lot of tips, tricks, and the settings I prefer to use.
To get great photos you still need to get yourself to the right place at the right time and point the camera in the right direction, which is a lot harder than mastering the settings of the R1. Right out of the box at default settings, the R1 does a great job all by itself. Making a great photo involves timing, FARTing, knowing the critical basics of what makes a great photo and a whole lot more.
Please enjoy my articles on How to Make Great Photos if you haven't already. Cameras don't take pictures, people do. It's all about finding something cool, and then showing us exactly what's cool about it. This guide will help you become an expert at the R1, but most importantly you need to be able to see the picture in the first place.
I got my EOS R1 at B&H. I'd also get it at Crutchfield, at Adorama or at Amazon, or get it used if you know How to Win at eBay, or get it used at KEH.
On with how to use your R1:
All of Canon's Mirrorless cameras have very similar menus, tricks and options. See also my much more detailed EOS R6 Mark II User's Guide and EOS R8 User's Guides as well. Most of those guides apply directly to the R1, especially the sections on autofocus, the C1, C2 and C3 modes and the FV exposure mode. Of course the exact menu locations will be different and some options may or may not be in both cameras, but you get the idea.
Below is mostly what's new or unique to the R1. If you own the R1, you're a big boy and I don't need to go into all the details I do at my more detailed R6 Mark II Guide, R8 Guide, RP Guide, R5 Guide, R6 Guide and EOS-R Guide.
Of course some of these settings are available in other places than the menu system I show below (like the [Q] screen), and I program my favorites to the function buttons. I don't waste this camera on video, so I program my red MOVIE button next to the eyepiece to be MENU button, but that's just me.
I got my EOS R1 at B&H. I'd also get it at Crutchfield, at Adorama or at Amazon, or get it used if you know How to Win at eBay, or get it used at KEH.
Power R1 review index top of guide
See the Specifications and Power sections of my review.
Set a Password — What? R1 review index top of guide
The newest firmware as of late 2025 now requires we set a password to use our cameras, and enter this new password every time we wake up our camera.
Nooo!
There's an easy way around this: you do have to set a password the first time (mine is 123456), and the next time you turn on your camera, enter the password then tap the DO NOT ASK ME AGAIN option, make sure that there is a check mark next to it, hit OK, and you'll never see it again.
This foolishness is from European privacy paranoia; they're actually concerned that you might have someone's face stored in the Favorite Faces section of the autofocus system, and that some enterprising hacker would go to the trouble of stealing this "personal information" (facial parameters) from your camera instead just pulling it from Facebook - the very name of which implies where people go to harvest facial recognition data along with the names, addresses and travel histories of these people obviously lacking from the data in your camera.
This is only to protect the very sensitive personal information in your camera; it does nothing to deter theft since you always can reset the camera and start from scratch, erasing that precious facial data.
Arrrgh.
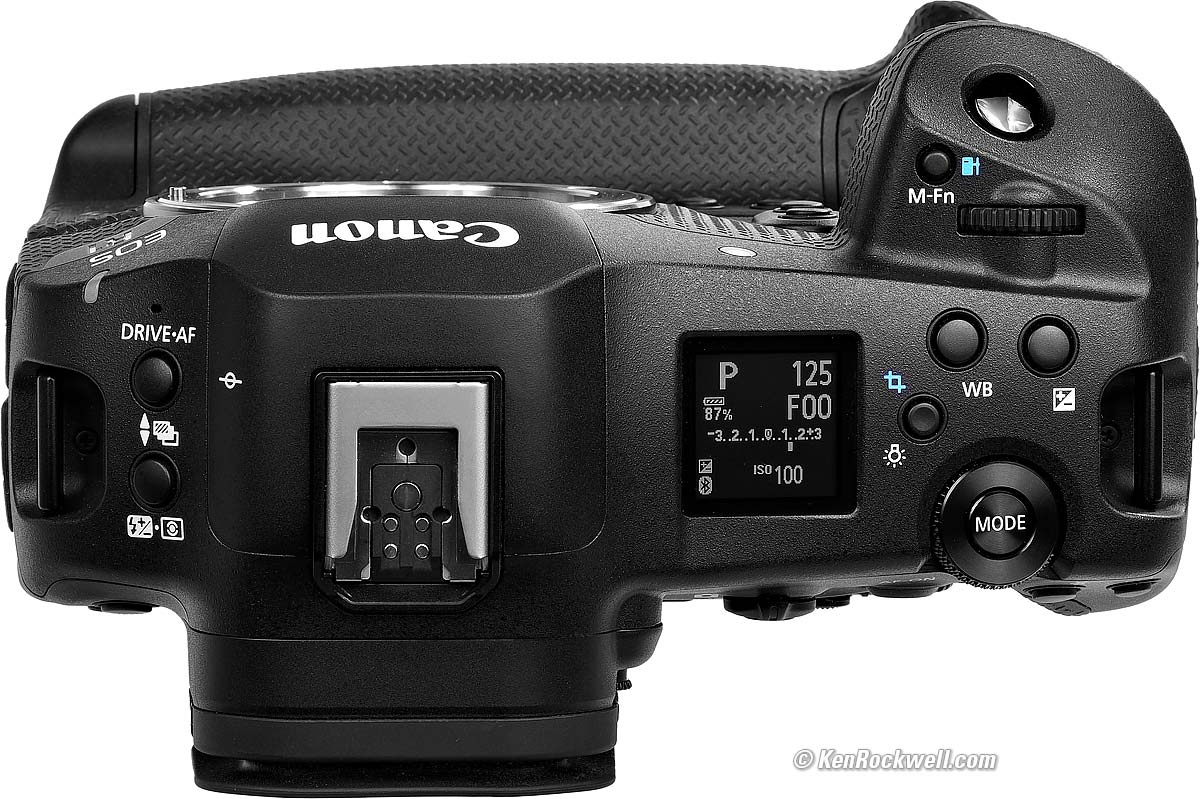
Custom Buttons R1 review index top of guide
We set the buttons to do what we want at:
MENU > Customized controls page 1 > Customize buttons for shooting > find the button you want, and set it as you like.
Sorry, not all buttons are programmable and you can't program them to everything.
Calibrating Eye Control R1 review index top of guide
To get it to work as well as possible, do the calibration routine at
MENU > Customized controls page 5 > Eye control > Calibration (CAL) > Start. Look through the finder and follow the directions.
Here's the trick: do this calibration multiple times under as many different lighting conditions as you can. The camera never shares this, but each time you run a calibration it adds it to the data it's already collected from precious calibrations. It does not simply write over the previous data; it refines it and recognizes it so it can apply it to the same conditions in the future.
Also important is to be sure to use the same CAL no. (MENU > Customized controls page 5 > Eye control > CAL no.) each time. Use different CAL nos for different people, not for different conditions.
Good luck. I turn off Eye Control (MENU > Customized controls page 5 > Eye control > OFF) because it's always off doing something different while the magic subject identification modes and the magic ThumbGlide controllers (explained next) work even better for me.
Activate the Amazing ThumbGlide Controllers Inside the AF-ON Buttons R1 review index top of guide
Be sure these are active by enabling them at
MENU > Customized controls page 1 > Customize buttons for shooting > find the AF ON✣ control > set it to anything but off.
Image Stabilization R1 review index top of guide
When used with an unstabilized lens, turn stabilization on and off at MENU > CAMERA page 7 > IS (Image Stabilizer) mode.
With stabilized (IS) lenses with a STABILIZER switch on the lens, this menu option is grayed-out.
Personally I add this option to my MY MENU (★) menu, in which case it will be there (but grayed-out) with a stabilized lens, and available with unstabilized lenses.
When used with a stabilized lens, the in-camera sensor shift stabilization works only at the same time as a lens' optical stabilization. There is no way to use either of the optical or sensor-shift stabilizers separately; they're either both ON or both OFF with a stabilized lens.
Getting 40 FPS R1 review index top of guide
The great news is I get 40 FPS with auto exposure, any Auto or manual ISO up to ISO 409,600 with full lens corrections and tracking autofocus.
However, it only gives 40 FPS under certain other conditions. Luckily moving subjects and changing lighting doesn't slow it down.
Set the High Speed + drive mode at MENU > CAMERA page 6 > Drive mode > High speed continuous +. That's the 40 FPS mode.
You need set the electronic shutter at MENU > CAMERA page 6 > Shutter mode > Electronic ES. The mechanical shutter only runs to 12 FPS.
Turn off Anti-flicker shooting at MENU > CAMERA page 2 > Anti-flicker shoot. and HF anti-flicker shooting > OFF. Frame rate slows with it on.
Your shutter speed needs to be 1/125 or faster. At 1/100 and slower the shutter has to stay open so long that it slows the frame rate!
I only get to 24 FPS with manual flash. It also will slow if you're using TTL flash exposure control.
I turn off distortion correction because it uses computing power and thus battery power, and I don't need ultra straight lines in my action shots. I wouldn't worry about it; this reminds me of my dad rotating the hood ornament on our rented Lincoln Continental by 90º back in 1973 to cut its wind resistance to improve our cruising range. Dad was kidding us, of course.
Fine Tuning Frame Rates R1 review index top of guide
If you don't want the default rates for each frame rate setting with the electronic shutter, adjust these at MENU > CUSTOM page 4 > ES Continuous shooting speed.
Live RGB COLOR Histograms While Shooting R1 review index top of guide
Neither Nikon nor Sony can do this at all, but Canons can show you live RGB histograms before you shoot!
Single grayscale histograms are nearly useless with color images; you need live RGB histograms as you shoot to gauge exposure with color images.
To activate these, set MENU > CAMERA page 9 > Shooting info. disp. > Histogram disp. > Brightness/RGB > RGB
and
MENU > CAMERA page 9 > Shooting info. disp. > Histogram disp. > Display size > your choice of Large or Small. I prefer small; it shows me what I need and covers less of the image.
Show Battery Percentage in Finder R1 review index top of guide
I set this at:
MENU > CAMERA page 9 > Shooting info. disp. > scroll down below the bottom of the page > hidden down there, find Battery level (%) display option > and set it to ON.
Right-Side Vertical Exposure Compensation Bar Graph R1 review index top of guide
This is on by default. I turn it off because there's already one at the bottom of the finder and the vertical one blocks my image, unlike the ones at the side on DSLRs.
I turn it off at:
MENU > CAMERA page 9 > Shooting info. disp. > scroll down below the bottom of the page > hidden at the very bottom, find Vertical exp level > and I turn it off.
Getting the C2 and C3 Preset Modes R1 review index top of guide
I kid you not: Canon locks-out the C2 and C3 exposure modes unless you specifically unlock them!
Unlock them at MENU > CUSTOM page 1 > Restrict shooting modes > (select C2 and then C3) > tap SET to check them > OK.
Auto White Balance R1 review index top of guide
There is a new AWB-W "White Priority" setting in addition to the usual AWB setting, now called "AWB - Ambience Priority."
Use the AWB-W setting when you want neutral colors under indoor (tungsten) light, and use the regular AWB setting when you want warm light to stay warm.
Set this at:
MENU > CAMERA page 4 > White balance > AWB > press INFO button > turn big rear knob > SET.
Exposure R1 review index top of guide
Be careful with eye-control; often you'll get spot-weighted metering which can give different exposures from frame-to-frame of the same subject as your eye may move around. No big deal; just pay attention if this is happening and it's not the effect you want. Before eye control we weren't able to move focus areas, and often meter weighting, around so fluidly.
Focus Bracketing & Depth Compositing R1 review index top of guide
I covered this back in my EOS R1 review at Focus Bracketing & Depth Compositing.
Bulb Timer and Long Exposures R1 review index top of guide
In BULB, a MM:SS timer shows on the top LCD. Sadly, even if the top LCD is set to illuminate, it reverts to the unilluminated mode while the timer's running so you can't see it in the dark!
Better, the R1, like many newer Canon cameras, has a clever BULB TIMER option at MENU > CAMERA page 6 > Bulb timer that lets us set precise long exposures out to 100 hours. Set this, select BULB mode, set the self timer, tap the shutter and walk away, no need for a remote cord or stopwatch. Bravo!
One-Click PLAY & Magnify R1 review index top of guide
I program my SET button to both PLAY an image, as well as magnify it with just one click. It's a super time saver for checking my work.
I program this at MENU > Customized controls page 4 > Customize buttons for playback > choose the SET button > set it to 🔍 Magnify/Reduce.
One tap and you're already looking at your zoomed image. Hit SET again and it reverts back to showing the complete image.
96 Megapixel Upscaling R1 review index top of guide
This only works after you've shot a frame, not while you're shooting. It works from raw and especially works great from JPGs, but you have to find the image and process it after it's shot.
Set this at
MENU > [▶] PLAY page 3 > In-Camera Upscaling > Select the photos you want upscaled and have at it.
It saves a new image in the same format as the original.
Simplify Playback Options R1 review index top of guide
I find it helpful to deactivate the playback options I don't use. It's much faster selecting the screens I do use since I don't have to click past the ones I don't.
I uncheck the INFO pages I don't use at:
MENU > [▶] PLAY page 5 > Playback information display > and uncheck everything other than the first three.
RGB COLOR Histograms Everywhere in Playback R1 review index top of guide
The B&W (grayscale) histogram is useless unless you're shooting in B&W, yet most cameras show these by default.
We usually have to press the INFO button a bunch of times to get to an RGB histogram in playback.
Here's how I make the little histogram to the right of the little playback image icon in most of the INFO screens always show the three RGB rather than grayscale:
MENU > [▶] PLAY page 5 > Playback information display > select any of the options other than number 1 > press INFO > select RGB.
Whew! You're welcome 😁.
Best Burst Image Selection R1 review index top of guide
The R1 has a new "Delete Burst" playback option. If you PROTECT any images, the TRASH button or Delete Burst option won't touch them.
I never use the RATE function, however, especially at 40 FPS, there is a clever way you can erase all but the best images from long bursts. This means instead of sorting through thousands of images after an event you can come back with just the winners and all the junk already deleted!
Tap TRASH while playing, and if the displayed image is part of a burst, a cryptic "erase scene including image" option appears. That's Japanese for "Delete Burst." Select that and the whole burst is deleted.
Simply PROTECT the best image or images out of any burst, and then when you Delete Burst, all the images are erased except your very best!
You can PROTECT images the hard way at MENU > [▶] PLAY page 1 > Protect images, or program your RATE/MIC button to be a PROTECT button at MENU > Customized controls page 4 > Customize buttons for playback > and set whatever button(s) you like to any of the 🗝 Protect or 🗝 Protect/combination options.
Now just tap PROTECT for your winning shots, delete the rest of the burst, and nothing but your good (protected) shots remain.
For easy voice notes and selecting images, program the RATE/MIC button to be a PROTECT/MIC button at MENU > PLAY page 4 > Protect/Mic. Now you can hold the RATE/MIC button to record a voice memo while playing an image, or tap it to PROTECT the image.
Hint: There is no marked 🗝/PROTECT button, you have to program a button to 🗝 Key/Mic as described above.
Hint: Once protected it doesn't seem to want to record a voice memo with that image, so first record and then PROTECT an image. If an image is protected (shown with a [🗝] icon on playback), tap the RATE/MIC button to unprotect, then hold it to record, and tap again to protect. There may be a smarter way to use these two functions at once; I haven't played with it that much.
Hint: Double check as this can change with firmware and how you have your camera set, but I use my second card as a backup (Card Function > Record to Multiple), and for me when I delete anything, it deletes only from my primary card, not the backup card. Therefore if I delete anything accidentally I always can retrieve it from my backup card.
Voice Recorder R1 review index top of guide
Set your choice(s) of the top left rear [▶] PLAY/MIC button and/or the bottom left rear RATE/MIC button (and who knows what others) to the Play/Mic option at MENU > Customized controls page 4 > Customize buttons for playback > and set whatever button(s) you like (M-Fn3, RATE and who knows which others) to [▶] PLAY/MIC, ★ Star/Mic or 🗝 Protect/Mic to use that button as a one-touch voice recorder.
You can program at least two different buttons to these functions; it's a free country.
Once set, play an image and hold that button for two seconds or more and speak. A .WAV file with the same file number gets recorded. Release the button when done. Easy!
To play in-camera, you'll see a [ ♪ ] icon while playing an image with a voice note. Tap the button(s) you've programmed to [▶] PLAY/MIC and it plays the recording. Hold the programmed button(s) to record more.
We use this to take notes as events unfold, typically to name the people in a photo and/or give the exact spellings of their names, or mention what's special in that photo for when the images are published.
When downloaded, the WAV files sort right next to their images.
SIMPLE!
GPS R1 review index top of guide
Activate GPS at MENU > ↓~↑ Various settings page 4 > GPS settings > GPS > (choose mode 1 to work properly, or mode 2, which only gets GPS locations after the camera has been ON for about a minute).
It doesn't work very well. For all I know it might be better to use the app and use the GPS in your phone.
Shutter Counter R1 review index top of guide
See this at MENU > 🔧 WRENCH page 6 > System status display.
It shows the serial number, the firmware version and the shutter count in thousands.
I suspect it's only showing mechanical-shutter shots because mine still reads "≤ 3000" and I believe I've made about 17,000 shots so far.
© Ken Rockwell. All rights reserved. Tous droits réservés. Alle Rechte vorbehalten. Alla rättigheter förbehållna. Toate drepturile rezervate. Niciun vampir nu a fost implicat în crearea acestei lucrări. Doe! Omnia jura reservata. Ken Rockwell® is a registered trademark.
Help Me Help You top
I support my growing family through this website, as crazy as it might seem.
The biggest help is when you use any of these links when you get anything. It costs you nothing, and is this site's, and thus my family's, biggest source of support. These places always have the best prices and service, which is why I've used them since before this website existed. I recommend them all personally.
If you find this page as helpful as a book you might have had to buy or a workshop you may have had to take, feel free to help me continue helping everyone.
If you've gotten your gear through one of my links or helped otherwise, you're family. It's great people like you who allow me to keep adding to this site full-time. Thanks!
If you haven't helped yet, please do, and consider helping me with a gift of $5.00.
As this page is copyrighted and formally registered, it is unlawful to make copies, especially in the form of printouts for personal use. If you wish to make a printout for personal use, you are granted one-time permission only if you PayPal me $5.00 per printout or part thereof. Thank you!
Thanks for reading!
Ken.