iPhone 16 Pro Max Tutorial & Users Guide
<—back to iPhone 16 Pro Max Review
See also the Cases, Chargers, Lenses, Gimbals & etc., Filters and Microphones sections of my iPhone 16 Pro Max Review.
|
|
iPhone 16 Pro Max. bigger. |
iPhone 16 Pro Max. bigger. |
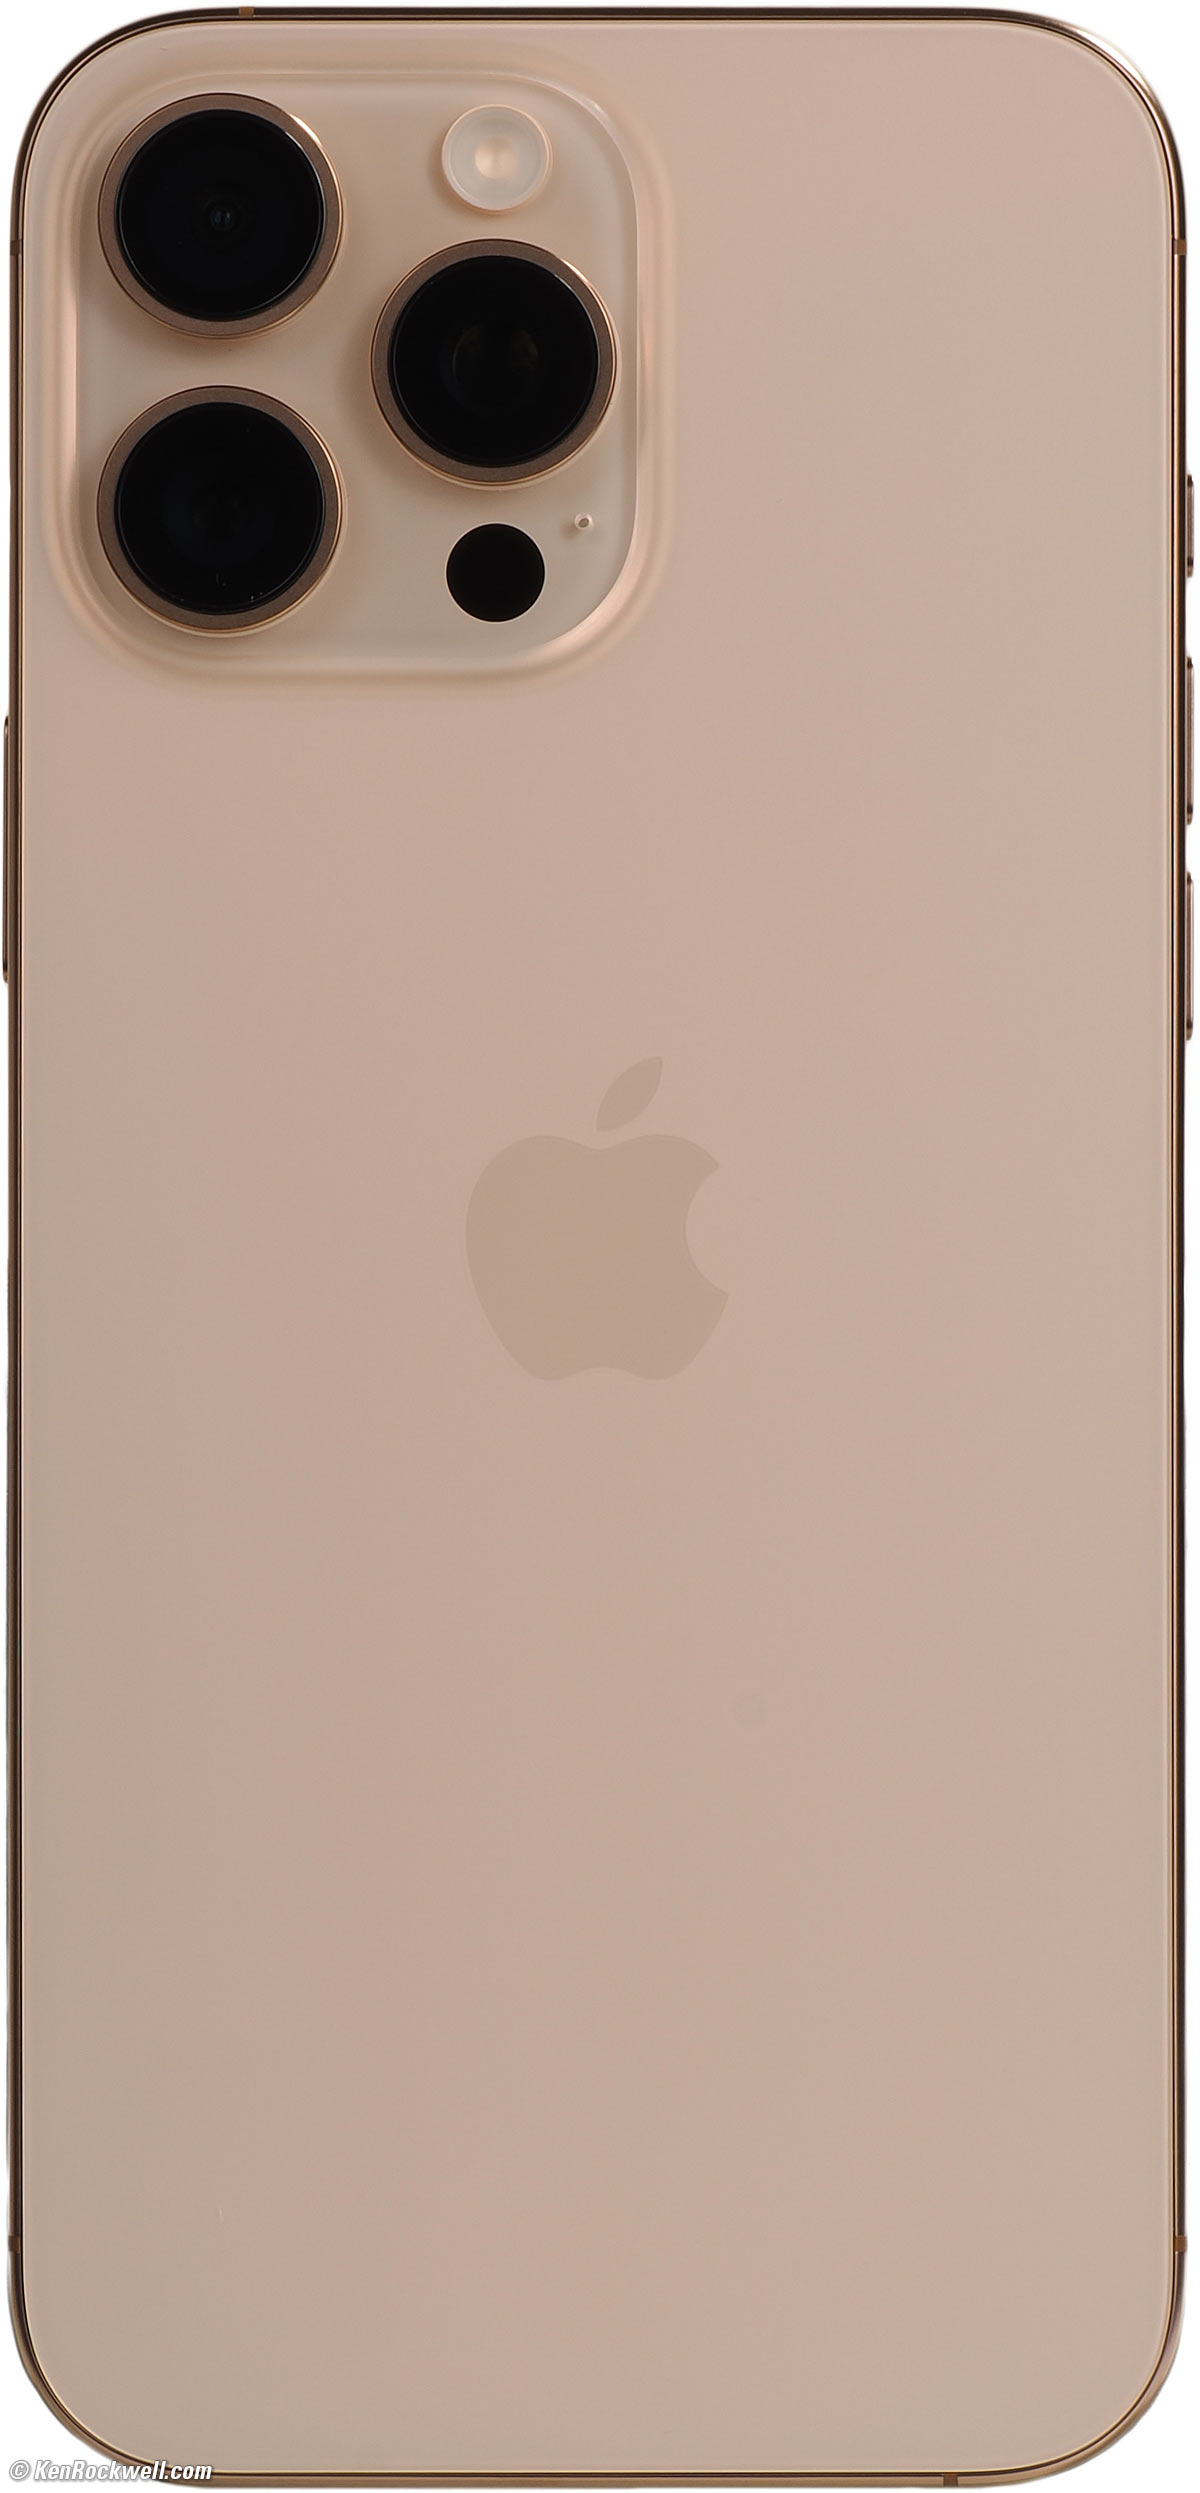
Apple iPhone 16 Pro Max in Desert Titanium (1TB, 512GB or 256GB storage, titanium edge with integral Ceramic Shield screen protection, 7.970 oz./226.0g). bigger. I'd get it at Amazon or get it at eBay (How to Win at eBay).
This all-content, junk-free website's biggest source of support is when you use those or any of these links to approved sources when you get anything, regardless of the country in which you live. Thanks for helping me help you! Ken.
April 2025 Better Pictures Apple Canon Sony Nikon Fuji LEICA Zeiss HASSELBLAD All Reviews


|


Transferring Everything from Your Old iPhone top iPhone 16 Pro Max Review
We all have our preferences. Since I have a ton of files on my iPhone imported from my Mac, simply restoring from an iCloud backup fails to copy 700 GB of photos and video that came from my Mac, requiring a long Sync later to get it all back.
Therefore what transfers everything for me is to transfer directly from iPhone to iPhone by keeping them close to each other, not downloading from iCloud.
700 GB took 3.4 hours to transfer, along with everything else like my Recent Photos (all 60,000 of them).
Once my data is transferred, your new iPhone will download fresh copies of all your apps.
Once this is done, open every app and log in with your password. About half your apps will require this, so best to do it while you can rather than when you're in a rush out in the field.
I had to delete and reinstall the My BMW app because it wasn't seeing any of my cars, however doing this erased the app's saved camera images from my car's 360º camera. Next time I'll pay more attention to trying to find my cars inside the app rather than deleting and reinstalling; when transferring from phone to phone it usually transfers over all the data from each app, but not if I deliberately delete the app, duh.
The Stopwatch keeps time even when transferred to the new phone! It doesn't miss a beat.
Google Maps timeline is now stored on your phone, so to get your history on your new phone, you have to go to the Google Maps app > Tap your face in the upper right > tap Your Timeline > tap the cloud on the top middle right > see "Your backups" toward bottom of screen > tap the three dots next to the older phone (not "This device") and tap Import. It will bring it all up to date!
Be sure to go out to your garage and reconnect CarPlay to all of your cars now while you're not running out for an appointment, otherwise you'll be disconnected when you get in your car in a rush.
Hint: In the iPhone, select Settings > General > CarPlay (instead of Bluetooth) and look for your car under "others" at the bottom and take it from there. Assuming you have a CarPlay car, don't connect via the old Bluetooth settings.
Hint: See the rest of this guide for how to reorganize your app icons in CarPlay. You do it in your iPhone, not on your car's CarPlay screen.
Be sure to reconnect all your headphones to Bluetooth again. Doing all this now while you're in the mood is much better than having to reconnect each device as you come across them and want to relax.
Ditto for eMail signatures; I had mine saying "sent from iPhone 15 Pro Max," and of course I updated it to "sent from iPhone 16 Pro Max." Don't laugh, if you don't go changing all this now you might go 8 months with the wrong signature.
Rename your phone; I have so many devices I name them with with kind of device they are. Set this at SETTINGS > GENERAL > ABOUT > NAME to be sure your new phone is named as you like.
If you have a BMW digital car key stored in your Wallet so you can open and start your car with just your iPhone, it doesn't transfer automatically to your new phone. BMW had no idea how to transfer it and told me to delete everything everywhere and start from scratch. Wrong!; I didn't even bother trying that. All I had to do is share the key again from the original iPhone which happened to be the "owner" of the car. I got an invitation on my new iPhone and accepted it. (The owner's iPhone will say that that person (me) was deleted when the new person (me on the new iPhone) accepts the key on the new iPhone, meaning it was deleted from that person's OLD phone.)
Last but not least, FaceBook Messenger asked me for some cockamamie password I had created a year or so ago when it encrypted message history and we all clicked through whatever to get our messages back. I had to find that password and reenter it to restore my old FaceBook Messages on my new iPhone.
Charging top of User's Guide iPhone 16 Pro Max Review
Wireless Charging Stations
While I have loads of USB-C chargers and my new iPhone 16 Pro Max works great with the same wireless chargers I've had since 2018 for my iPhone Xs Max, I really love my new Petino Samba Pad Pro 3-Way Wireless Charging Station:

Petino Samba Pad Pro 3-Way Wireless Charging Station.
Of course there are loads of other wireless charging stations. This one is fast and holds everything perfectly on my night stand.
Super Fast Charging top of User's Guide iPhone 16 Pro Max Review
Wireless chargers charge at up to 25 watts, which is more than fast enough to charge a totally dead phone in a few hours.
The iPhone 16 Pro Max charges at up to about 15 watts from an old-fashioned USB-A source with a USB-A to USB-C cable. I haven't measured the actual rates, but I have tried and iPhone 16 Pro Max charges fine from all the usual the old USB sources with a USB-A to USB-C cable.
If you need faster, the iPhone 16 Pro Max charges at up to 32 watts as I measure mine (15V at 2.1A) with a USB-C charger, USB-C PD power bank or USB-C PD solar panel rated at least this power and a USB-C to USB-C cable.
At 30 watts mine charges at about 2% per minute, so 15 minutes gets me from 30% to 60%, or a half hour brings me from 20% to 80% (the last 80% to 100% takes longer because the charge rate slows down).
Use a 20W charger or better and it's super-fast.
No matter how high your charger is rated, the system is smart enough not to charge too fast or overcharge. A 100W charger won't charge any faster than 30 watts with iPhone 16 Pro Max. It's safe to use a USB-C charger of any rating.
Don't expect that generic USB-C ports will charge this fast unless they're marked with their power ratings. Many cars have these ports, but most only put out 15 watts. If you're as curious as I am, get a USB-C Power Meter and you can measure exactly how much power things draw or provide.
If you need fast charging in your car and your car lacks high-powered USB-C ports, I use this Anker 535 (A2731) car charger that provides up to 67W at each USB-C port, more than enough to power-charge my iPad Pro or MacBook Pro at the same time.
Longer Battery Life: Low Power Mode top of User's Guide iPhone 16 Pro Max Review
If I'm going to be out shooting all day in the wilderness or anywhere cell coverage is weak or questionable (which uses much more battery power than when you're close to cell towers), I set it to Low Power Mode (SETTINGS > BATTERY > LOW POWER MODE, or add the Low Power Mode icon on your Control Center at SETTINGS > CONTROL CENTER > add Low Power Mode) and I'm fine.
Low power mode limits how bright the screen can get, and also displays HDR images with regular dynamic range, skipping brilliant highlights of the HDR display.
I carry a 20,000 mAh Nitecore power bank and USB-C to USB-C cable to charge my iPhone or camera, but haven't had to use it since batteries last so long today. If I do loan this rig to friends, it charges their phones fast at 30 watts. Hint: also bring a USB-C to Lightning cable for your friends with older iPhones. You'll be their friend forever when you get their phones recharged pronto while out in the boonies.
Camera App top of User's Guide iPhone 16 Pro Max Review
I shoot with only the iPhone's native Camera app.
While it's easy to read the iPhone's apertures, ISOs and shutter speeds in the Photos app (just tap the ⓘ photo info icon) as well as external software, I'm letting my iPhone set these all automatically as it shoots and reading the data later to report to you. I have no idea what it's doing as I shoot and I don't need to know.
Personally I read the EXIF exposure data for all my shots later in Photo Mechanic so I can report them under each image; I certainly don't fiddle with manual exposures or other apps.
Secret Hidden Camera Button top of User's Guide iPhone 16 Pro Max Review
Separate from the new Camera Control, you can set your iPhone to go to the camera immediately with two taps on the back! It doesn't even need to be unlocked; it just goes! You don't need the new Camera Control button of the iPhone 16; I tried this on my old iPhone 15 Pro Max on iOS 17.6.1, however I don't use this. I find getting the double tap just right is fidgety and doesn't always respond; the new Camera Control is much more reliable.
Set this at:
Settings > Accessibility > Touch > Back Tap > Double Tap > Camera.
Cool, huh?
New in iOS 18 is that you also can set this instead to Camera Controls, and now a double tap on the back will also take the picture once you're in the camera app. Cool, huh?
HEIF/JPG/DNG Format Settings top of User's Guide iPhone 16 Pro Max Review
I use the default HEIF format (Settings > Camera > Formats > CAMERA CAPTURE > High Efficiency) mode.
Because Photoshop 2021 doesn't read the modern HEIF images I shoot on iPhone, I convert the iPhone HEIFs to JPGs as I import them to my Mac by selecting the appropriate images, tapping the SHARE icon, then OPTIONS > FORMAT > Most Compatible, which temporarily converts them to JPG before AirDropping them. I don't worry about archiving the HEIC files because they're still stored in my iPhone (and its backups) if I need them later.
I never shoot raw for many reasons. Additionally, DNGs take forever to AirDrop and are not necessarily readable everywhere.
If you want to shoot DNG (ProRAW) be sure your software can read them before an important shoot. If your software can't read these DNGs, no worry, just AirDrop with Options > Most Compatible and it will transfer them as JPGs!
I never use ProRaw (DNG); I always shoot HEIC in-camera and save them on my Mac as JPGs, and obviously you can do whatever you want.
Resolution Settings top of User's Guide iPhone 16 Pro Max Review
I shoot in the 24 MP mode at Settings > Camera > APP SETTINGS > Formats > PHOTO CAPTURE > Photo Mode > 24 MP. This saves images at 24 MP JPG in 1×, 1.2× and 1.5× when it can, otherwise it saves at 12 MP.
You get 24 MP by default from the 1×, 1.2× and 1.5× cameras, and 12 MP from everything else. Night Mode is always only 12 MP.
If you prefer it always save at 12 MP so you can save more pictures on your phone that still look great, then set Settings > Camera > APP SETTINGS > Formats > PHOTO CAPTURE > Photo Mode > 12 MP.
If you prefer 48 MP when it can from the 1× camera, then set Settings > Camera > APP SETTINGS > Formats > PHOTO CAPTURE > ProRAW & Resolution Control > ON, and then Settings > Camera > APP SETTINGS > Formats > PHOTO CAPTURE > Pro Default > then either HEIF Max or ProRaw Max (up to 48 MP), which will save at up to 48 MP in whatever format you like — but only at 48 MP for the 1× camera.
In the 48 MP mode you get 48 MP at 1×, and progressively less as you zoom in, which is cropping from the 48 MP sensor. Night Mode is always 12 MP.
I shoot in the HEIC Max setting and even 48 MP images are saved in the efficient HEIC format, and effortlessly transfer or save as JPGs when you select the "Most Compatible" options.
The cool thing about using these 48 MP options is that it shoots by default at the lower 12 MP or 24 MP resolutions and shows "HEIC MAX" crossed-out on the camera screen. Tap HEIC MAX and it now saves at the highest resolution up to 48 MP. It resets back to normal after you're done until you select higher resolution again. Perfect!
Image Look & Feel top of User's Guide iPhone 16 Pro Max Review
I leave the "look" of my iPhone 16 Pro Max at Standard, which you can check at at Settings > Camera > APP SETTINGS > Photographic Styles > Standard.
Previously I had my iPhone 15 Pro Max set to Warm at Settings > Camera > Photographic Styles > Warm (Tone 0 and Warmth 50)). It seems that my iPhone 16 Pro Max adopted Standard by itself, which is great because honestly I set Warm because it looked like the standard iPhone look in iPhones before Apple adopted the different settings.
I LOVE the standard look from iPhone, and I think most of us do.
Lens Corrections top of User's Guide iPhone 16 Pro Max Review
The 0.5× ultra-wide and front "selfie" cameras offer the option of electronic lens distortion correction. I leave this ON at Settings > Camera > Lens Correction > ON, although I've never seen it make any difference.
Stills at 10 FPS (Burst Mode) top of User's Guide iPhone 16 Pro Max Review
It's easy to shoot continuously at 10 FPS: just swipe the shutter button towards the last-shot photo icon (left or down) and hold!
Electronic Level top of User's Guide iPhone 16 Pro Max Review
You may notice a thin white or yellow line in the center of your screen. Tilt your iPhone until it turns yellow, and you're level. The line goes away once you're level.
The camera measures G forces with accelerometers to determine which way is down, so so ignore it while in an accelerating vehicle.
Macro top of User's Guide iPhone 16 Pro Max Review
Simply select your zoom setting and shoot. iPhone figures out how to make it happen and just does it, which often means shooting with the 0.5× camera and cropping for the selected zoom level.
If you want to keep the full 48 MP resolution of the 1× camera, you can have your iPhone warn you that it's subbing the 0.5× camera if you set SETTINGS > CAMERA > MACRO CONTROL > ON, in which case it will show a yellow circle with a flower in it to let you know it's cropping from the 0.5× camera in the 1× or 2× settings. It doesn't show when it crops from the 1× camera when you're too close in the 5× mode.
Flash top of User's Guide iPhone 16 Pro Max Review
I never use the flash, except maybe for fill indoors.
Tap the flash icon as you like, and if you need more flash settings, tap the " ^ " icon at the top to see more options at the bottom.
Time Exposures in the Dark top of User's Guide iPhone 16 Pro Max Review

The Milky Way, Bridgeport, California, 8:30 P.M., Saturday, 14 October 2023. Apple iPhone 15 Pro Max 1× (6.89mm actual or 24mm eq.) camera at f/1.8 for 10 seconds at Auto ISO 3,200 (LV -6⅔ — that's minus 6⅔!!!), Skylum Luminar Neo. More tech details. bigger.
I put my iPhone on a tripod with an Oben SPA-1000 iPhone adapter and invoked the Night (time exposure) mode by making sure the flash was off (tap the flash button on the top left until it shows off). With the flash off you can simply point-and-shoot the Milky Way handheld, but by using a tripod it will let me expose for 30 seconds rather than the default 3 seconds hand-held. Time exposures are shown with a yellow icon at the top left, if it's not yellow and showing something like "3s" then tap it to turn it on. Once it's on, tap the triangle in the top center to get to more settings (shown at the bottom). Tap the yellow moon (night mode) icon to see the exposure time slider, and slide it to its maximum.
The iPhone is super-smart and its accelerometers let it know if you're on a tripod or not, and offers different exposure time options: up to 10s handheld or 30s on a tripod, if it's dark enough.
For this shot I had it set to 30s, and that's how long it took to expose. The EXIF reports 10s, which I'll assume is how much actual exposure happened (night mode captures numerous shorter exposures which are aligned and then added together).
As-shot it's a very dark image, which is how the Milky Way appears to our eyes. It's pitch black out there. iPhone does a fantastic job of making things look natural in any light, however I want this image to look bright as it does above, so again Skylum Luminar Neo made it easy to erase airplane tracks and embolden the image. I used both the Enhance slider as well as Curves inside Neo.
Don't always trust the yellow count-down bar in Night Mode. When it goes away and the shutter icon spins as if it's processing, still saying "hold still," I didn't hold still (thinking it was simply processing what it had shot and no longer capturing) and got all sorts of blur. Hold still until it's all done for best results, although I've also seen it do a great job if everything starts moving before the main exposure is done; it's generally brilliant.
More at How to Photograph the Milky Way.
Hand Held Long Exposures for Motion Blur top of User's Guide iPhone 16 Pro Max Review

Lee Vining Falls, 11 AM, 24 October 2017. 2½ second time exposure, hand-held. bigger.
How water looks at different exposure times.
All revealed at How to Smooth Motion with Long Exposures on iPhone, using samples from the amazing October 2019 trip.
Underwater Shooting top of User's Guide iPhone 16 Pro Max Review
I'm too chicken to dunk my phone, and I know people who've gotten stunning results underwater, or carry their phones in their board shorts as they go out surfing. I also know people who've had their iPhones in waterproof cases, which sunk to the bottom when they lost hold of them out on the ocean.
While Apple rates the iPhone 16 Pro Max as water resistant to IP 68: 6 meters (20 feet) for up to 30 minutes per IEC 60529, this is for a new iPhone. As soon as you drop it a couple of times you may break the seals and it won't be this good.
Be careful unless you have a new iPhone. As far as I know, friends have made awesome underwater videos, but likewise Apple doesn't cover water damage if yours leaks. Good luck!
ACTION VIDEO top of User's Guide iPhone 16 Pro Max Review
For years iPhone video has been so well stabilized it hasn't required any gimbals for superb hand-held results even while walking and moving around for tracking shots.
Ever since iPhone 6 of 2014 the screen would look very bumpy as we shot video, however the playback is always rock solid, even if we're walking and holding our phone in our hand. The unstabilized shooting screen tricks many people into buying gimbals, which we don't need with iPhone. Look at the playback image and you'll be amazed.
An "Action Mode" increases the amount of motion for which the iPhone can compensate. It does this by using a smaller crop inside whatever camera is in use, which quite literally gives electronic stabilization more wiggle room to track camera shake and subject motion. This has been a standard technique (being able to correct more motion by using smaller cropped areas) in professional video for decades.
ACTION VIDEO allows full stabilization even while running or dealing with even more extreme camera motion.
In the Camera app, select the VIDEO mode and look for the crossed-out icon of a runner. Tap the icon, it lights in yellow as the screen blurs for a moment to hide the change in cropping, then shoot. As always in video mode, the screen image will be jittery as you shoot because the stabilization doesn't happen until iPhone saves your file. The file looks magnificent on playback.
See also Accessory Lenses, Filters and Microphones back in my iPhone 16 Pro Max Review
In-Camera Editing top of User's Guide iPhone 16 Pro Max Review
It's nice that Apple offers so much flexibility in setting other looks if you like, but when I want to change the look, I do that after I shoot.
Personally I love the free Snapseed app which I use for just about everything on my iPhone. Snapseed lets me do all sorts of amazing things with just one talented finger. Snapseed is a blast.
You can spend a lifetime playing with other apps on your iPhone, but for me, Snapseed is it.
As an artist I often edit images in my Mac.
Transfer Photos & Video to Mac top of User's Guide iPhone 16 Pro Max Review
We all have our favorite methods. I use AirDrop: in the Photos app, select the images you want to transfer and hit the Share icon.
Photoshop CC 2021 still doesn't read modern HEIF or HEIC images properly. I have my iPhone save my images in the more efficient HEIC format to save lots of storage space, so I have my iPhone convert these to JPGs as they're transferred to my Mac. I select images, hit the Share icon, tap "Options" and select "FORMAT > Most Compatible." This way my phone temporarily converts HEIC to JPG for sharing. No big deal if I ever need the HEICs: they're still all on my iPhone.
Hint: AirDrop only transfers what you've selected. When shooting at 10 FPS in burst mode it usually only selects what it thinks is the best image of the burst. To transfer all the images from a Burst, be sure to select the burst in Photos, tap the "Burst (##) >" drop-down at the top left and select which you want from that burst.
Hint: I try to do these transfers with up to about 100 images at a time, ideally not more than 70. Otherwise it's common that with few hundred images selected that it gives up and they don't transfer, seeming to give up doing the temporary conversions to JPG.
I could shoot my iPhone in JPG (Settings > Camera > APP SETTINGS > Formats > CAMERA CAPTURE > Most Compatible) and save this conversion step, however I prefer HEIC which takes less space on my iPhone. I see no quality difference between HEIC and converted JPGs.
AirDrop drops them into my Mac's Downloads folder, and I drag them from there to wherever I need them.
Hint: "Most Compatible" airdrops .MOV video files with about double the file size compared to leaving Share > Options > FORMAT at its default of Automatic. Seeing how the original MOVs play fine everywhere I need them, I AirDrop my MOVs without going into the Options option.
If I'm importing videos into iMovie, I will connect my iPhone to my Mac with a high-speed 10 Gb/s USB-C to USB-C cable, a Thunderbolt 3 cable or Thunderbolt 4 cable and then import from within iMovie into a project, which works much faster than AirDrop since it takes advantage of the faster corded transfer speeds in the iPhone 16 Pro Max.
ThunderBolt 3 makes it super fast to download video directly to iMovie: 27 seconds for a 1.11 GB 0:22:23 1080/25p HEVC file.
I believe the included USB-C woven design charge cord is only rated for the old USB 2 standard, which is rated at 60 MB/s (480 mb/s) and only passes about 30 MB/s (240 mb/s) in practice, but I haven't confirmed that.
Photo Editing top of User's Guide iPhone 16 Pro Max Review
If Snapseed won't do it in-camera, I use Photoshop CC in my Mac, usually with the Skylum Luminar Neo and/or the Radiant Photo plugins until each completed work looked as I originally envisioned it.
I'm not a fan of presets; I use this software as tools to get to the image I first saw in my mind faster, but skip the presets each offers.
Portrait Mode Editing top of User's Guide iPhone 16 Pro Max Review
While I prefer to select the PORTRAIT mode before I shoot, usually one can select it after you've made your shot! Just look for the PORTRAIT option as you look at your shot in the photos app.
Better, you can adjust the amount of defocus after you shoot the image!
Subject Extraction top of User's Guide iPhone 16 Pro Max Review
Since iOS 16 iPhone has had one-touch ability to select, extract, copy and paste subjects and remove backgrounds.
It's so simple you'd never notice it: in the Photos app on iPhone simply hold your finger over a face or object in your image and you'll see it highlight the object. Remove your finger, you'll see options to COPY, ADD STICKER or SHARE (email, save, copy, print, assign to contact, etc.) and you're done.
Try it yourself. Snap a selfie, play it back, hold your finger on your face and release when you see the menu options. It's this simple.
Screen Shots top of User's Guide iPhone 16 Pro Max Review
Press the VOLUME UP and LOCK buttons simultaneously.
It's a little confusing because they're not directly across from each other.
Image Search top of User's Guide iPhone 16 Pro Max Review
iPhone's native Photos app makes it trivially easy to find anything you've shot purely by location or date, or just tap the 🔍 icon and ask to search by your friend's names or "dog" or "pen" and iPhone just finds it.
I have photos from at least 25 years of shooting film and digital in my iPhone, and it looks inside those photos, knows what's in them, and finds them for me. Yes, iPhone even sees and searches what's inside my saved film scans!
I'll say that again: iPhone has human-like intelligence to look inside the actual visual content of images from just about any digital photo, scanned film or screen shot, and search and find things based solely on their appearances, not needing keywords, metadata, captions or written text descriptions! Of course it easily finds signs or text inside an image as well, like STOP signs.
Mentioning captions, it's also easy to add, search and read text captions and notes to your iPhone photos' metadata (tap the ⓘ photo info icon), but none of this is needed for search.
I add text captions to help the system find things I will need to look up later, labeling a photo something like "Gym Hours" for a photo of my gym's hours.
Visual Look Up top of User's Guide iPhone 16 Pro Max Review
If you don't know what something is, your iPhone can tell you what it is! Apple calls this Visual Look Up.
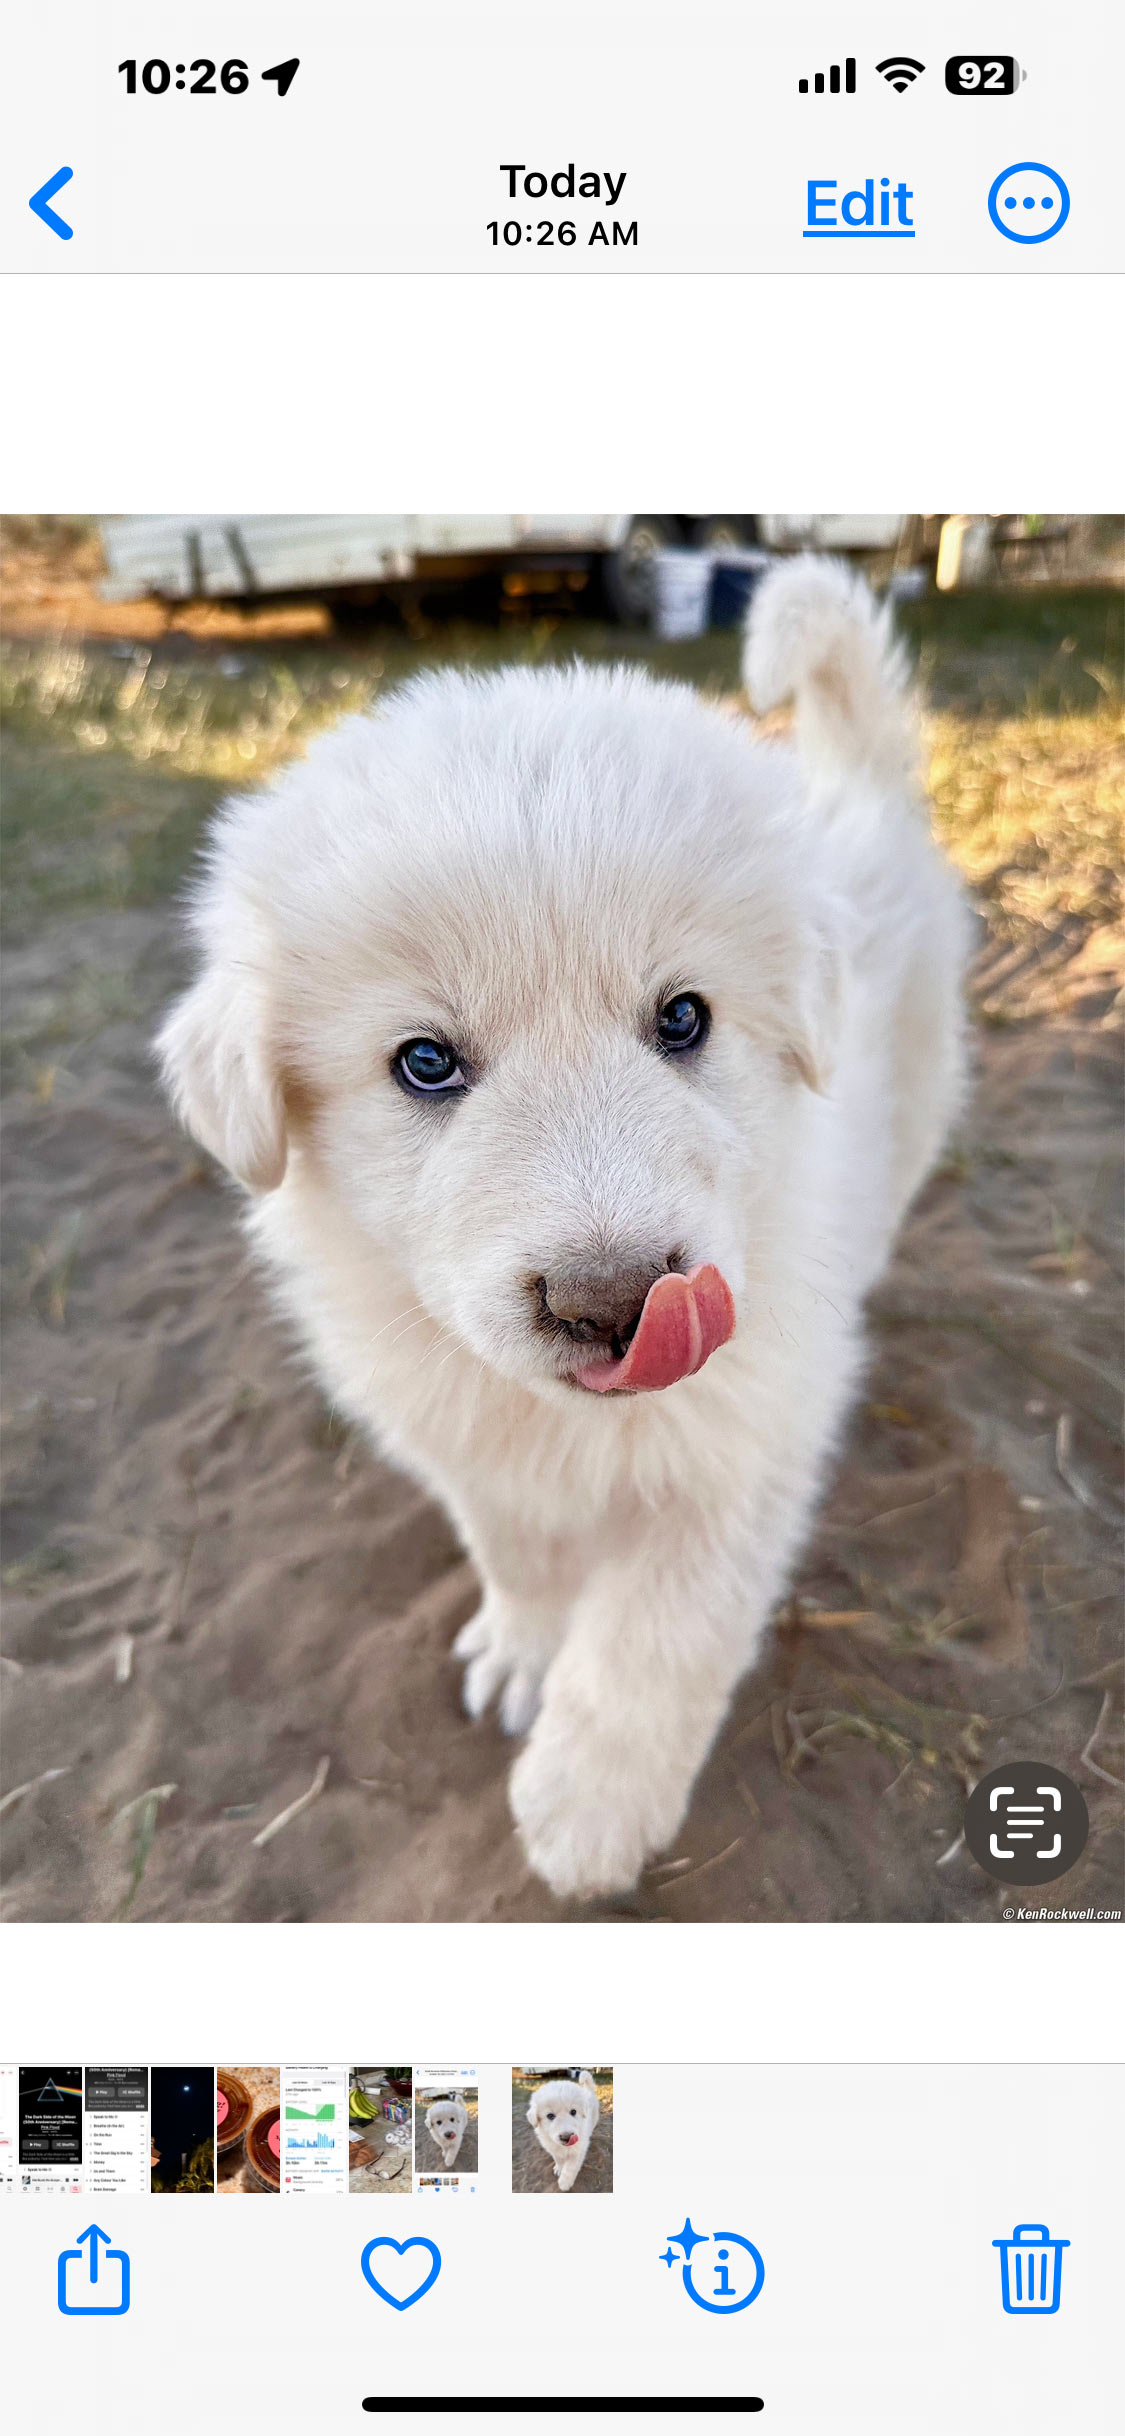
If you see little sparkles on the ⓘ (photo info) icon as you look through Photos, iPhone wants to tell you all about what it is. It can identify kinds of fungus, dogs, plants, pets, animals, landmarks, statues, works of art, album covers and just about anything:
|
|
|
Sparkles on the ⓘ icon tells you iPhone knows who this is. bigger. |
What it finds for this Great Pyrenees puppy. bigger. |


Making Everything Legible top of User's Guide iPhone 16 Pro Max Review
We all have our preferences; I prefer big, bold, legible text rather than the default of thin, illegible ultralight default text that took over as of iOS 7.
To make everything more legible, go to SETTINGS > DISPLAY & BRIGHTNESS > and in that series of menus chose a larger TEXT SIZE, select BOLD TEXT ON (which makes text of a normal weight rather than the default ultralight), and scroll down to the very bottom to DISPLAY > DISPLAY ZOOM > and select the LARGER TEXT option, which makes everything, even icons, more legible.
I also enable the ability to zoom the screen for any reason in any app with a few fingers at SETTINGS > ACCESSIBILITY > ZOOM > ON. Double-tap three fingers to zoom; instructions for zooming are at the menu listing.
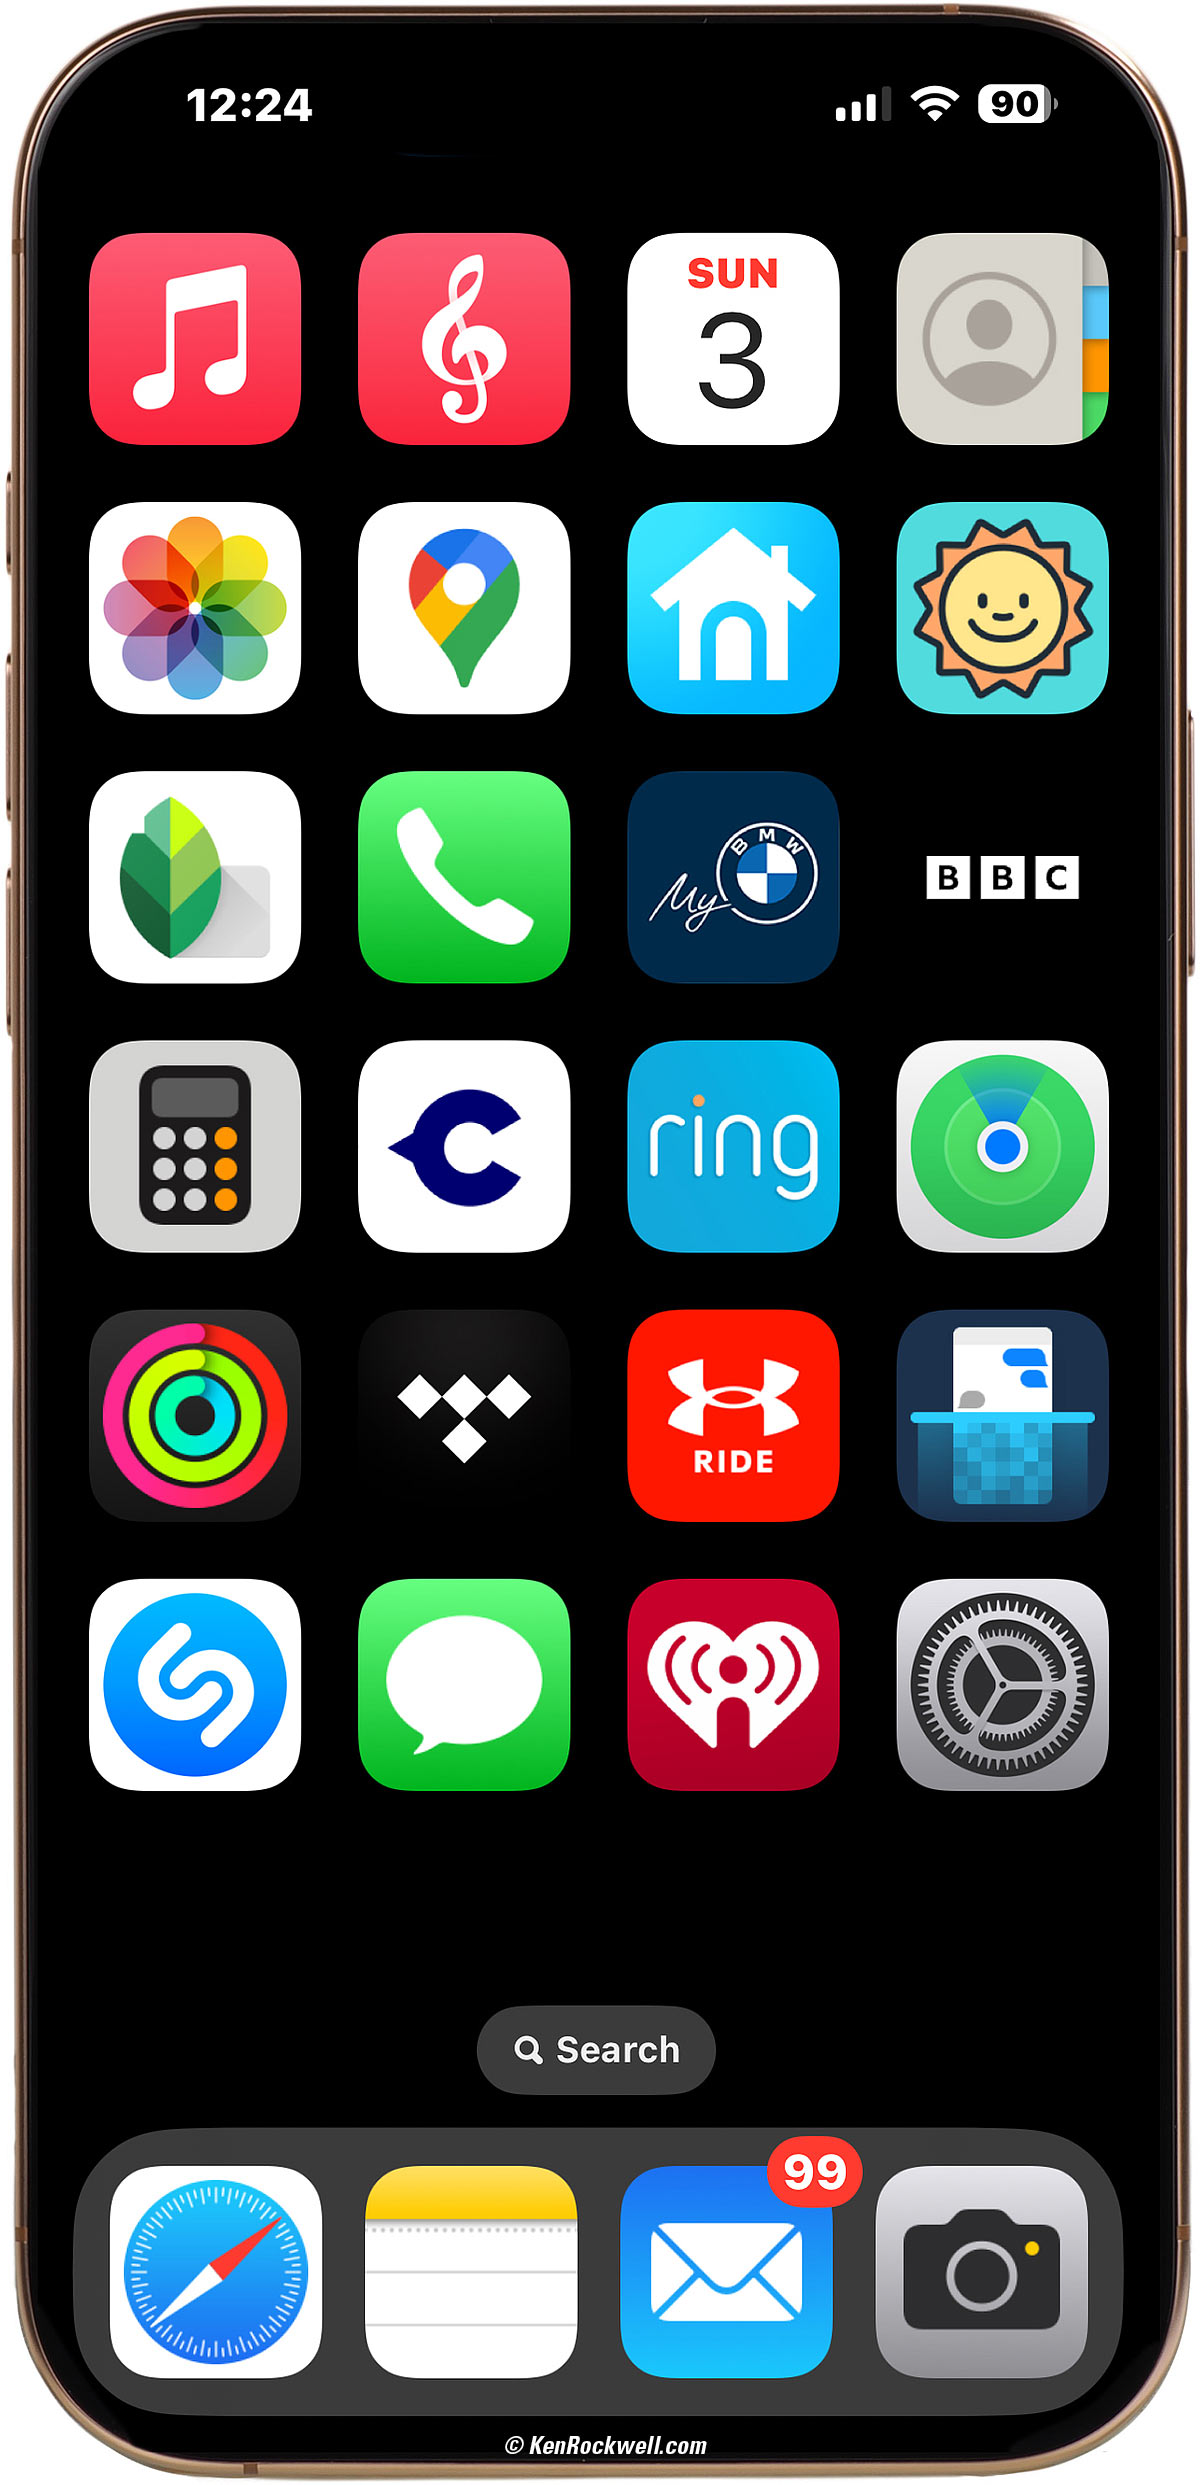
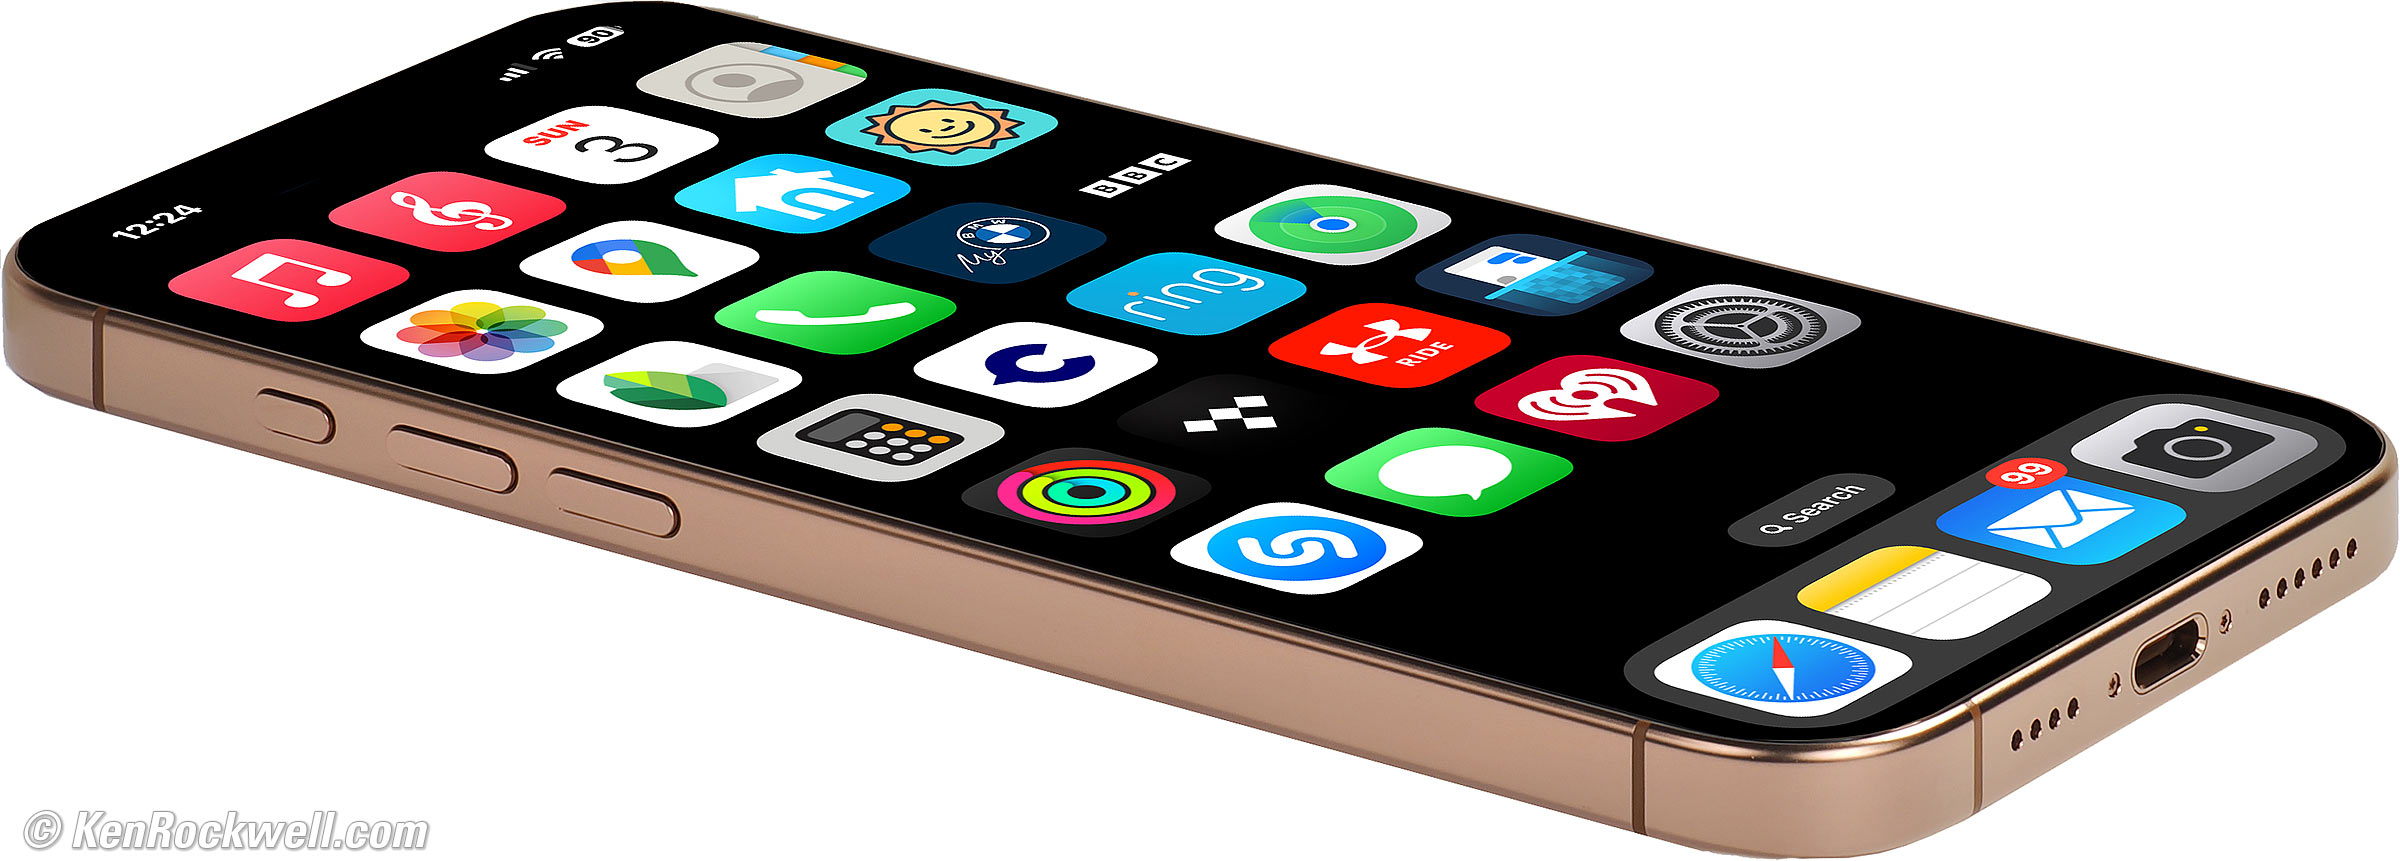
Big Home Screen Icons top of User's Guide iPhone 16 Pro Max Review
To get the big, clean App icons as shown above without text below them:
a.) At the Home screen, tap and hold a blank section on either side of the (🔍Search) icon for a moment until all the app icons start to wiggle.
b.) Tap Edit at the top left.
c.) Tap Customize.
d.) At the bottom, tap (Large), and you done!
Note that the icons get big and clean because they grow to fill the space previously occupied by the text with the name of the app. This looks great if your screen is all apps, but good luck trying to figure out what is each now unmarked folder holding multiple apps!
Heat and High Brightness top of User's Guide iPhone 16 Pro Max Review
The 16 Pro Max has an astoundingly bright screen for when you need it in sunlight, and much better than the older phones, is able to stay at these high brightnesses for a reasonably long time before it has to dim to keep from overheating.
If your screen goes dim after while outdoors, let it cool, and try the dark theme in daylight if you need it, as it will save battery and probably give you more time at full brightness when only the letters are white, rather than every pixel except the letters.
In high heat with the screen on in daylight for long periods, it will get dimmer and dimmer to keep itself from overheating.
Good news is I haven't had any problems with this, unlike with all the older phones. Bravo, Apple!
Notifications top of User's Guide iPhone 16 Pro Max Review
To find the Notifications Center, swipe down from the top left, then up from middle bottom center (not from the bar at the very bottom).
Remote Control top of User's Guide iPhone 16 Pro Max Review
When I lose my Apple TV remote in my sofa, no worries, it's duplicated in an app on iPhone: just swipe down from the top right and look for the REMOTE icon. If it's not there, be sure you added it to your Control Center on iPhone at Settings > Control Center, which is trivially easy to find with the Search box at Settings.
There's also a completely different app called Remote (that's still an app, not an icon in the Control Center) that lets us control iTunes on Mac to control and play from a Mac to anywhere. You even can see all the album covers of music in your Mac on the iPhone remotely!
"Please Return To" Message on Lock Screen top of User's Guide iPhone 16 Pro Max Review

My iPod Touch lock screen from back in 2010.
I create an image in Photoshop with big text with my address, email and other phone numbers that I set as my Lock Screen image. This way if I leave my iPhone someplace, whoever picks it up can contact me to come get it! This article may be from 16 years ago, but you get the idea. Include a friend's phone number so whoever finds your phone can call them and get it back to you. Don't add your phone number, as that would have them call the phone they just found!
I wish having our choice of text on the home screen all the time was a standard feature on iOS, but it's not. I've found a few left-behind iPhones, and never could figure out how to call or contact the owner other than getting nothing more than a first name if I tried to AirDrop to it.
Hint: also set your AirDrop name (same as your iPhone name at SETTINGS > GENERAL > ABOUT > NAME) to something that a stranger could use to contact you. This is a tough one as there are a lot of different places to name things and I'll admit that I'm not sure which one appears when others try to AirDrop to you, and different fields are pulled-up depending on from what kind of device someone else is trying to AirDrop you.
Don't be paranoid; strangers in general want to help you, not rip off your phone or harass you with your contact info.
Good luck.
USB-C to 3.5mm Headphone Adapter top of User's Guide iPhone 16 Pro Max Review
I've been using these ever since my iPad went to USB-C, and I just ordered some more at a whopping $9 each for my new iPhone 16 Pro Max. I use them to drive my corded Audeze planar magnetic headphones for serious listening.
Hint: Instead of buying new USB-C corded earpods (if anyone still uses these), you can use this USB-C to 3.5mm Headphone Adapter to let you use your 3.5mm earbuds from ancient times with your new iPhone 16 Pro Max. If you need corded earpods, I'd get the newest USB-C corded earpods rather than adapt old 3.5mm ones from under your couch, however in my case since I have adapters and old earpods I rarely use, I'm good.
USB-C to Lightning Adapter top of User's Guide iPhone 16 Pro Max Review
This USB-C to Lightning adapter has a female Lightning receptacle and a male USB-C connector, effectively turning your new iPhone 16 Pro Max back into a Lightning device for charging and audio with older devices.
While this adapter works great with Lightning headphones and earpods and mics, it refuses to work with any docks or Apple's 30-pin to Lightning adapters. Hopefully this will be addressed in the future, as a $30 adapter doesn't serve much purpose just to prevent us from having to replace a $20 lightning charge cord.
This adapter works great with my Sennheiser AMBEO 3D binaural recording microphone system for recording and playback.
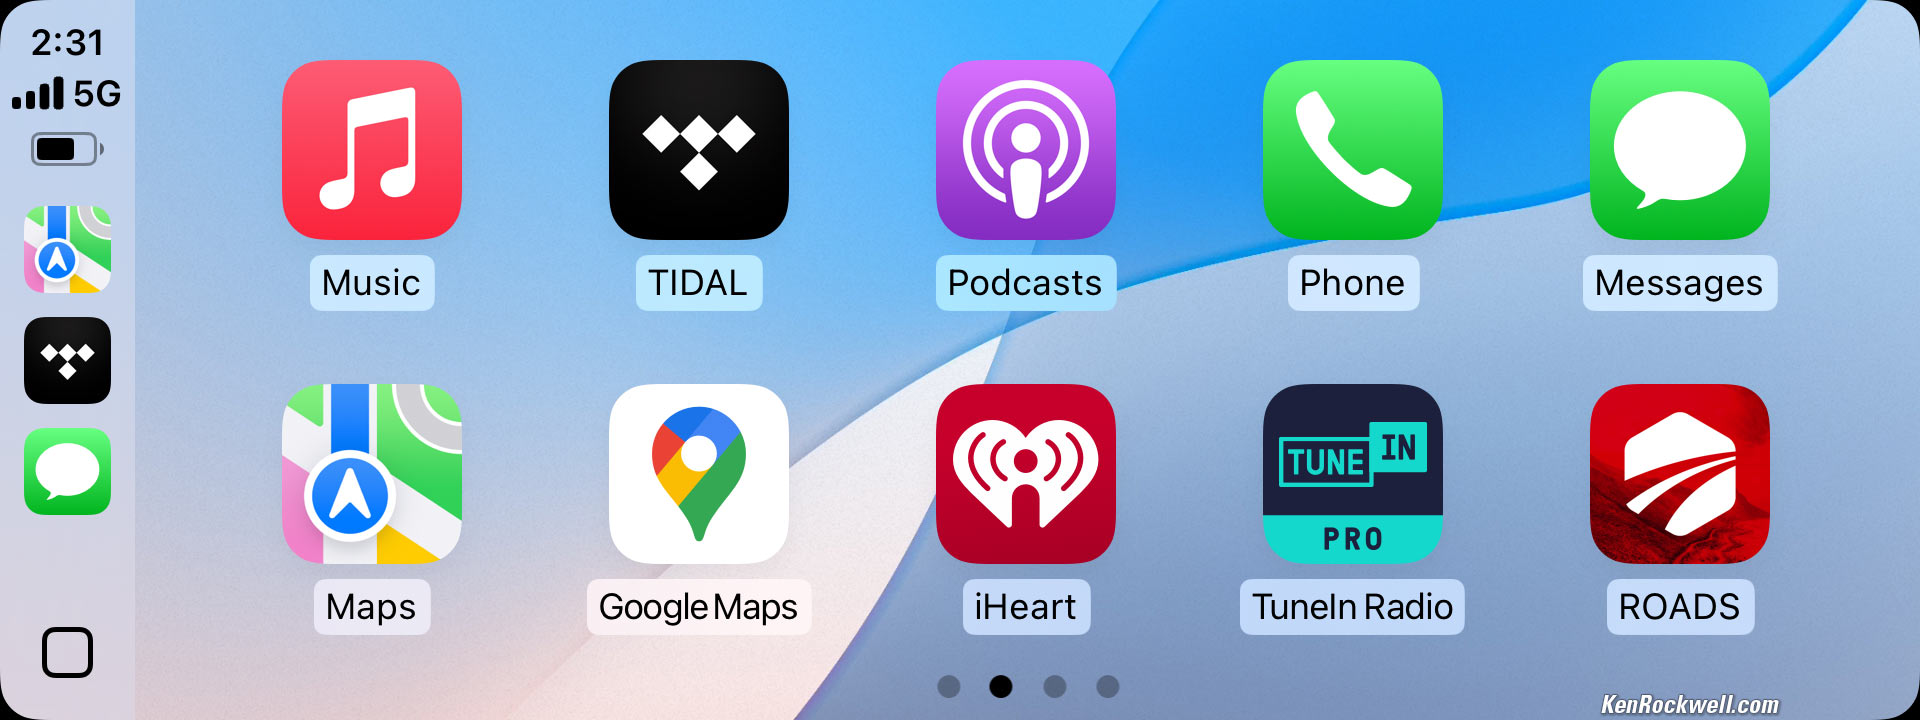
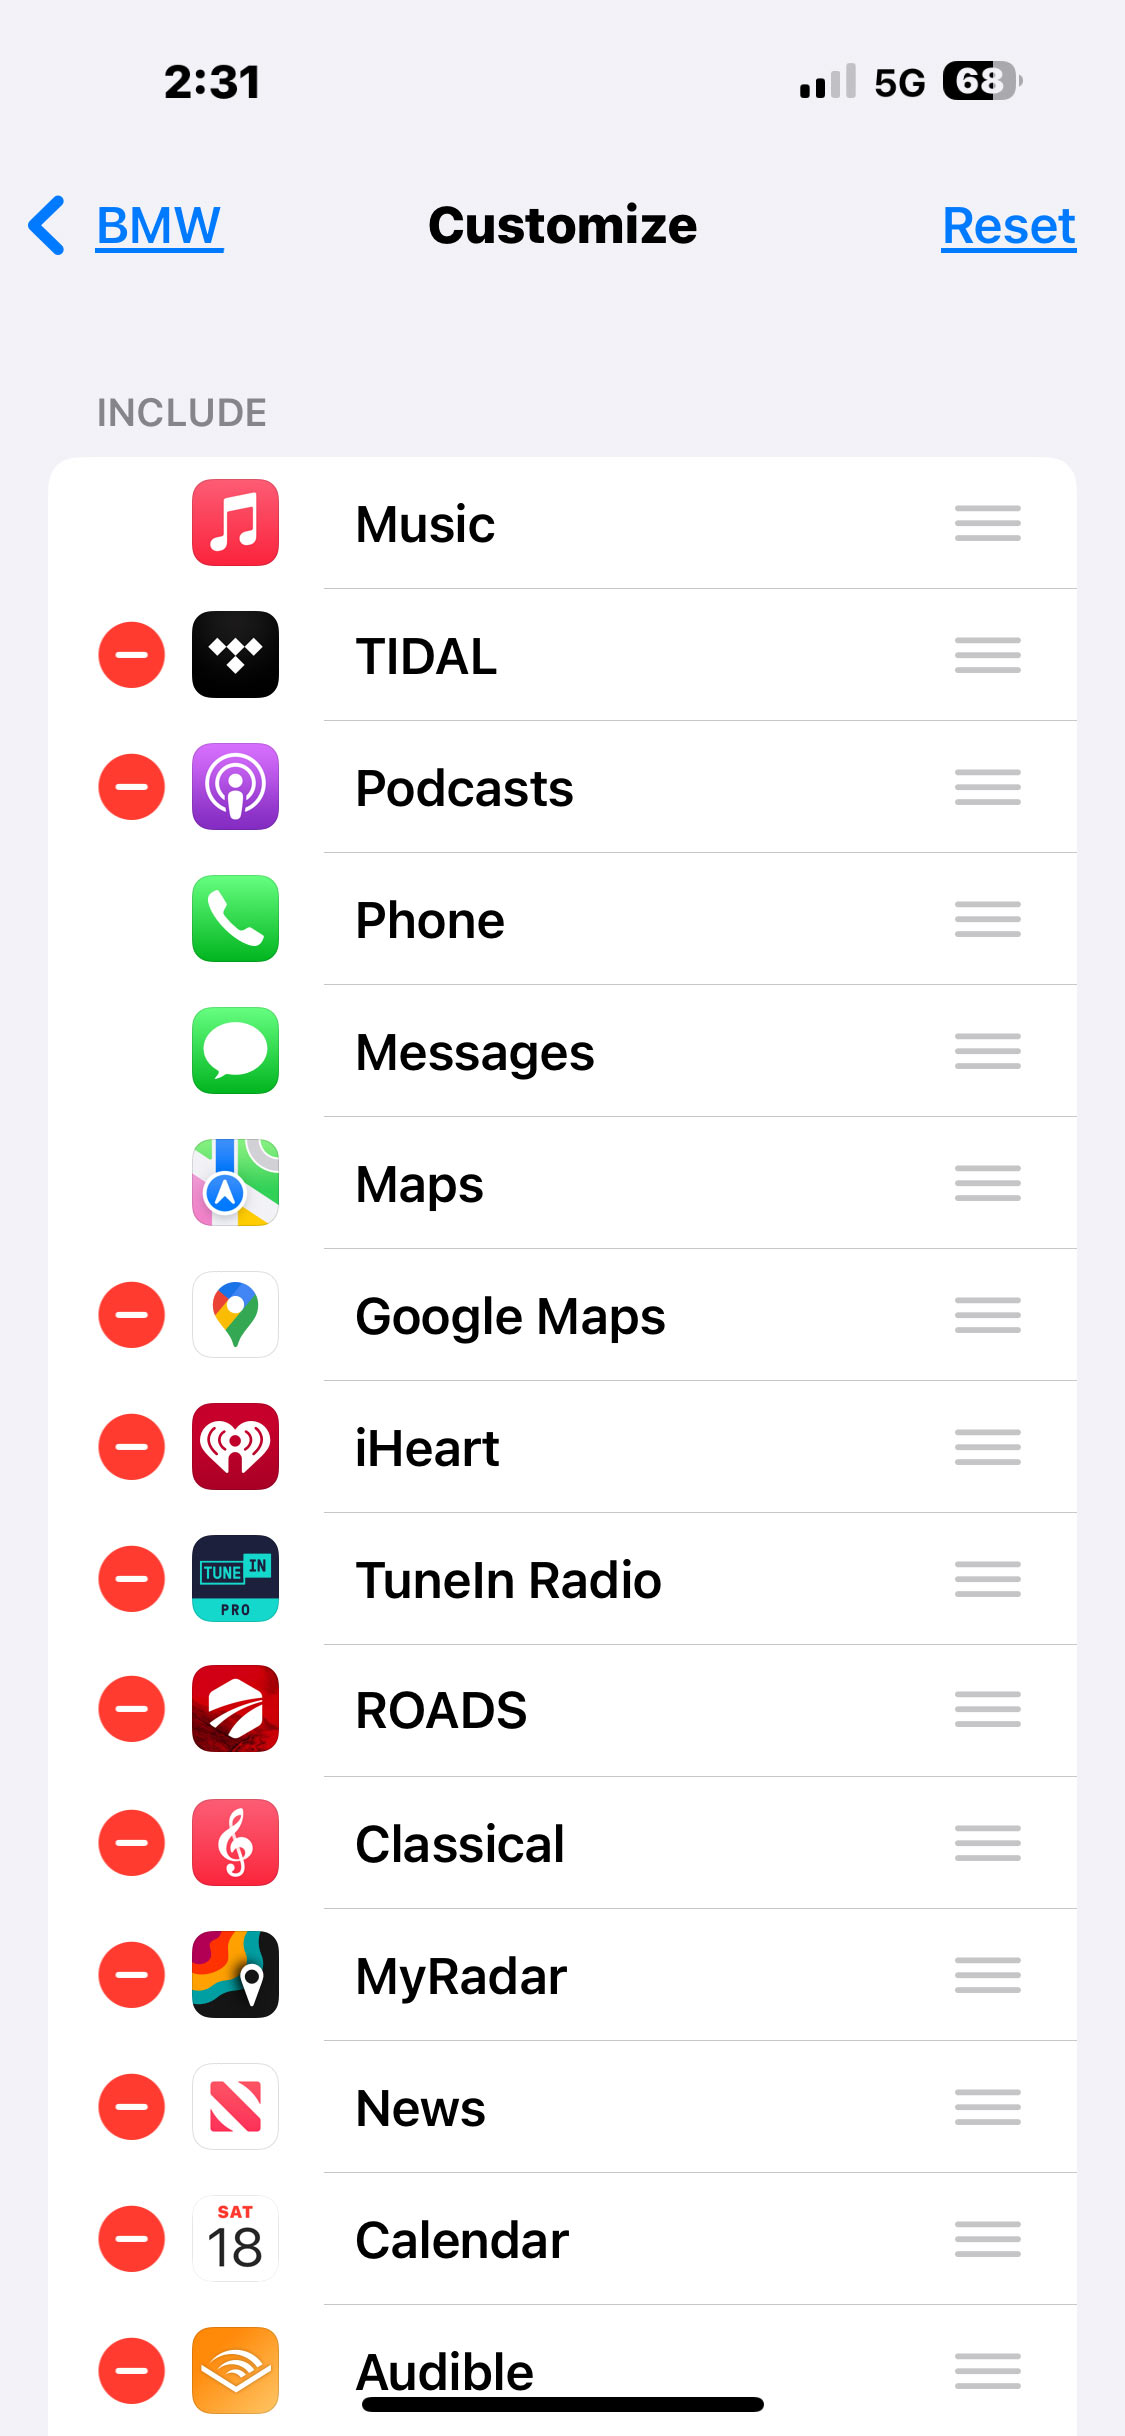
Reorganize Apps in CarPlay!!! top of User's Guide iPhone 16 Pro Max Review
|
|
CarPlay Screen, BMW 850i Convertible (iDrive 7). bigger. |
iPhone SETTINGS screen. bigger. |
You can't touch and drag icons and apps on your car's screen, instead oddly you have to rearrange them in your iPhone.
Go to Settings > General > CarPlay > (select your car) > Customize!
With more than one car you can (and have to) set them separately for each car.
It's weird because you're moving them up and down a one-dimensional list on your phone which doesn't correlate to the two dimensions of your CarPlay Screen, but this will still amaze your friends when you show them how they can customize their CarPlay screens, too.
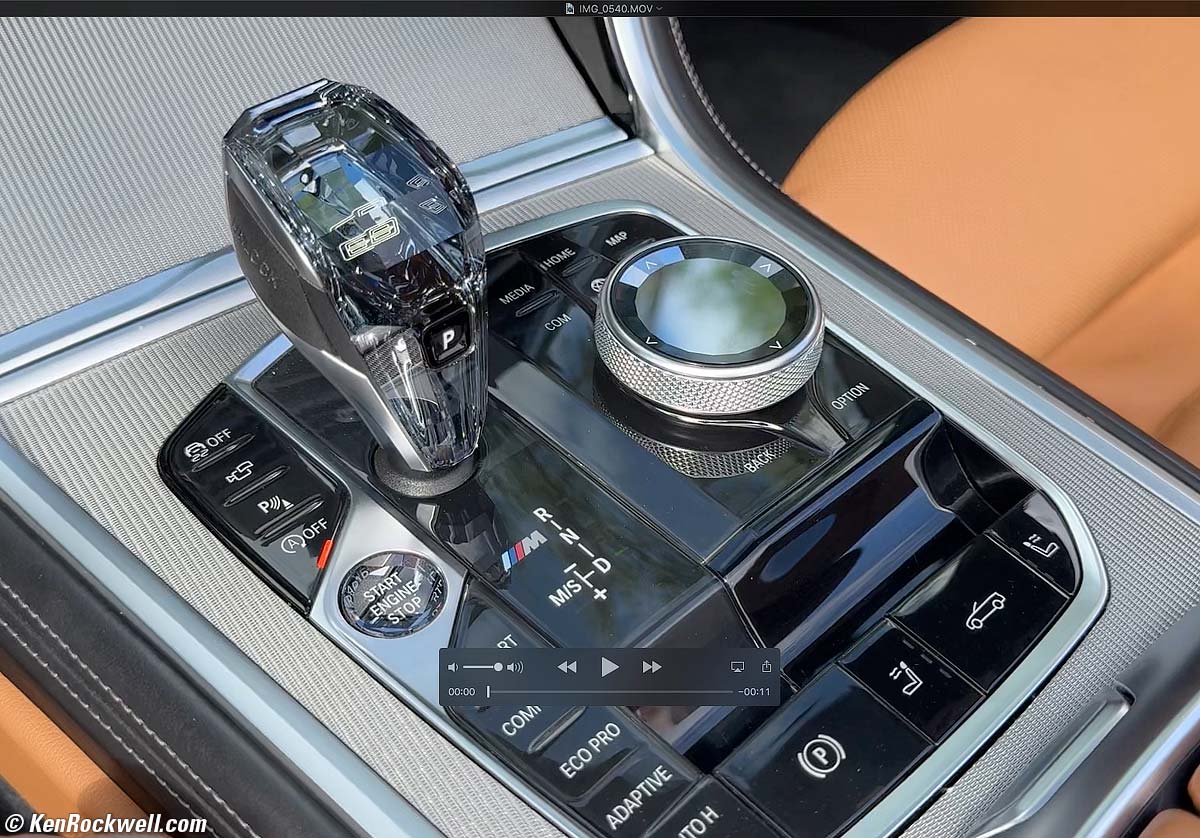
Fixing BMW CarPlay Connections top of User's Guide iPhone 16 Pro Max Review
About once a year I lose my CarPlay connection, and resetting and restarting and deleting and attempting to reconnect from my iPhones Settings > Bluetooth screen gets me nowhere. This process restored it both times.
To fix CarPlay in a BMW with iDrive 7:
1.) Turn off the iPhone's Bluetooth and Wi-Fi connections in the iPhone's Control Center (swipe down from the top right).
2.) Start the engine.
3.) Press and hold the radio power/mute ⏻ button inside the volume control knob on the center console below the air conditioned controls for 70 seconds (exactly). The screen turns on and off a few times.
4.) Go to the BMW's Apps by pressing the 🌐 globe icon button directly above the huge iDrive knob on the center console, press the OPTION button on the lower right of the huge iDrive knob, and select and click "Update Apps and Services." It says it's updating, and about 15 seconds later it's done. Yes!
5.) Turn Wi-Fi and Bluetooth back on in the iPhone's Control Center (drag down from the top right).
6.) Here's the critical part: DON'T try to reconnect with the iPhone at Settings > Bluetooth. Instead, get the BMW to its pairing screen and select CarPlay. Even easier, tap the Mic button on the steering wheel as a shortcut to the CarPlay setup screen.
7.) In the iPhone, select Settings > General > CarPlay (instead of Bluetooth) and look for your BMW under "others" at the bottom and take it from there.
The trick is going to Settings > General > CarPlay instead of Settings > Bluetooth.
Works like a champ again. The trick of going to Settings > General > CarPlay instead of Settings > Bluetooth probably applies to other cars as well.
Save Now to Save Yourself Later top of User's Guide iPhone 16 Pro Max Review
Quick: you're stuck out in the woods with no cellular signal. You need help and need to use the Satellite Emergency 911, Text, Road Service and other satellite features. How do you do it? Easy: just Google it!
Oops! You have no signal so you can't Google anything. Now what?
I assume iPhone will somehow explain how to use the satellite text rescue feature without being connected to the internet to look it up when we're stuck in the woods and actually need to use the feature, but just to be safe, I looked up the instructions on how to use the satellite text rescue feature while I have internet access, and saved and labeled screen shots of these pages to my Recents album in Photos so I can find them offline.
This way I can look up the instructions with no signal or internet connection in case my phone doesn't make it obvious. Read these now as there are some things you need to set up before you get stuck in the woods. I use the Tailor app to stitch all the screenshots into one tall image through which I can scroll just as if it was online.
Here are the two pages I saved as screenshots in Photos (hold Volume Up and tap the Lock button to save a screen shot):
Satellite SOS 911 emergency instructions
and
Send Your Location via Satellite.
How to Set Up a Whole-House Music System top of User's Guide iPhone 16 Pro Max Review
It's easy to play anything from anywhere to anywhere all around your house with AirPlay and iTunes on your Mac, as well as with Apple Music.
This all-content, junk-free website's biggest source of support is when you use any of these links to approved sources when you get anything, regardless of the country in which you live. Thanks for helping me help you! Ken.
Thanks for helping me help you!
Ken.
© Ken Rockwell. All rights reserved. Tous droits réservés. Alle Rechte vorbehalten. Alla rättigheter förbehållna. Toate drepturile rezervate. Niciun vampir nu a fost implicat în crearea acestei lucrări. Omnia jura reservata. Ken Rockwell® is a registered trademark.
Help Me Help You top
I support my growing family through this website, as crazy as it might seem.
The biggest help is when you use any of these links when you get anything. It costs you nothing, and is this site's, and thus my family's, biggest source of support. These places always have the best prices and service, which is why I've used them since before this website existed. I recommend them all personally.
If you find this page as helpful as a book you might have had to buy or a workshop you may have had to take, feel free to help me continue helping everyone.
If you've gotten your gear through one of my links or helped otherwise, you're family. It's great people like you who allow me to keep adding to this site full-time. Thanks!
If you haven't helped yet, please do, and consider helping me with a gift of $5.00.
As this page is copyrighted and formally registered, it is unlawful to make copies, especially in the form of printouts for personal use. If you wish to make a printout for personal use, you are granted one-time permission only if you PayPal me $5.00 per printout or part thereof. Thank you!
Thanks for reading!
Ken.