Skylum Luminar Neo Software
Turns Ho-Hum into WOW!
Sample Images Introduction User's Guide Recommendations
I got Luminar Neo directly from Skylum. This all-content, junk-free website's biggest source of support is when you use that or any of these links to approved sources when you get anything, regardless of the country in which you live. Thanks for helping me help you! Ken.
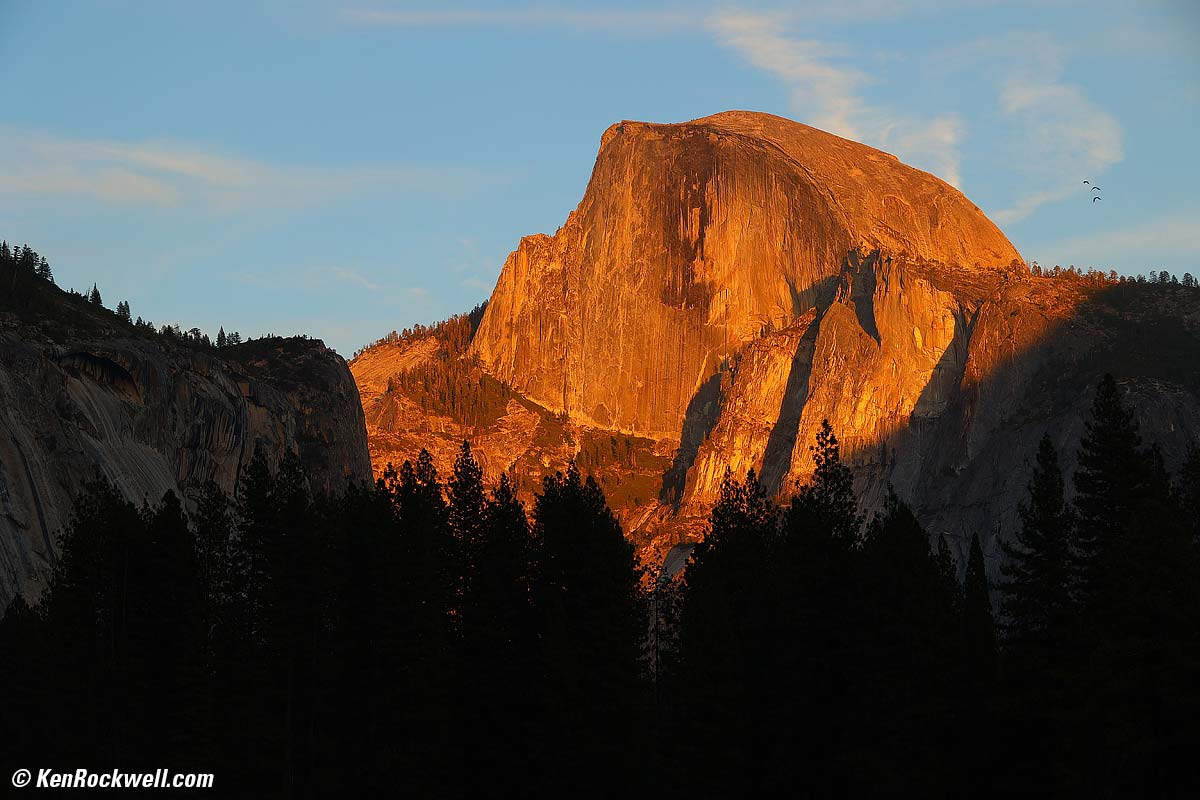
As shot. Dull sky and dull light, with an empty black foreground. Yawn! bigger.
After Luminar Neo:
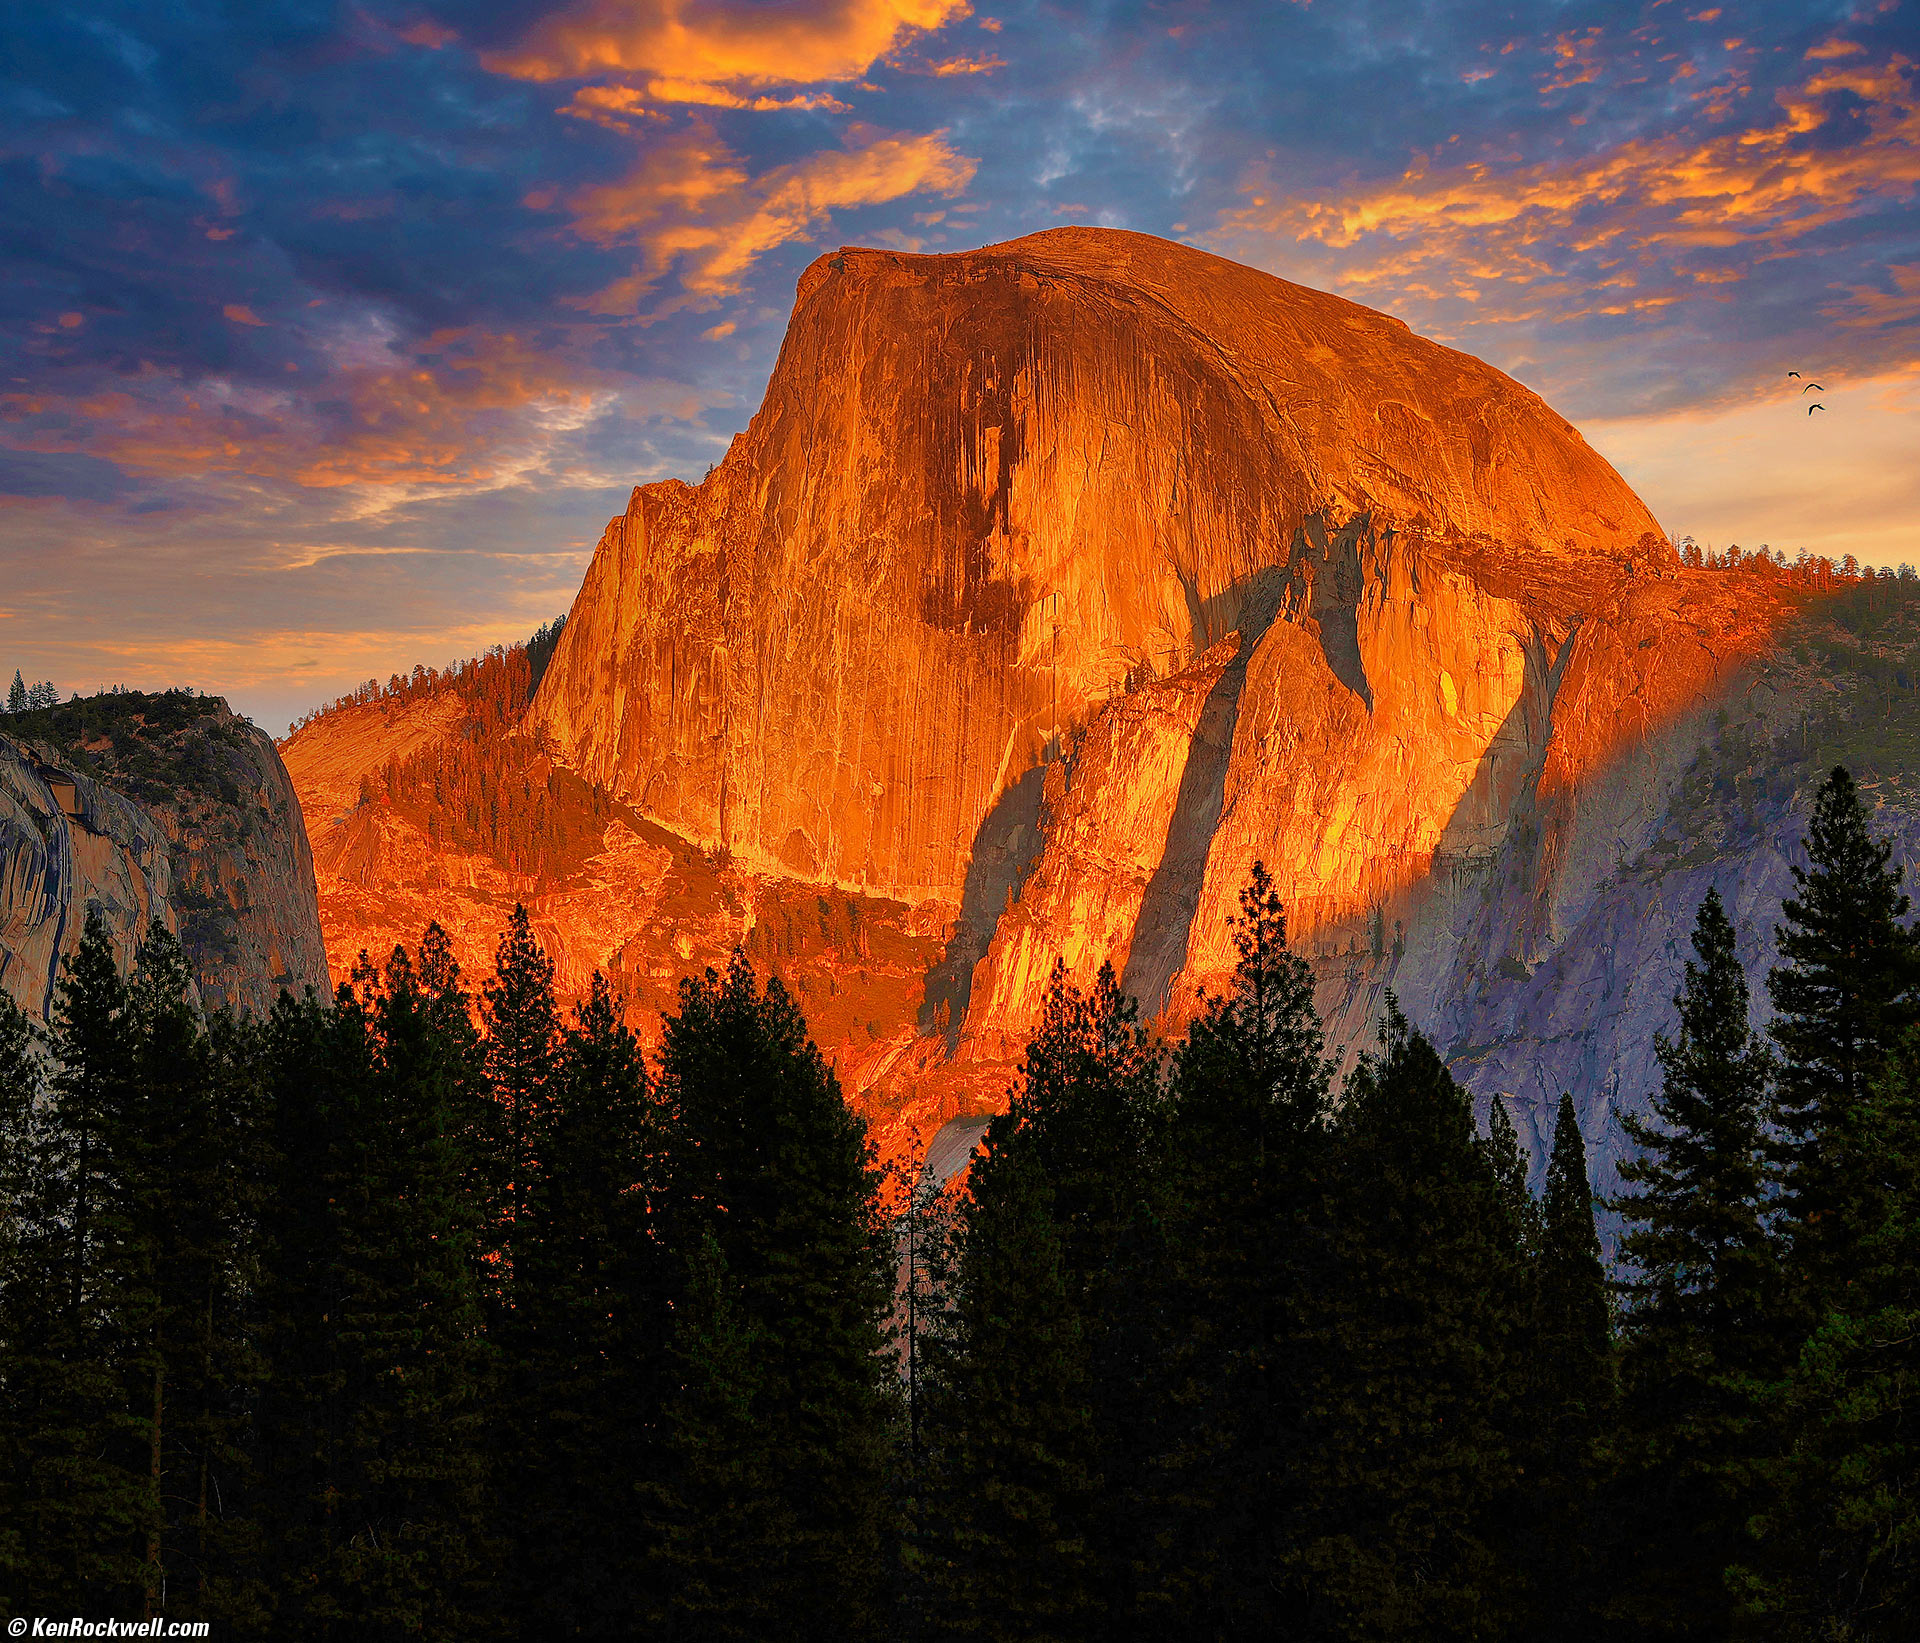
Half Dome in Last Light, Cook's Meadow, Yosemite National Park, California, 5:59 P.M., 17 October 2022. Canon EOS R6, RF 24-240mm IS USM at 83mm, f/8 hand-held at 1/60 at Auto ISO 100, -2/3 stops exposure compensation (LV 12.0). More tech details. bigger.
Skylum Luminar Neo let me bring out the warm reflections on the outcropping on the left, let me add vivid color and light to the Half Dome, and render the foreground pines exactly as I want them, mostly with the Enhance tool as I explain at my User's Guide.
Neo also let me add dramatic sunset clouds to an otherwise empty sky. It's easy to add clouds; they're already in the program and it's smart enough to put the sky where it belongs — and not cover the three birds on the right who really were in the photo!
July 2025 Canon Nikon Sony Fuji OM SYSTEM LEICA Zeiss HASSELBLAD All Reviews
Better Pictures: Vision FART Cameras Don't Matter How to Use Ultrawide Lenses How to Shoot Film
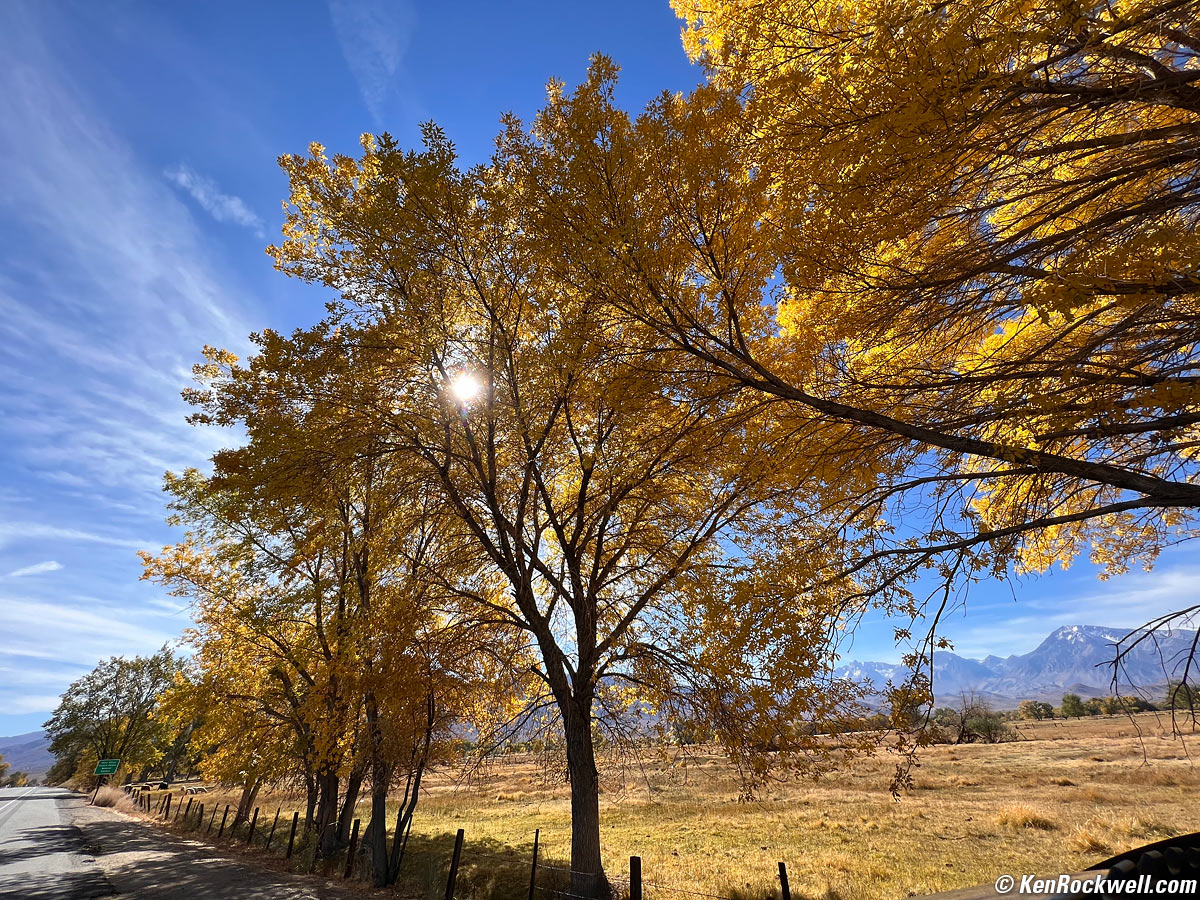
As shot. bigger.
After Skylum Luminar Neo:
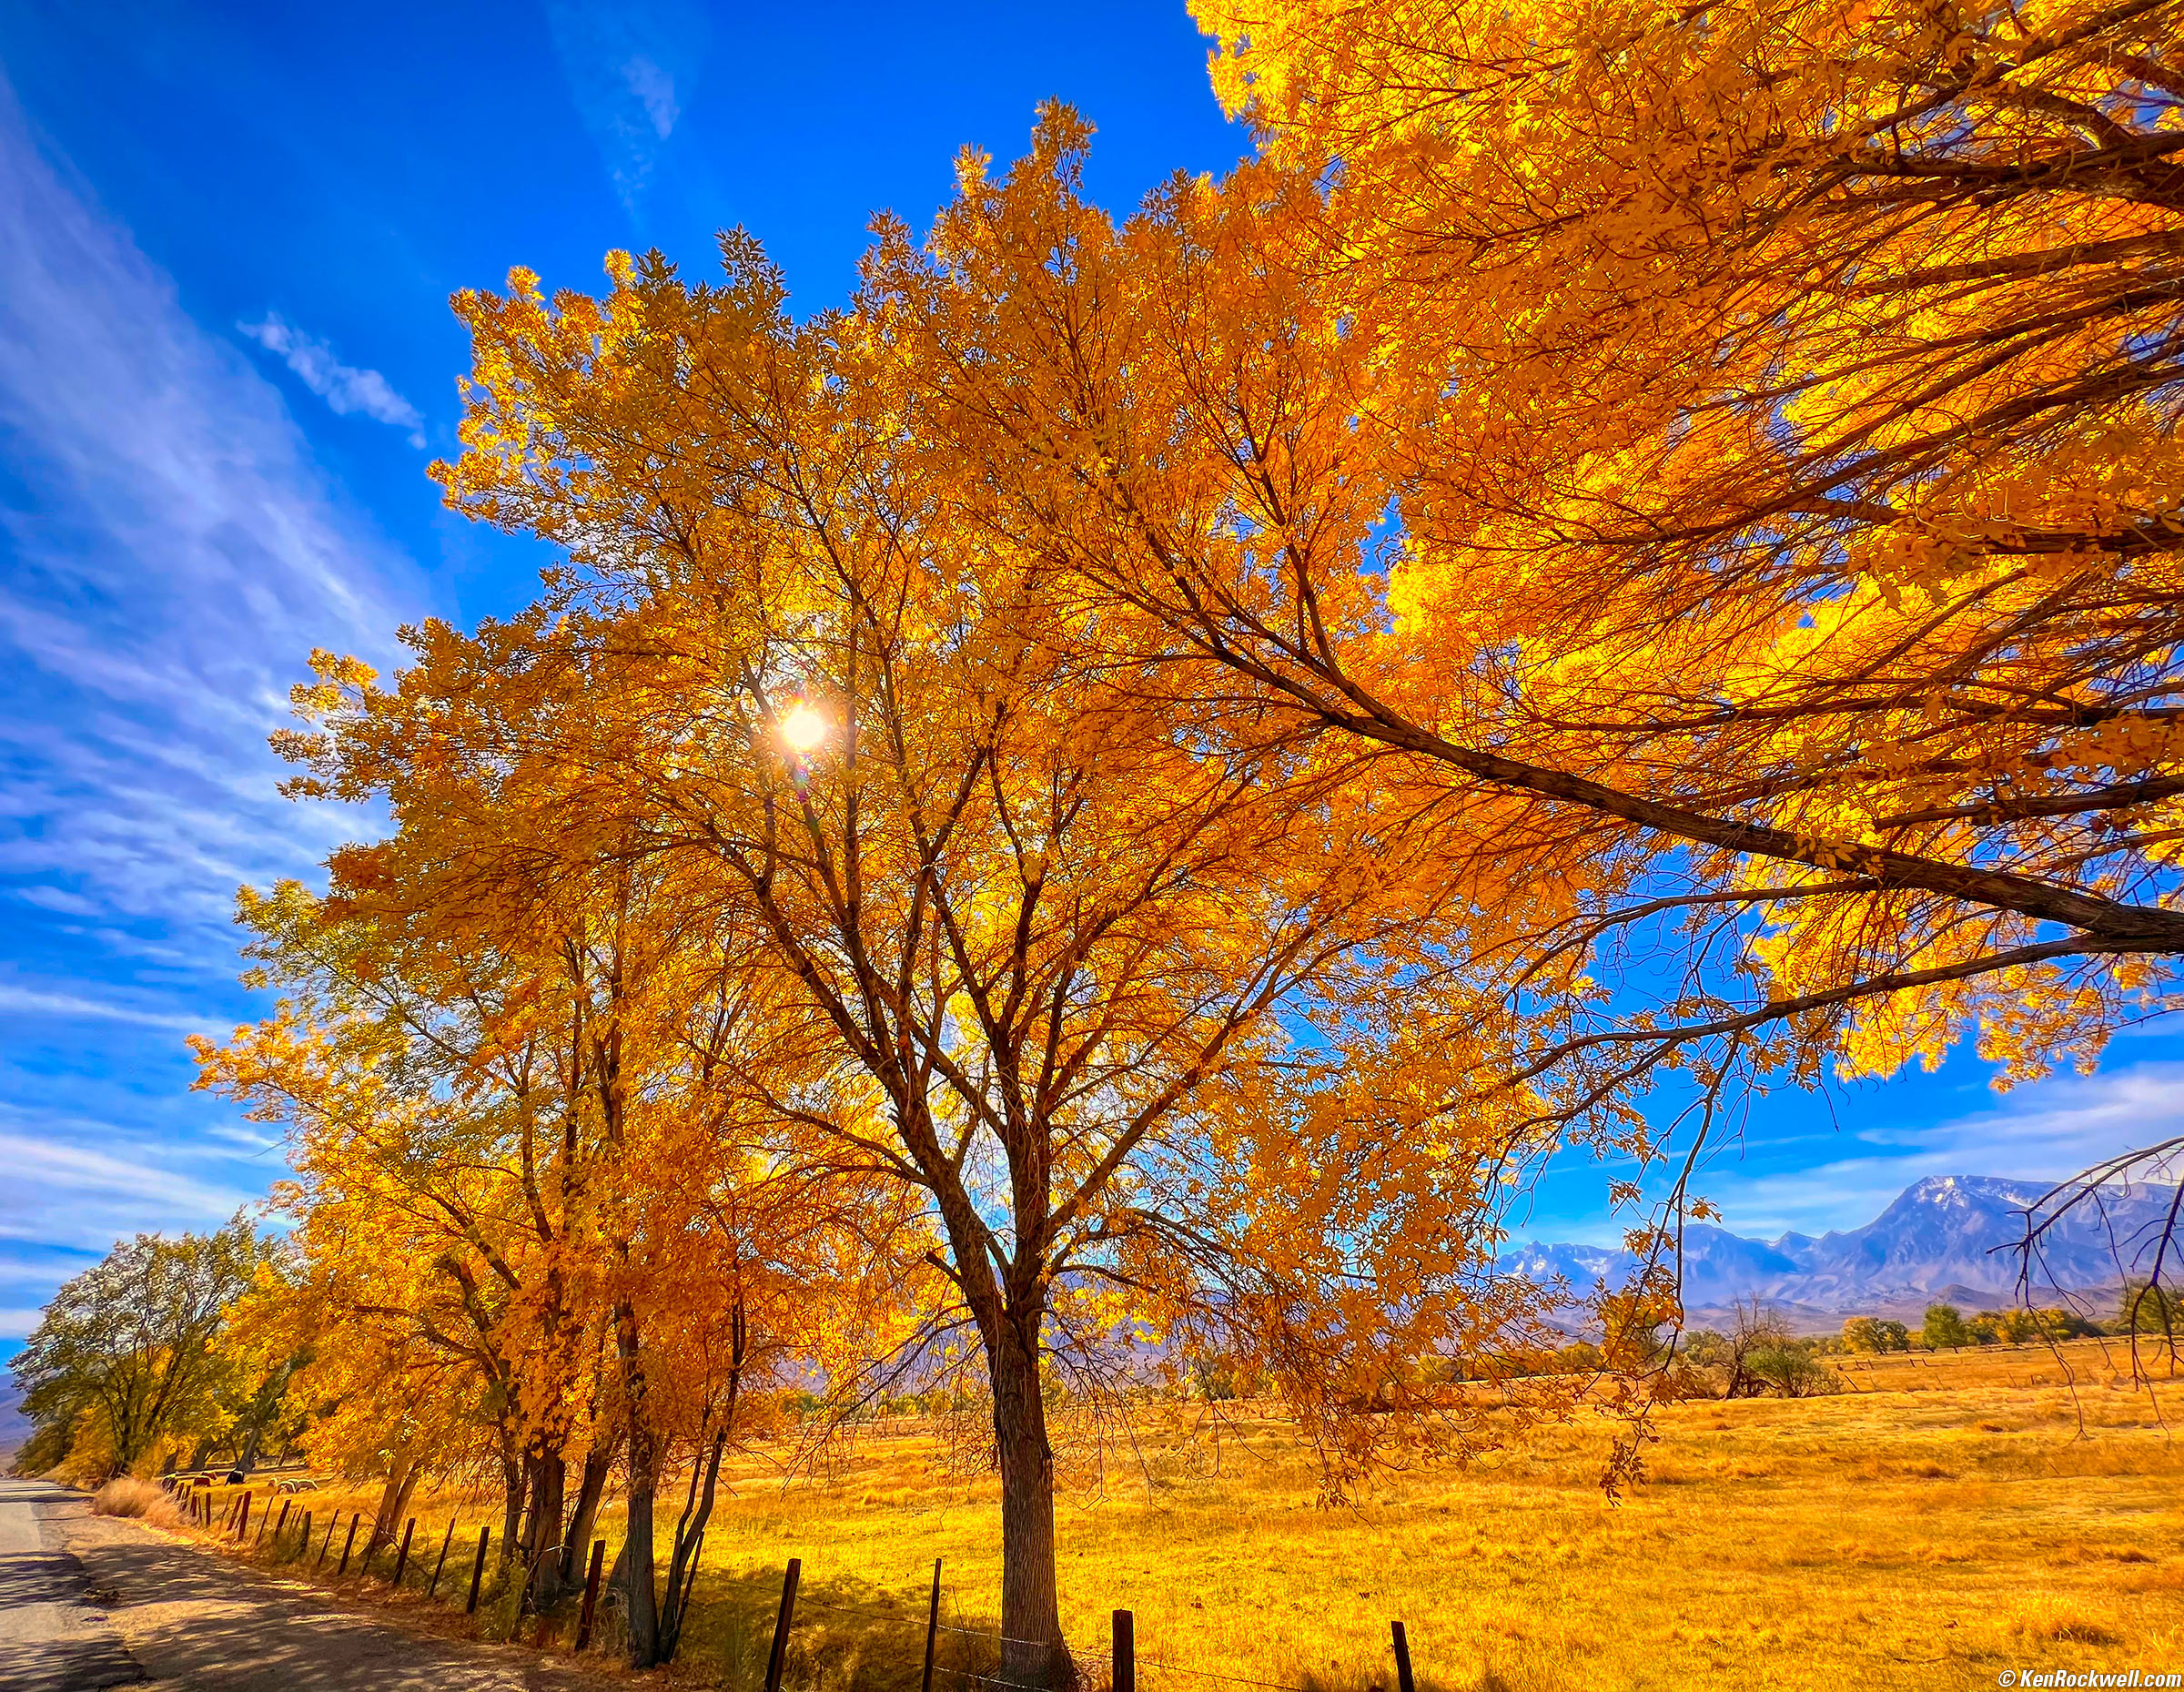
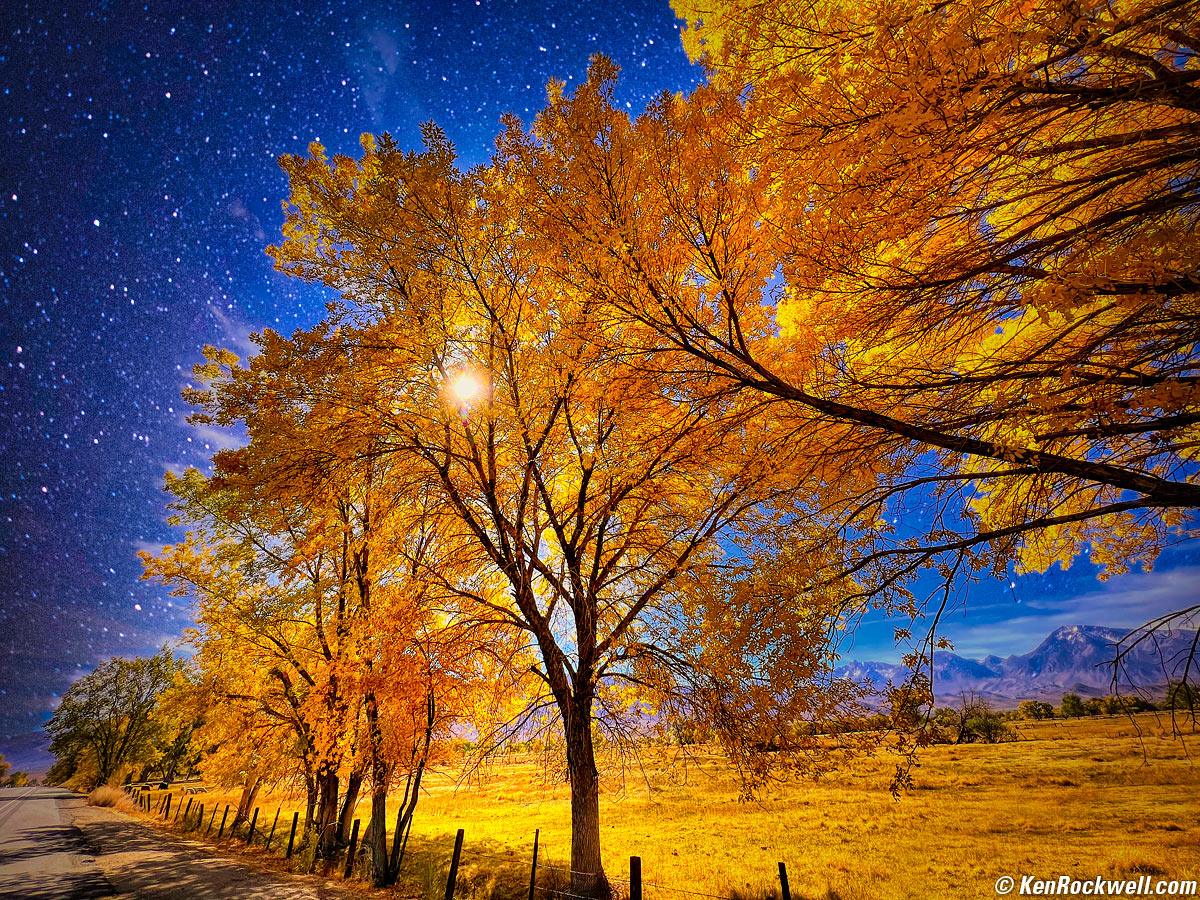
Golden Cottonwoods, Bishop, California, 1:58 P.M., 19 October 2021. Apple iPhone 13 Pro Max 1.57mm (13mm eq.) camera at f/1.8 at 1/809 at Auto ISO 32 (LV 13.0). bigger.
I snapped this by holding my Phone 13 Pro Max out my open sunroof; art is where you find it.
Skylum Neo made it easy to boost this snap from yawner to awesome from just one JPG file. All it takes is Edit > Color > Saturation and slide it to 100, then Supercontrast and slam Shadows Contrast to 100, and you're done! (see my user's guide.)
Saturation alone didn't make this; I needed the Shadows Contrast adjustment to add light to the cottonwoods in the center.

As shot. bigger or camera-original © JPG file.
And here's it after a few clicks in Skylum Luminar Neo to bump-up colors and add a fake sky:
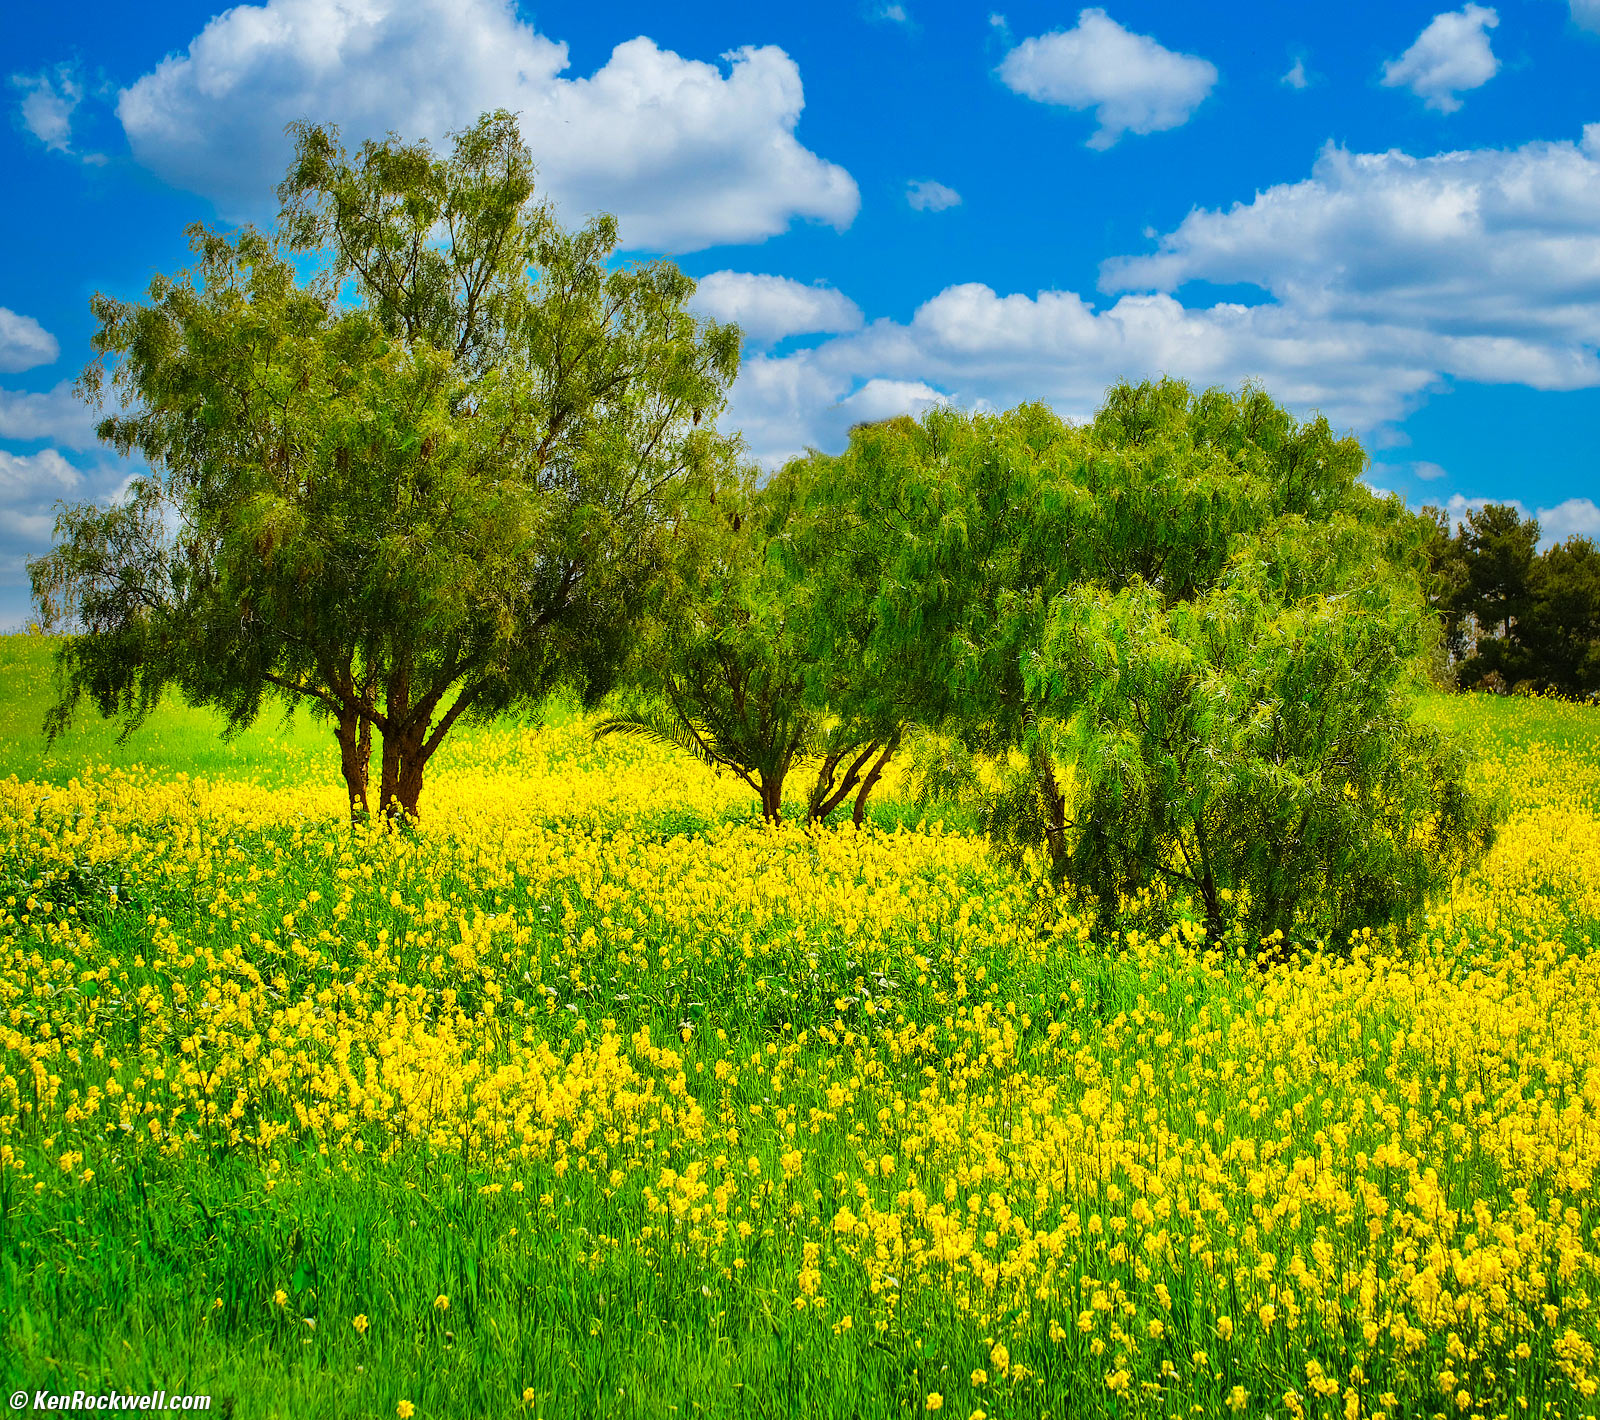
Springtime Mustard, Rancho Santa Fe, California, 11:7 AM, Saturday, 29 March 2025. Fuji X-T30 (which was in The Eastern Sierra with us in October, 2019), TTArtisan 56mm f/1.8 at f/8 at 1/800 at Auto ISO 160 (LV 14.0), Skylum Luminar Neo. bigger or camera-original © JPG file.
As shot. bigger.
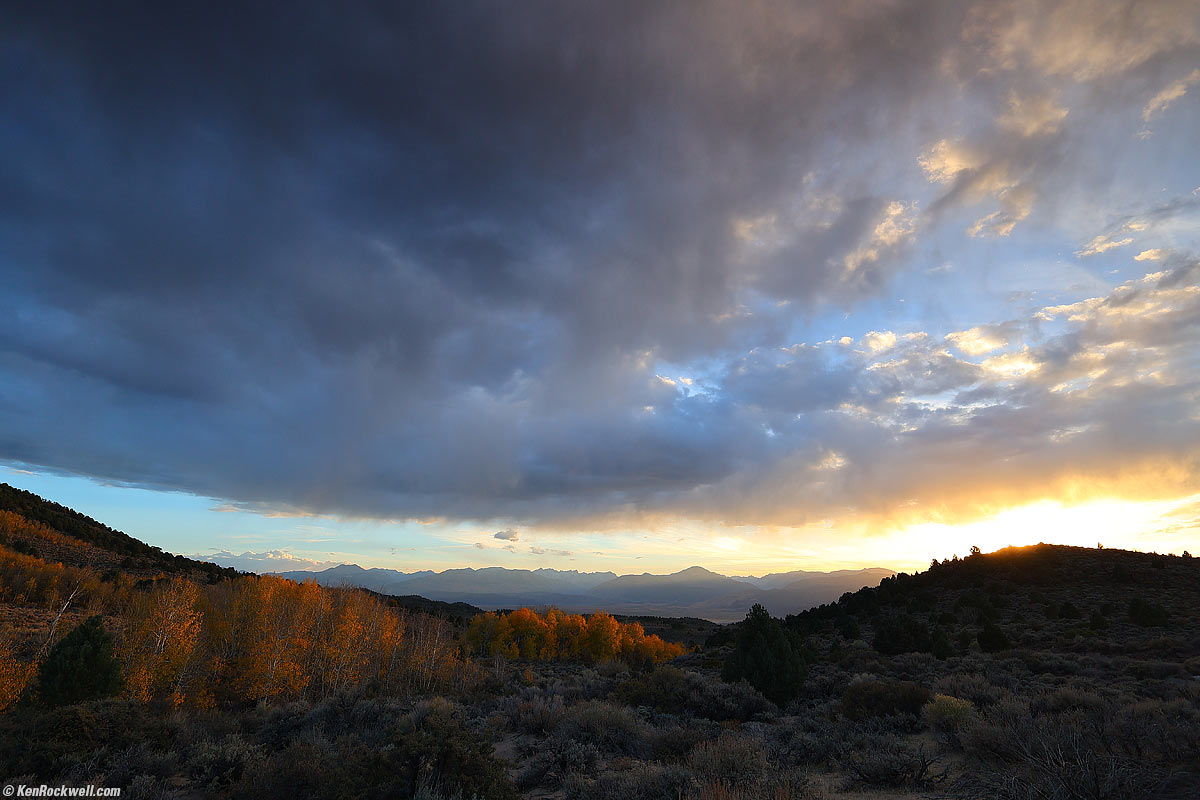
After Skylum Luminar Neo:

Sunset, East of Walker Lake, Bridgeport, California, 5:59 P.M., 17 October 2022. Canon EOS R6, RF 15-30mm IS STM at 17mm, f/6.3 at 1/100 at Auto ISO 100 (LV 12.0). More tech details. bigger.
Neo let me explode the sunset and fall color on the left, and add detail to the dark foregrounds and the bright parts of the sky, with just one or two sliders (see my user's guide).
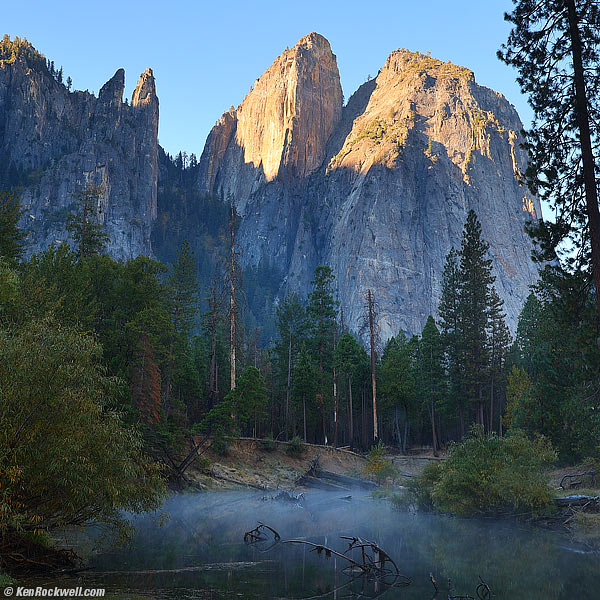
As shot. bigger.
After Skylum Luminar Neo:
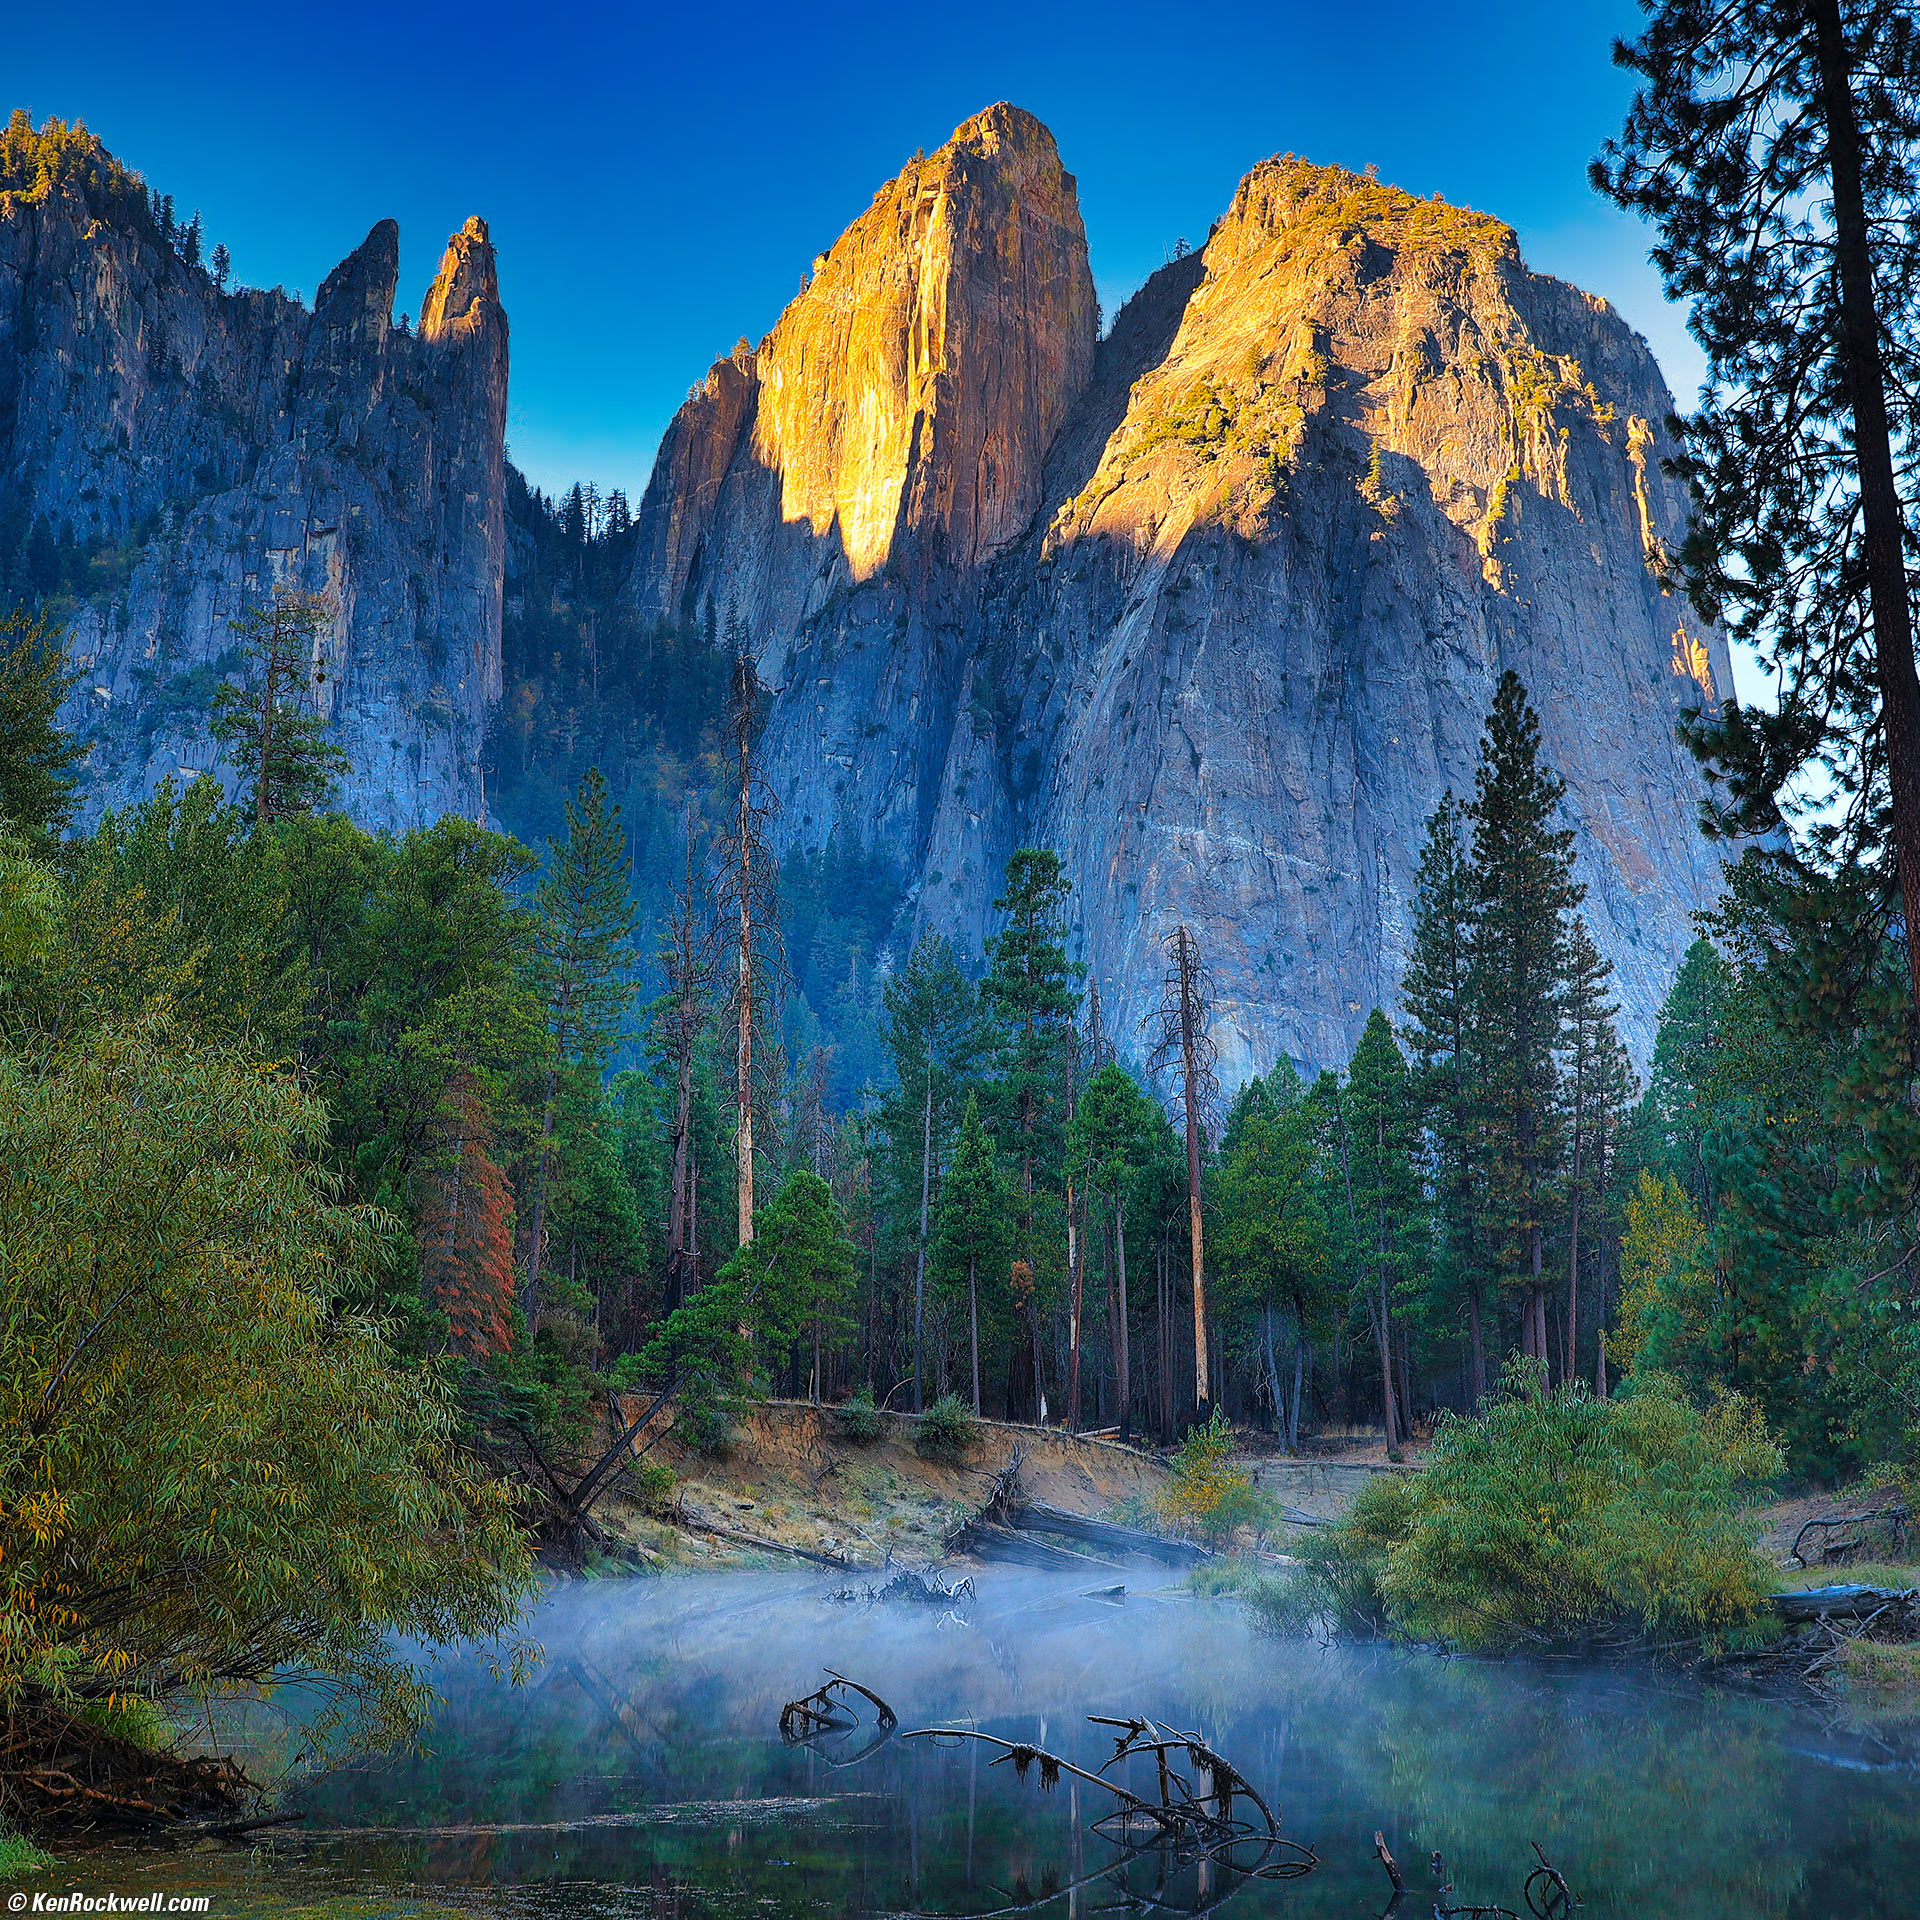
Cathedral Rocks and Merced River Fog at Dawn, Yosemite National Park, California, 8:34 A.M., 23 October 2022. Canon EOS R6 in square-crop mode, RF 24-240mm IS USM at 37mm (equivalent to the normal ZEISS 80mm f/2.8 PLANAR lens on HASSELBLAD 6×6), f/8 hand-held at 1/25 at Auto ISO 100, -1 stop exposure compensation (LV 10.6). More tech details. bigger.
I did this in a few seconds from just one original JPG file. I used the Enhance and Sky Enhance sliders and added some deliberate vignetting to keep your eyes in the picture et voilà, Luminar Neo let me recover detail and color in the highlights on the mountains, darkened the sky (I was too lazy to throw in clouds) and added light and detail to the deep, dark woods and fog crawling along the river at dawn.
As shot. bigger.
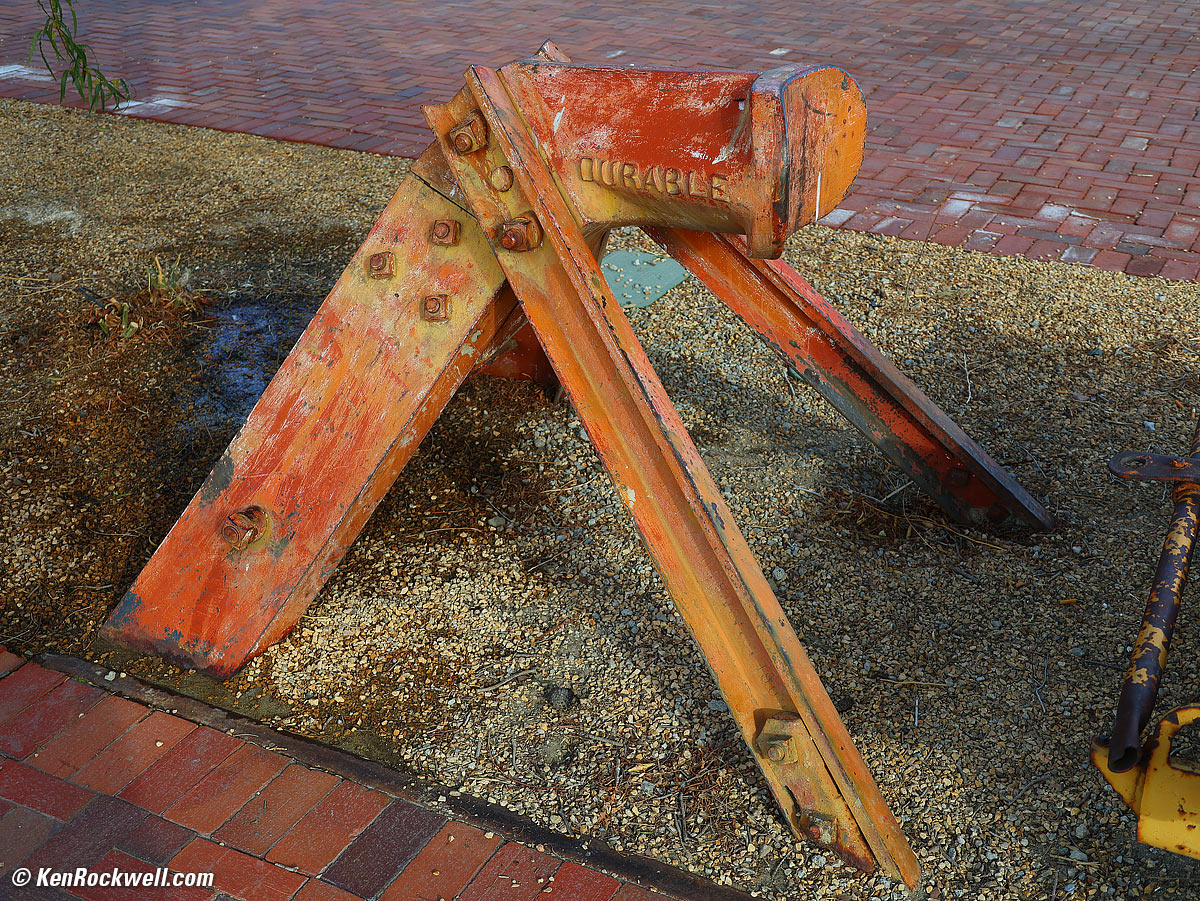
After Skylum Luminar Neo:

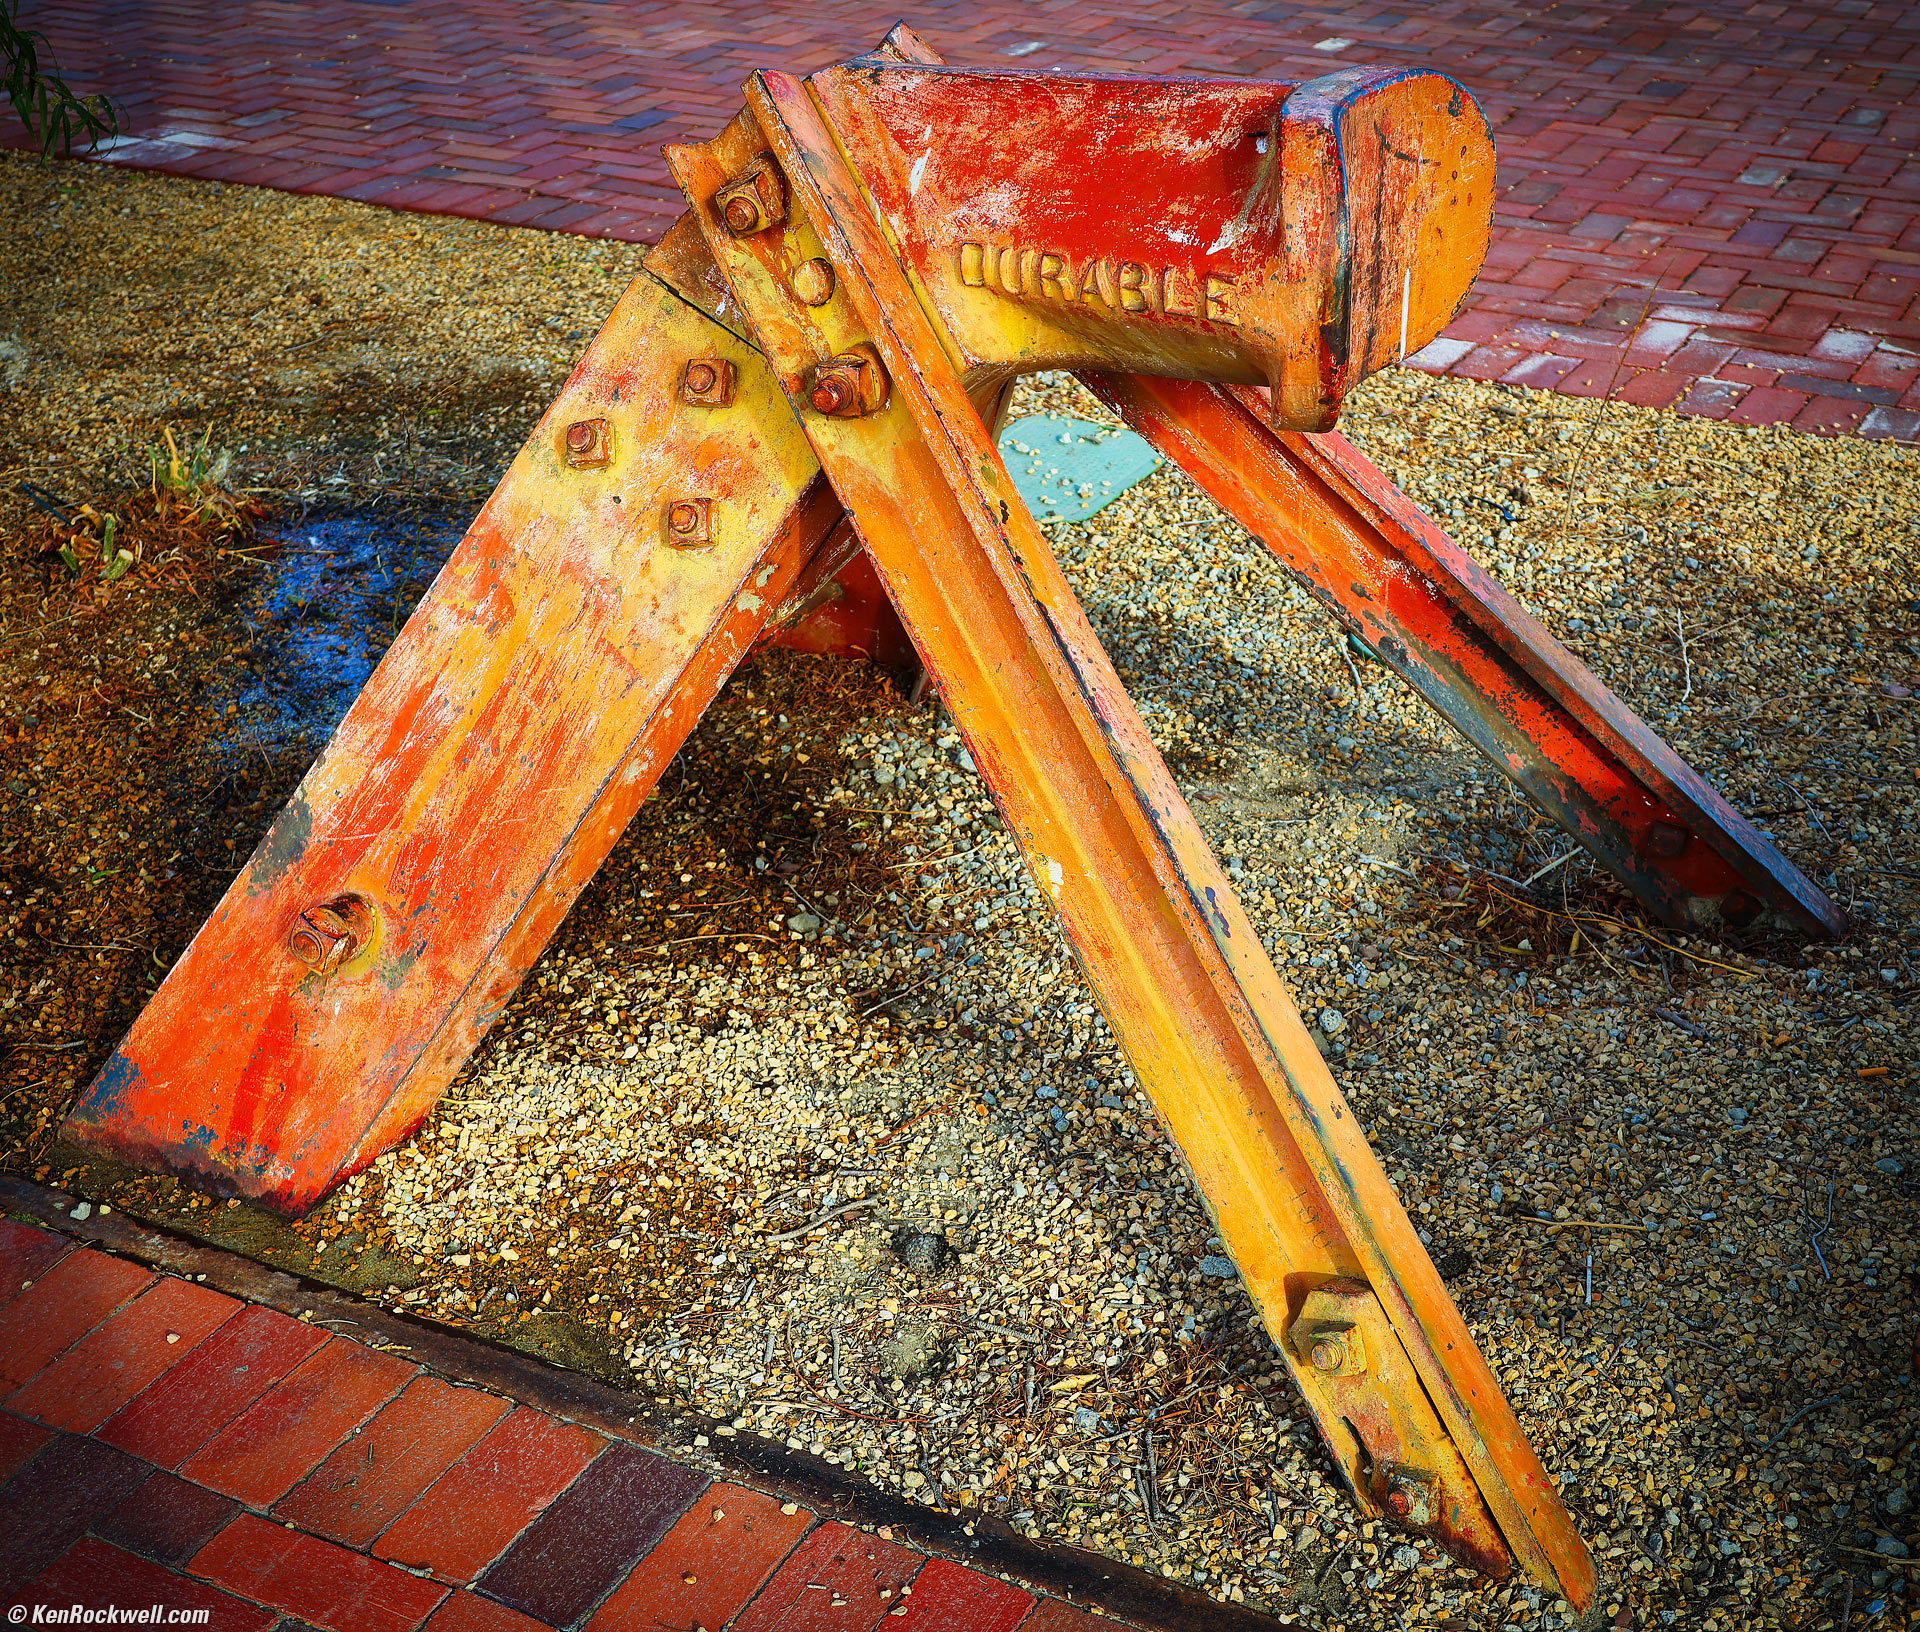
Rail Car Stop, Barstow, California, 8:48 A.M., 09 February 2025. Cropped a bit from Canon EOS R5 II in 4:3 crop mode, EF 28-135mm IS USM on EF to RF adapter at 38mm at f/5.6 at 1/125 at Auto ISO 100, -0.7 stops exposure compensation (LV 12.0). bigger or full-resolution 7.2 MB JPG file.
I amplified this otherwise dull shot with the Enhance & Color tools, and added vignetting, which Ansel Adams called edge burning, to make the subject stand out.
HDR Highlight & Shadow Recovery - from a single JPG frame! top
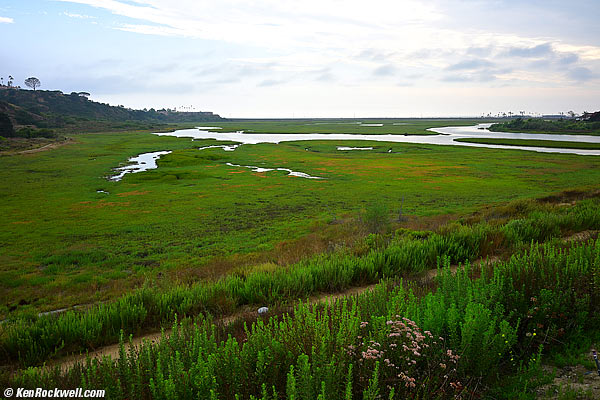
As shot. bigger.
After Skylum Luminar Neo:
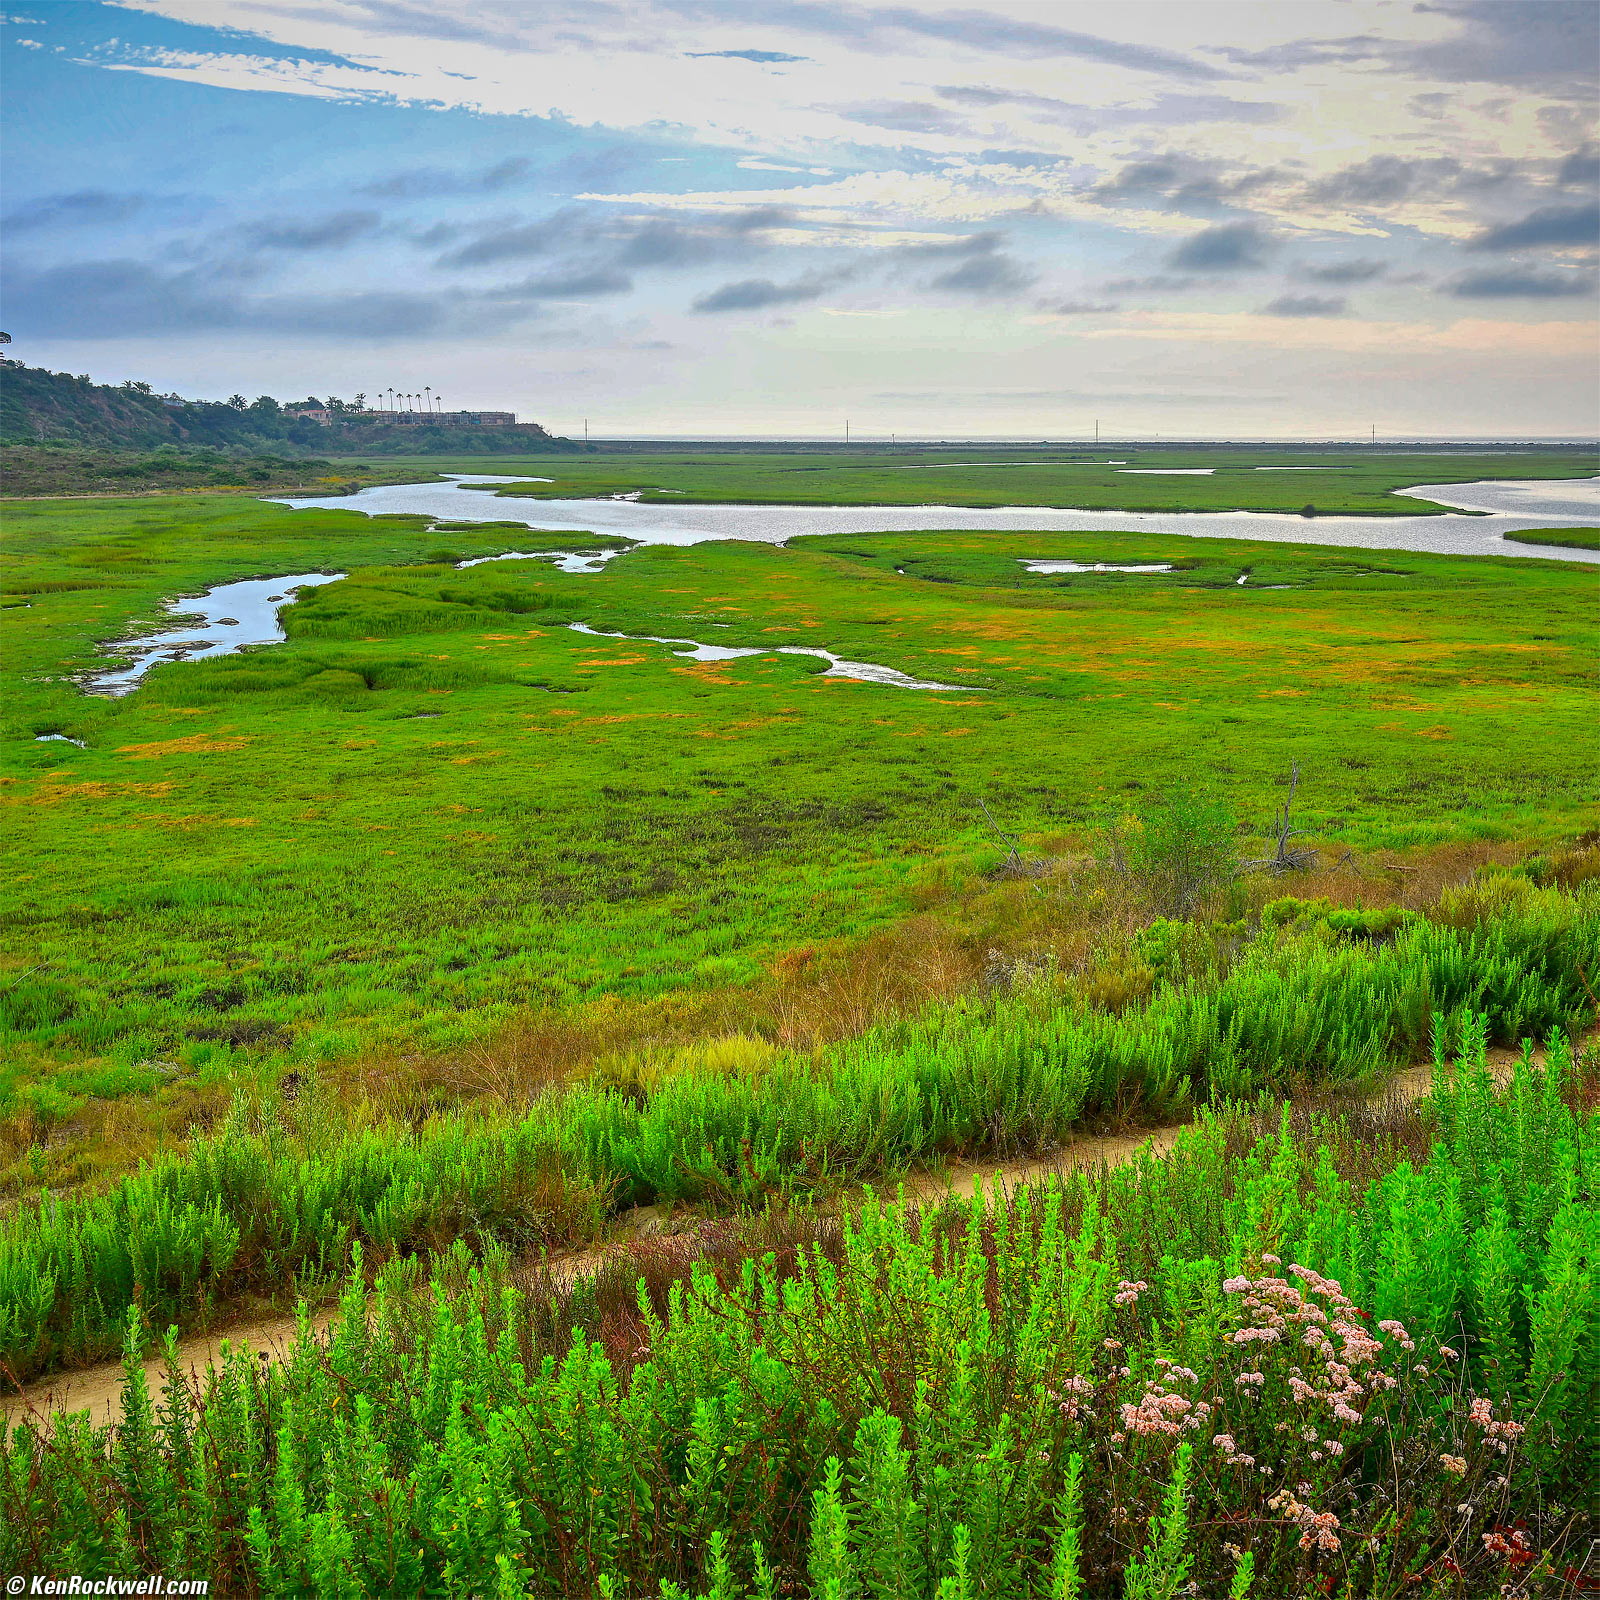
Lagoon under Stormy Sky, 5:19 PM, Sunday, 23 July 2023. Square crop from Nikon Z8, Z 26mm f/2.8 at f/9 hand-held at 1/25 at Auto ISO 64, +0.7 stops exposure compensation (LV 11.6). bigger.
Luminar Neo's Enhance tool lets me bring back the blown-out sky and light-up the emerald foreground with one easy glide of the Accent slider, from just one JPG file.
Modern cameras have pretty good shoulders and toes in their shadow and highlight H&D curves, so while a JPG may seem to have lost the highlights or shadows, lots of detail remains that usually can be brought back with the right software like Neo — no raw and no multiple exposures needed!
Astro top
As shot. This is how it looked to our eyes out in the pitch black, but not how I want my photo to look. Doe! bigger.
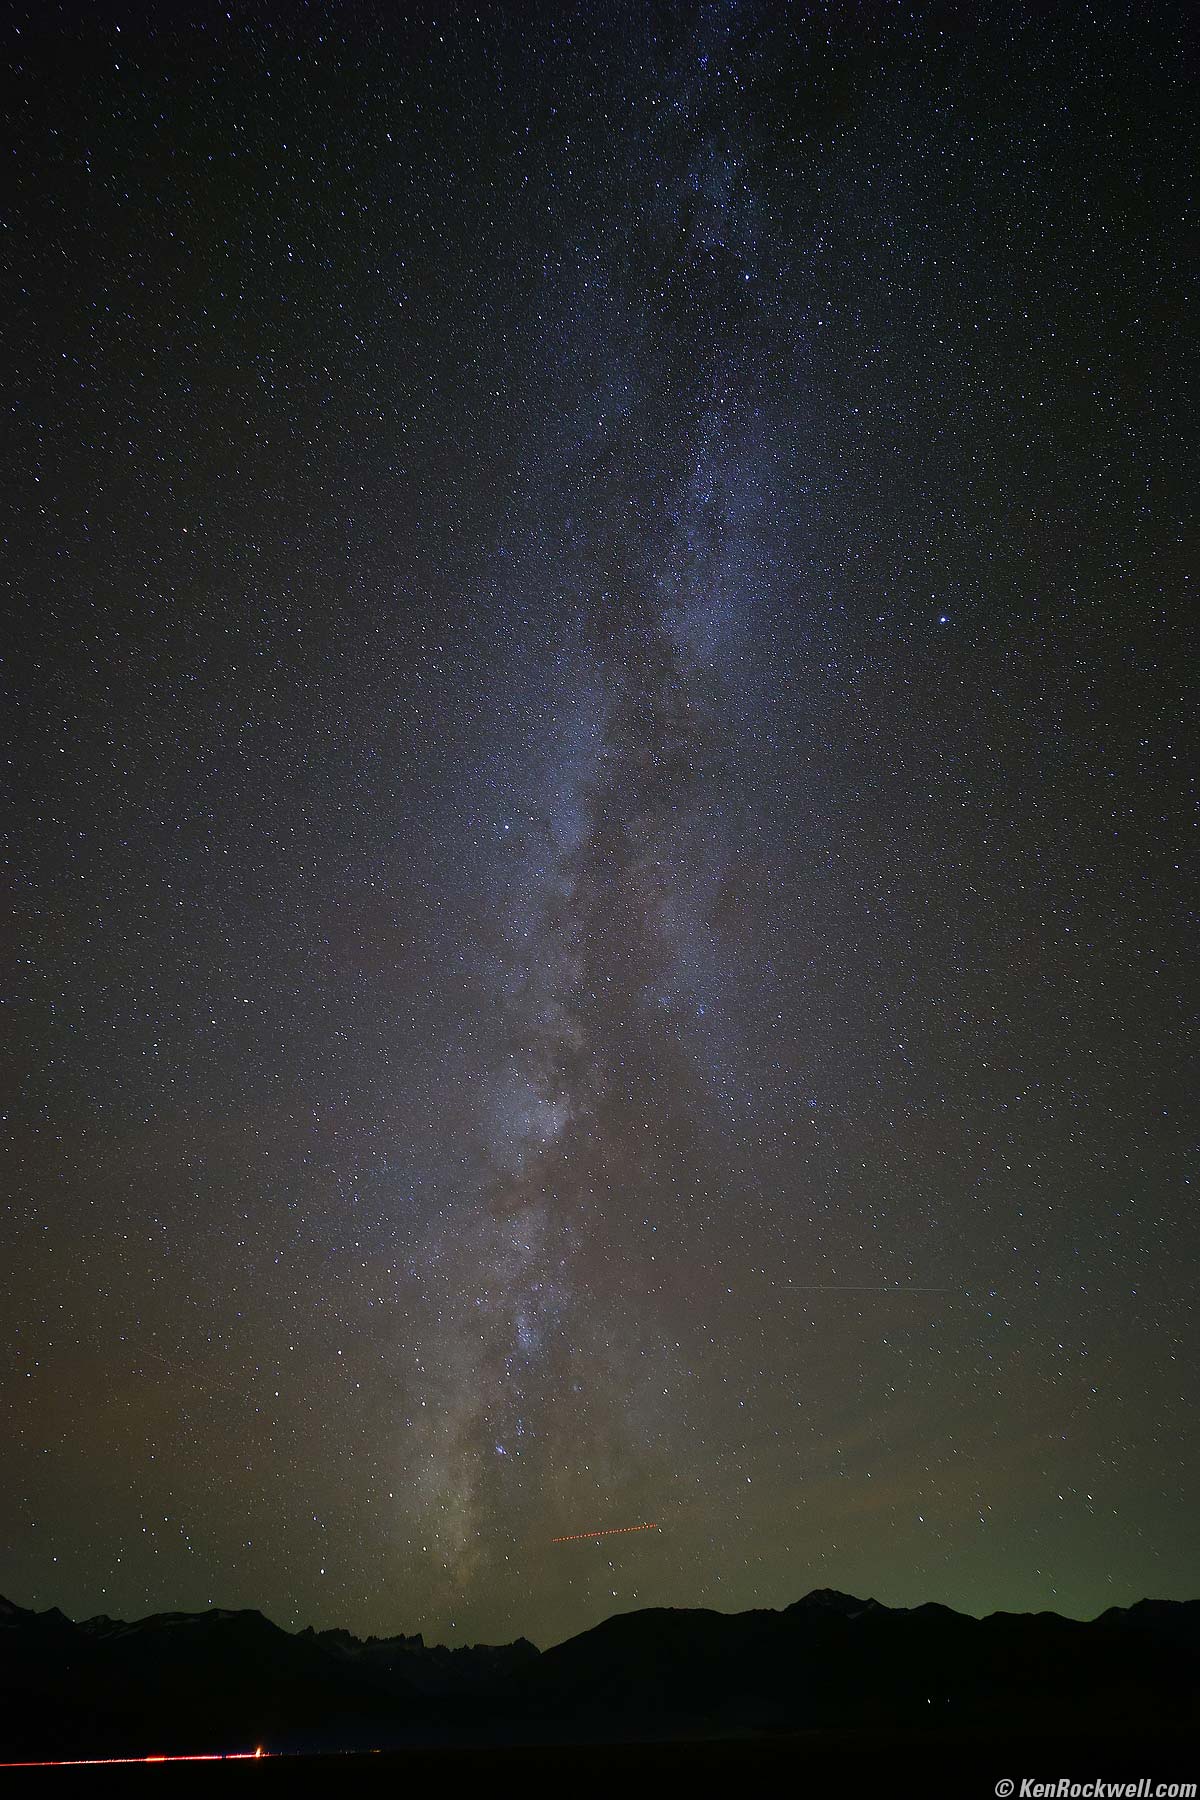
After Skylum Luminar Neo:
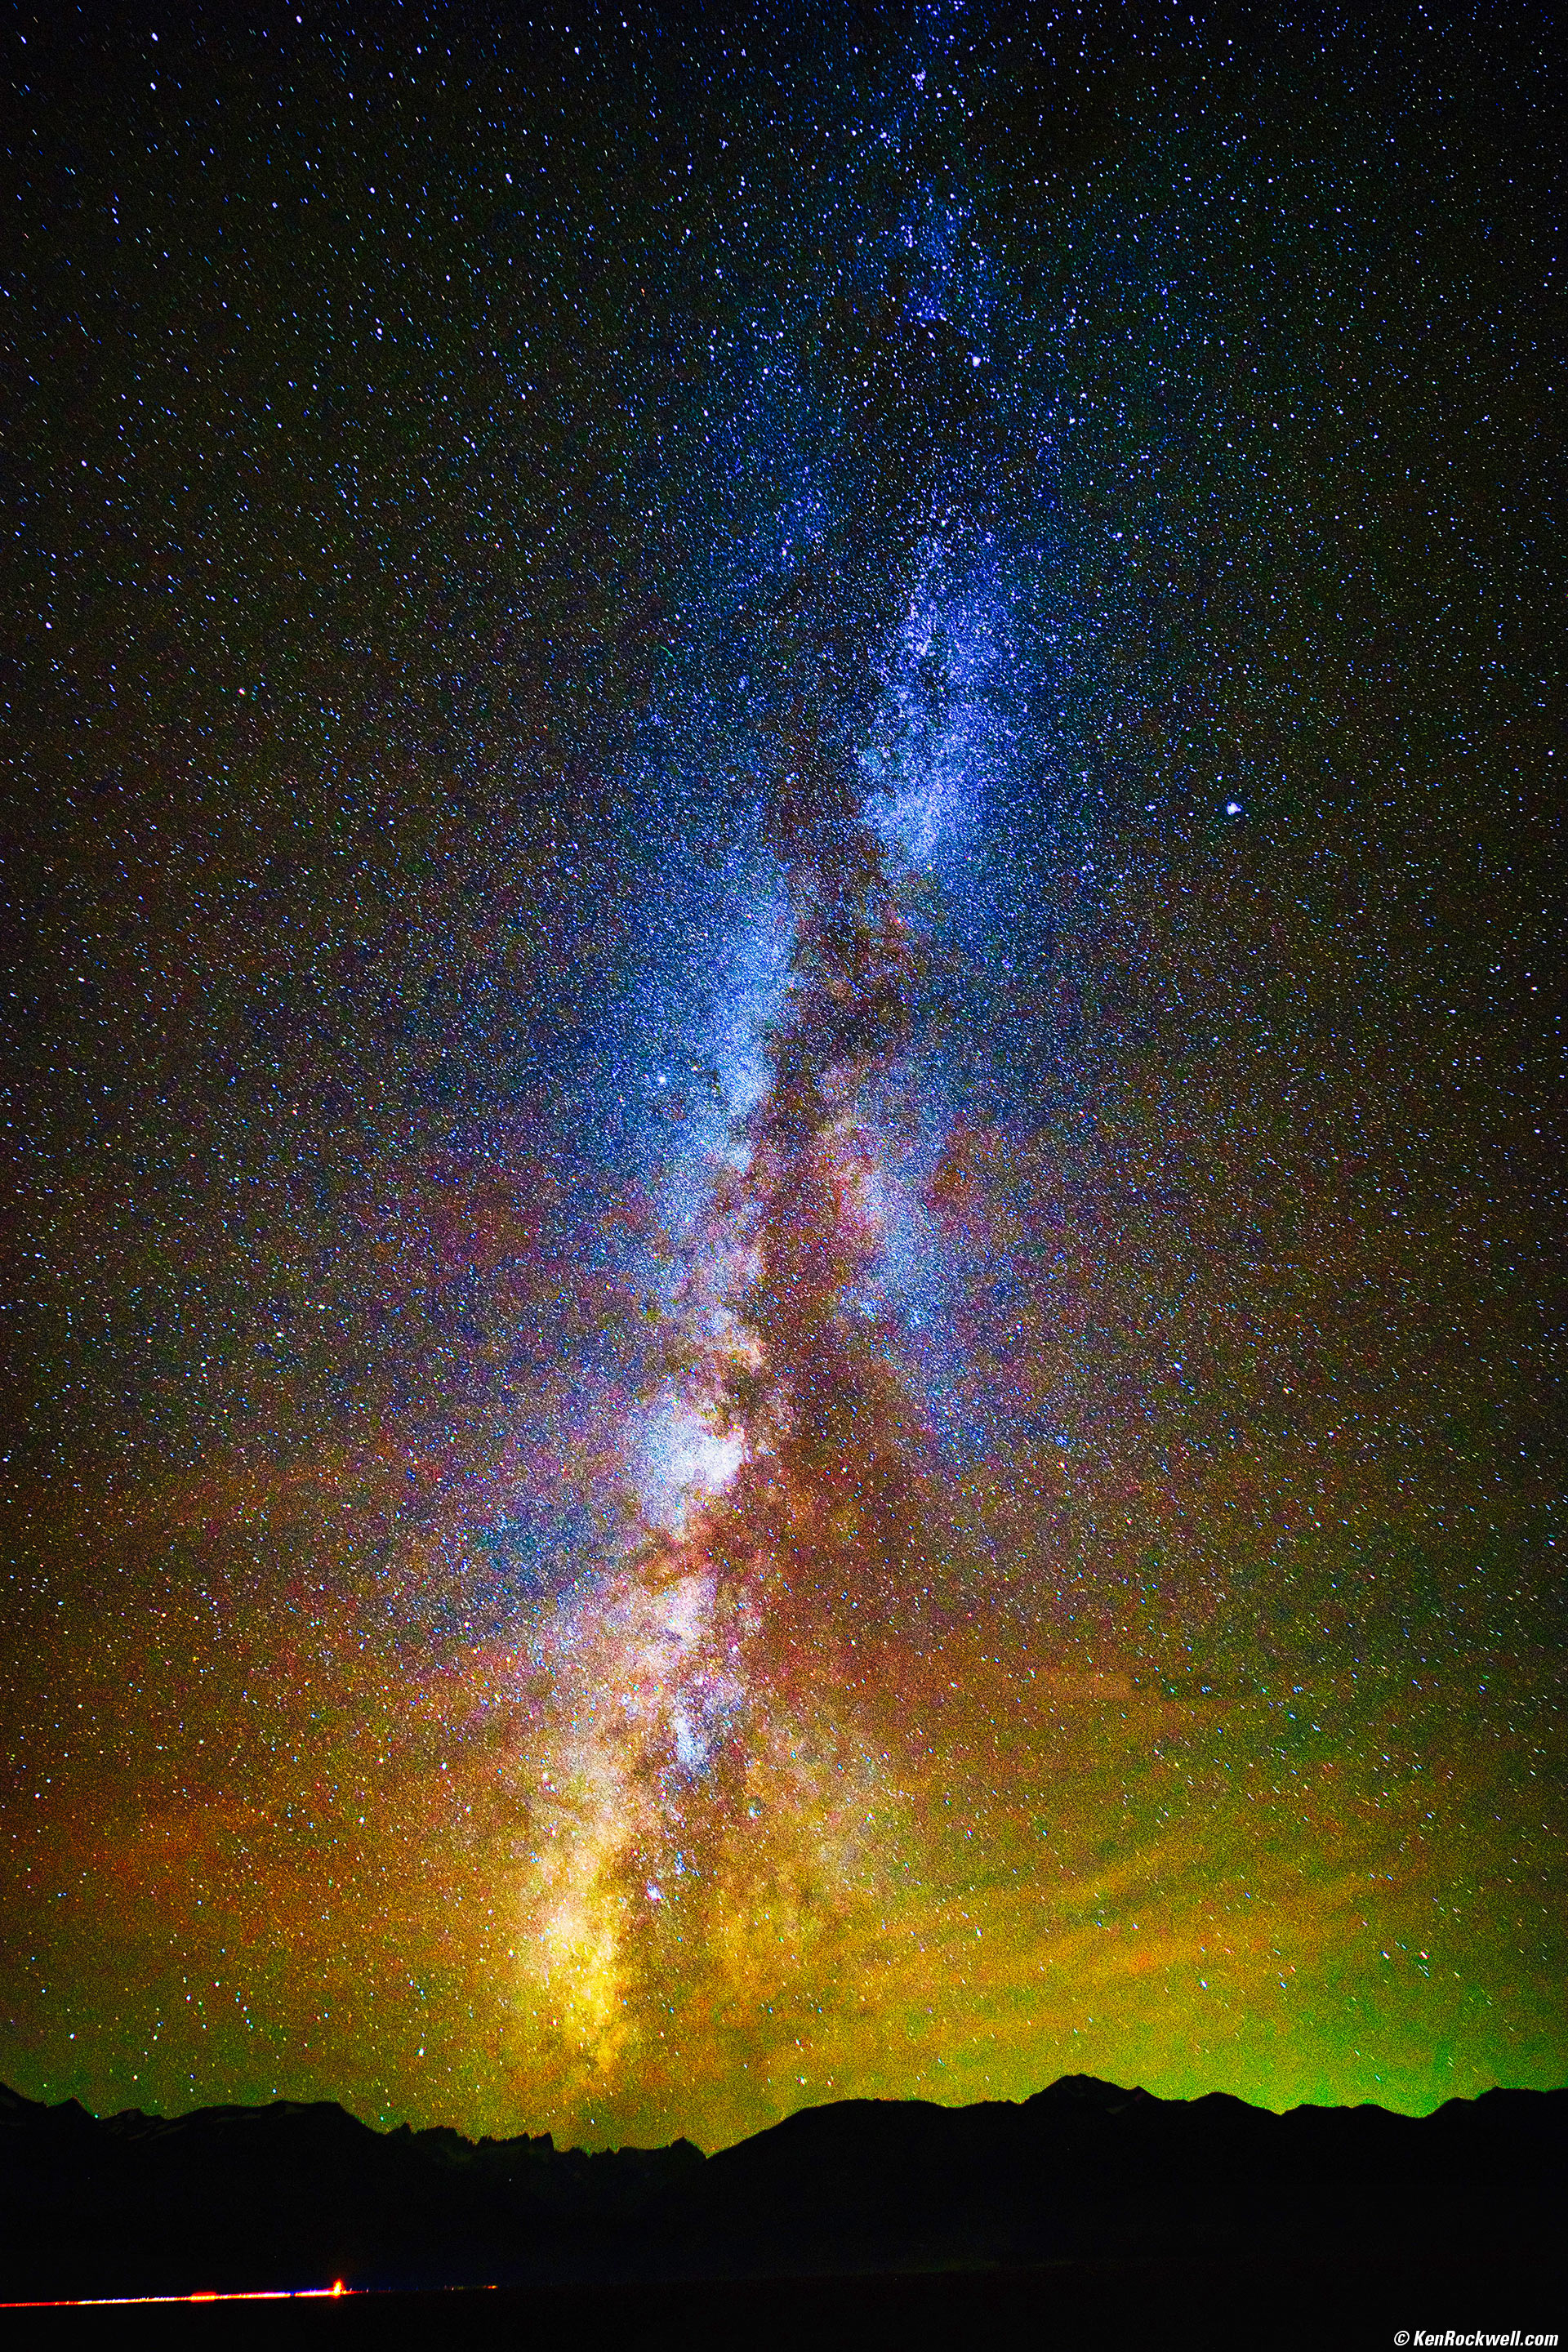
The Milky Way, Bridgeport, California, 8:43 P.M., 14 October 2023. Canon EOS R6 II, Pergear 14mm f/2.8 II wide-open at f/2.8 for 30 seconds at ISO 6,400 (LV -8 — minus 8!!!), tungsten (3200K) White Balance to force the sky to blue, Skylum Luminar Neo. More tech details. bigger.
Neo lets me bring out tens of thousands of stars, and especially bring out all the color that was invisible to my eye and camera. The camera recorded very muted colors in the original image, and Skylum Luminar Neo let me explode the colors as I wanted.
This was done with Edit > Color rammed to 100, then Enhance > Accent set to 68, then Color > Saturation set to 18 again (yes, you can keep adding more and more saturation seemingly without limit), then Supercontrast > Midtones Contrast set to 100. This shot also took tweaking with curves adjustment layers in Photoshop.
Skylum Luminar Neo's Erase tool made it trivial to remove at least three airliner tracks in the sky. As I lifted the brightness and saturation, more airliner trails became apparent.
How to Photograph the Milky Way.
Works with Film! top
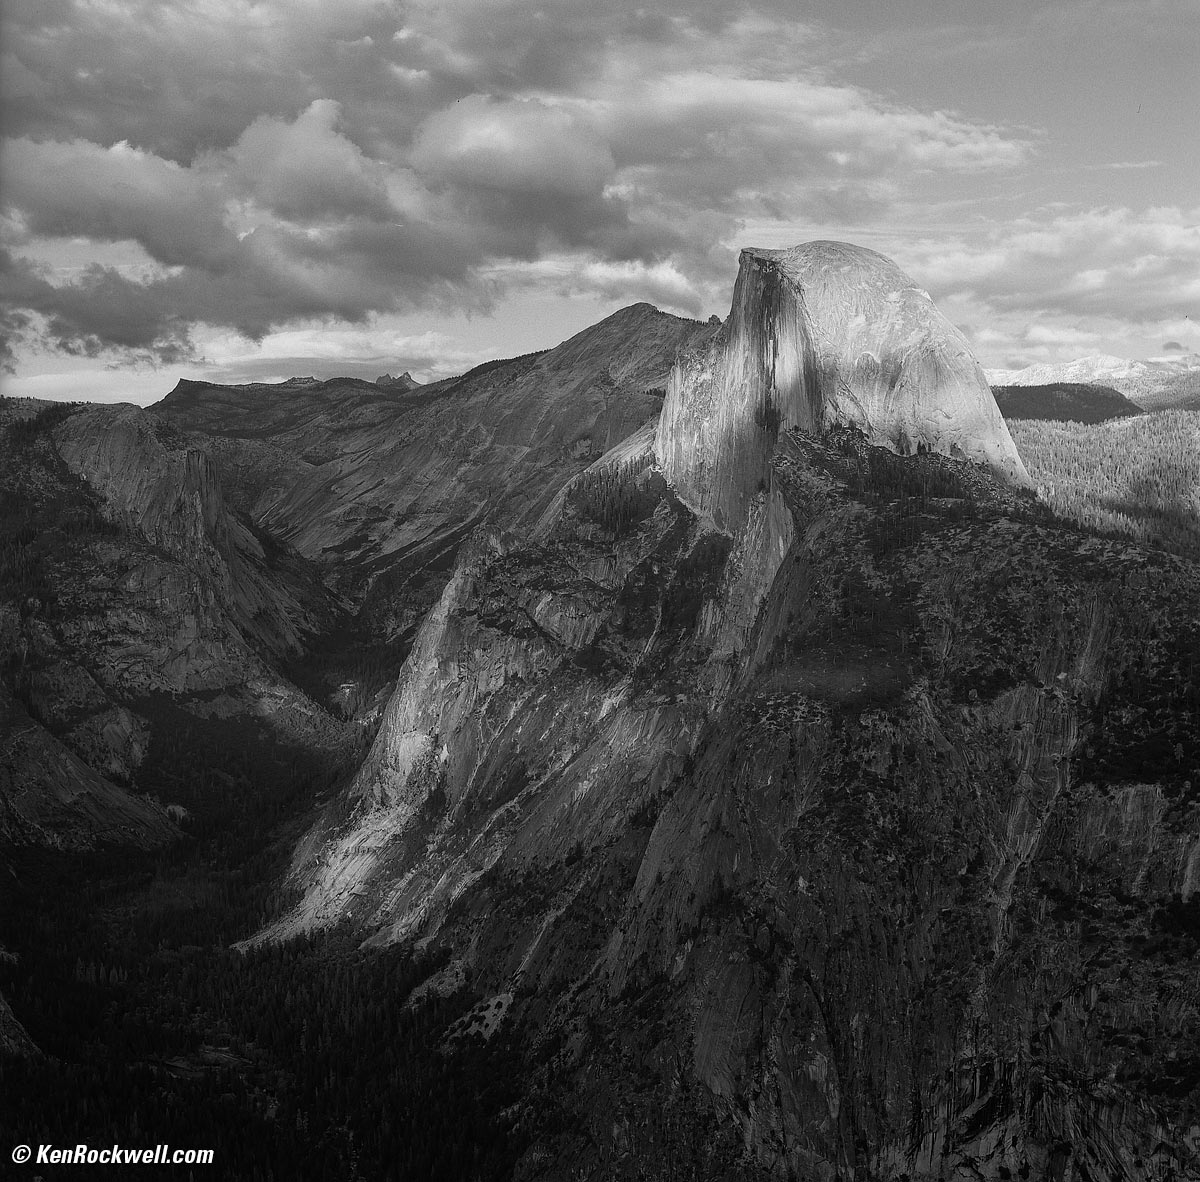
As scanned. bigger.
After Skylum Luminar Neo:
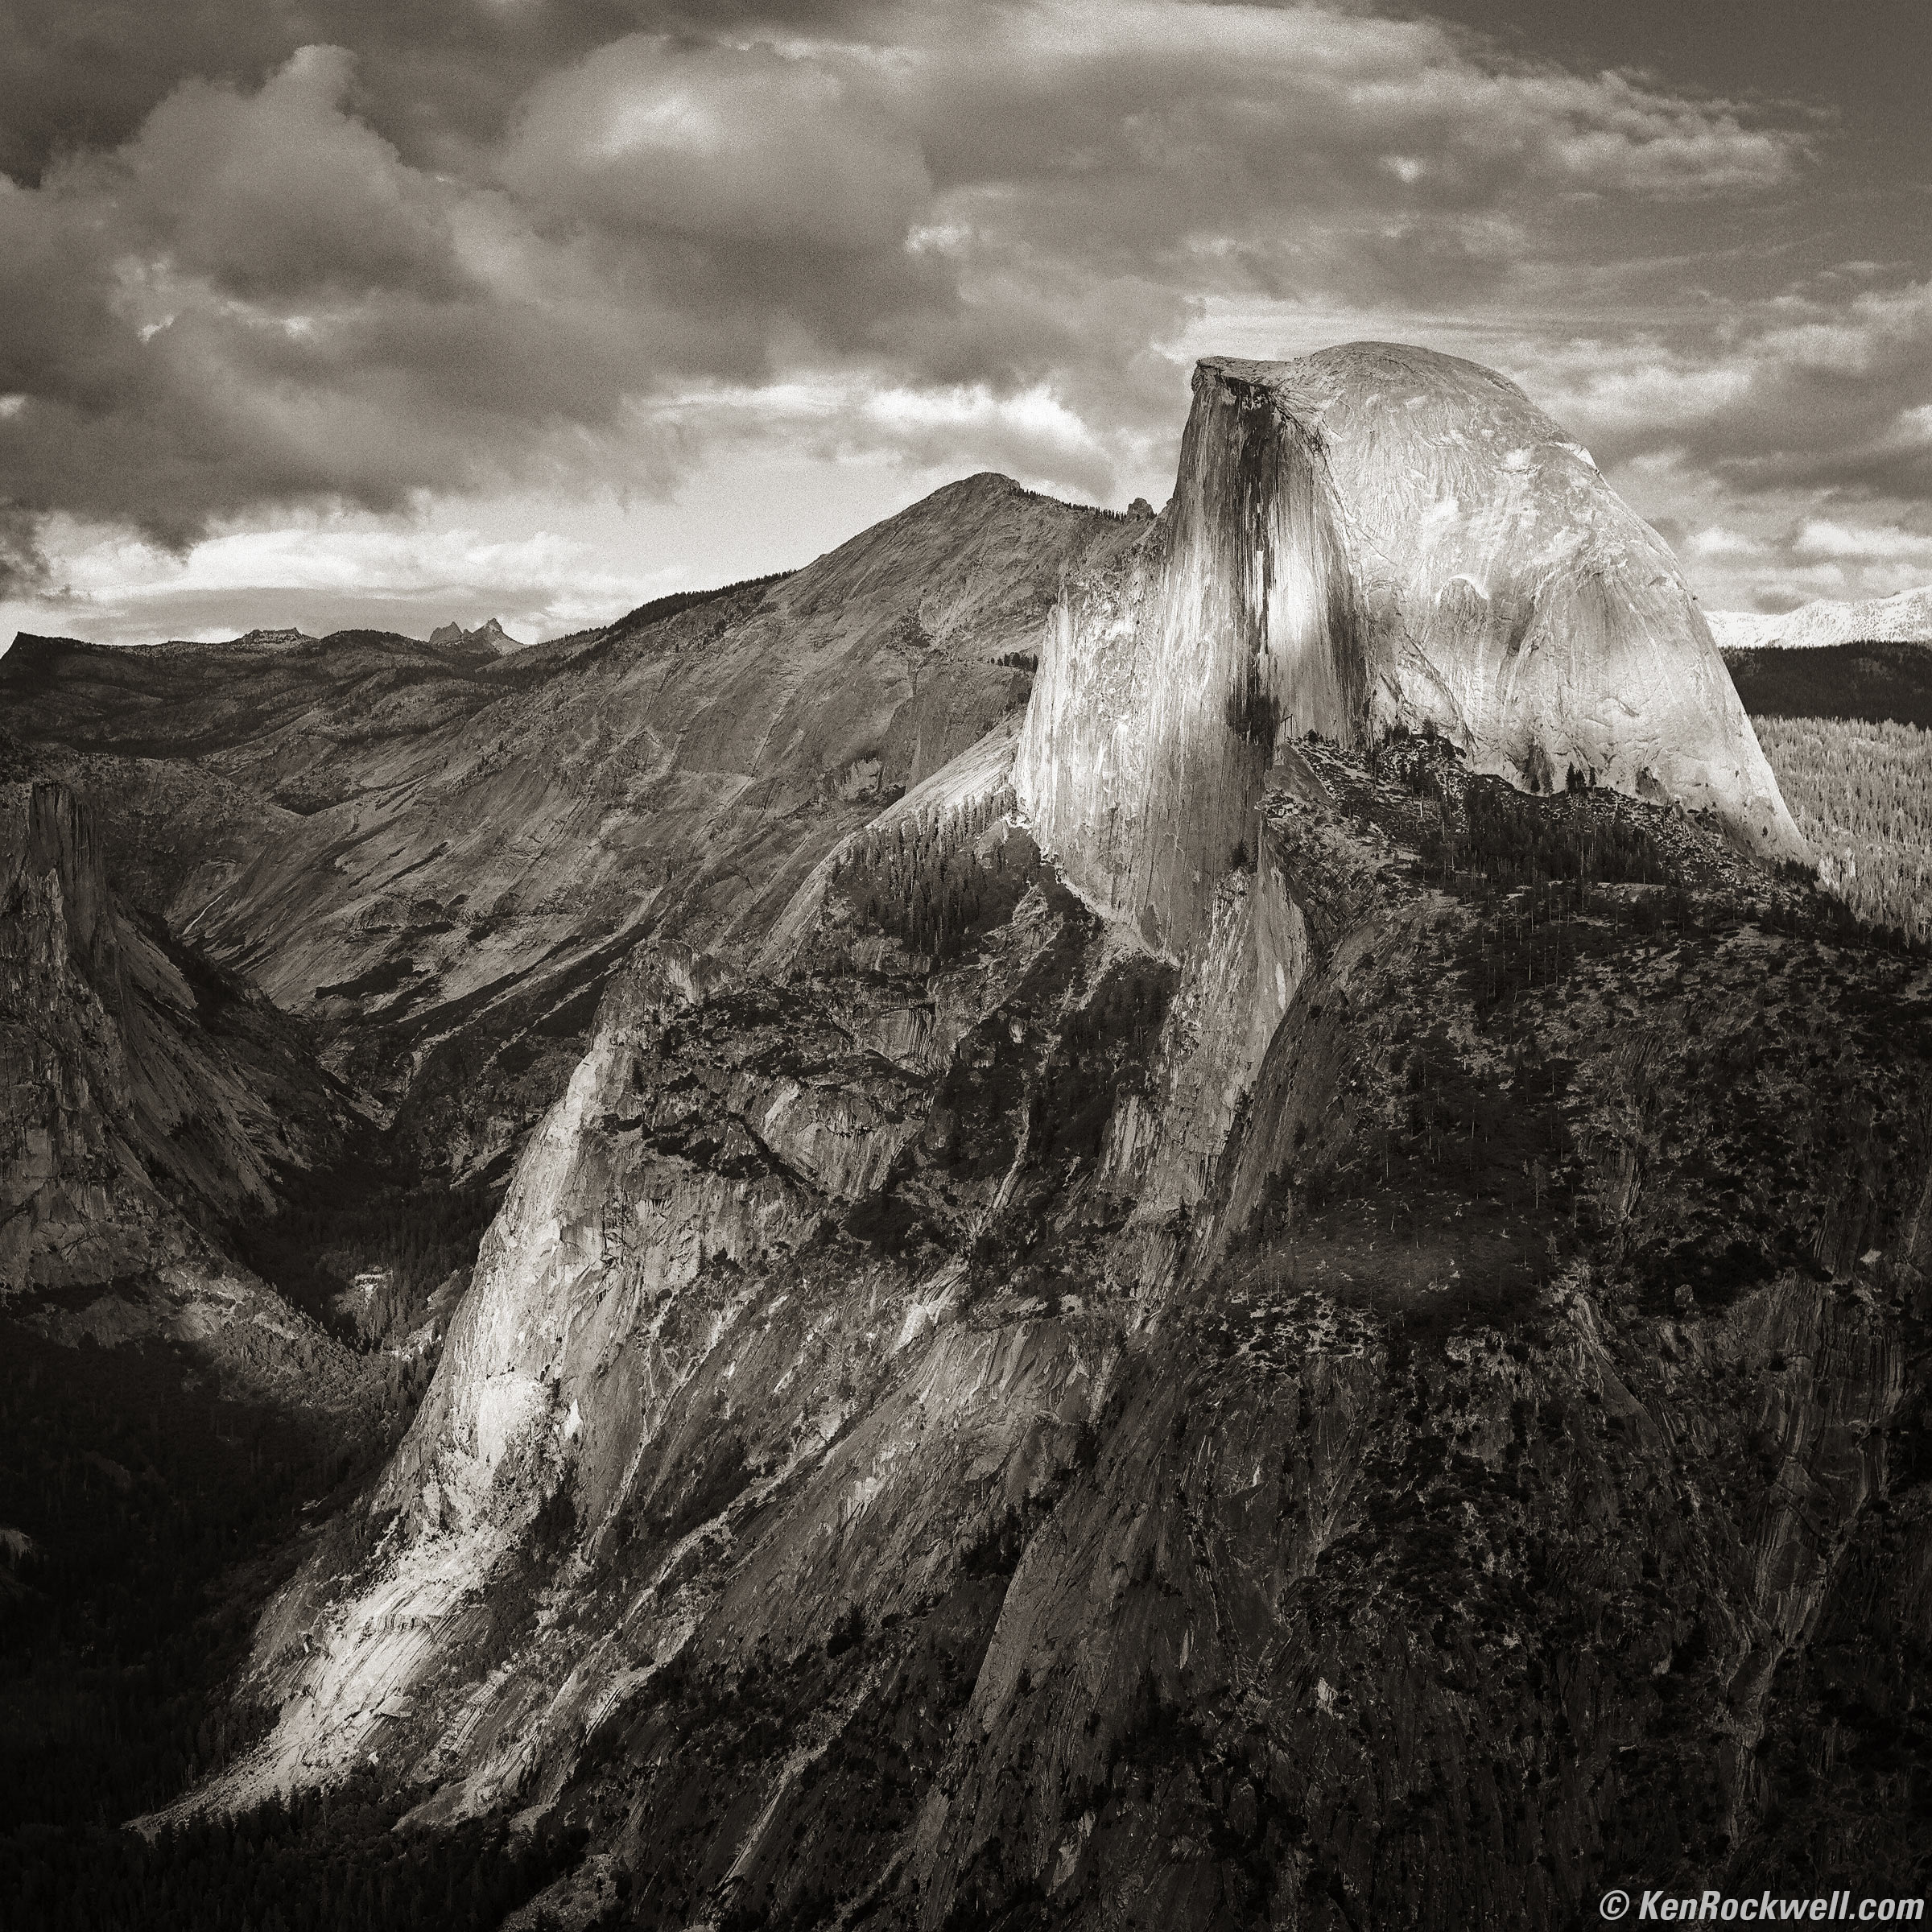
The Half Dome as Seen From Glacier Point, Yosemite National Park, 5:21 PM, Monday, 24 October 2016. HASSELBLAD 500C/M, klassisch silber non-T✻ ZEISS PLANAR 80mm f/2.8, B50 25A red filter, f/9.5 at 1/8 of a second on Fuji ACROS 100, Great American Photo Lab develop & scan, Radiant Photo and Skylum Luminar Neo software for emphasis, split-toned print. bigger.
I use Neo to pull out detail everywhere from an otherwise lifeless scan.
Wire & Object Removal: The "Erase" Tool top
As shot. bigger.
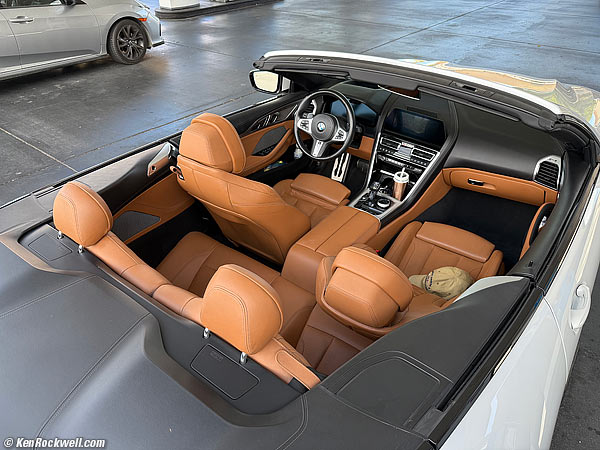
After Skylum Luminar Neo:
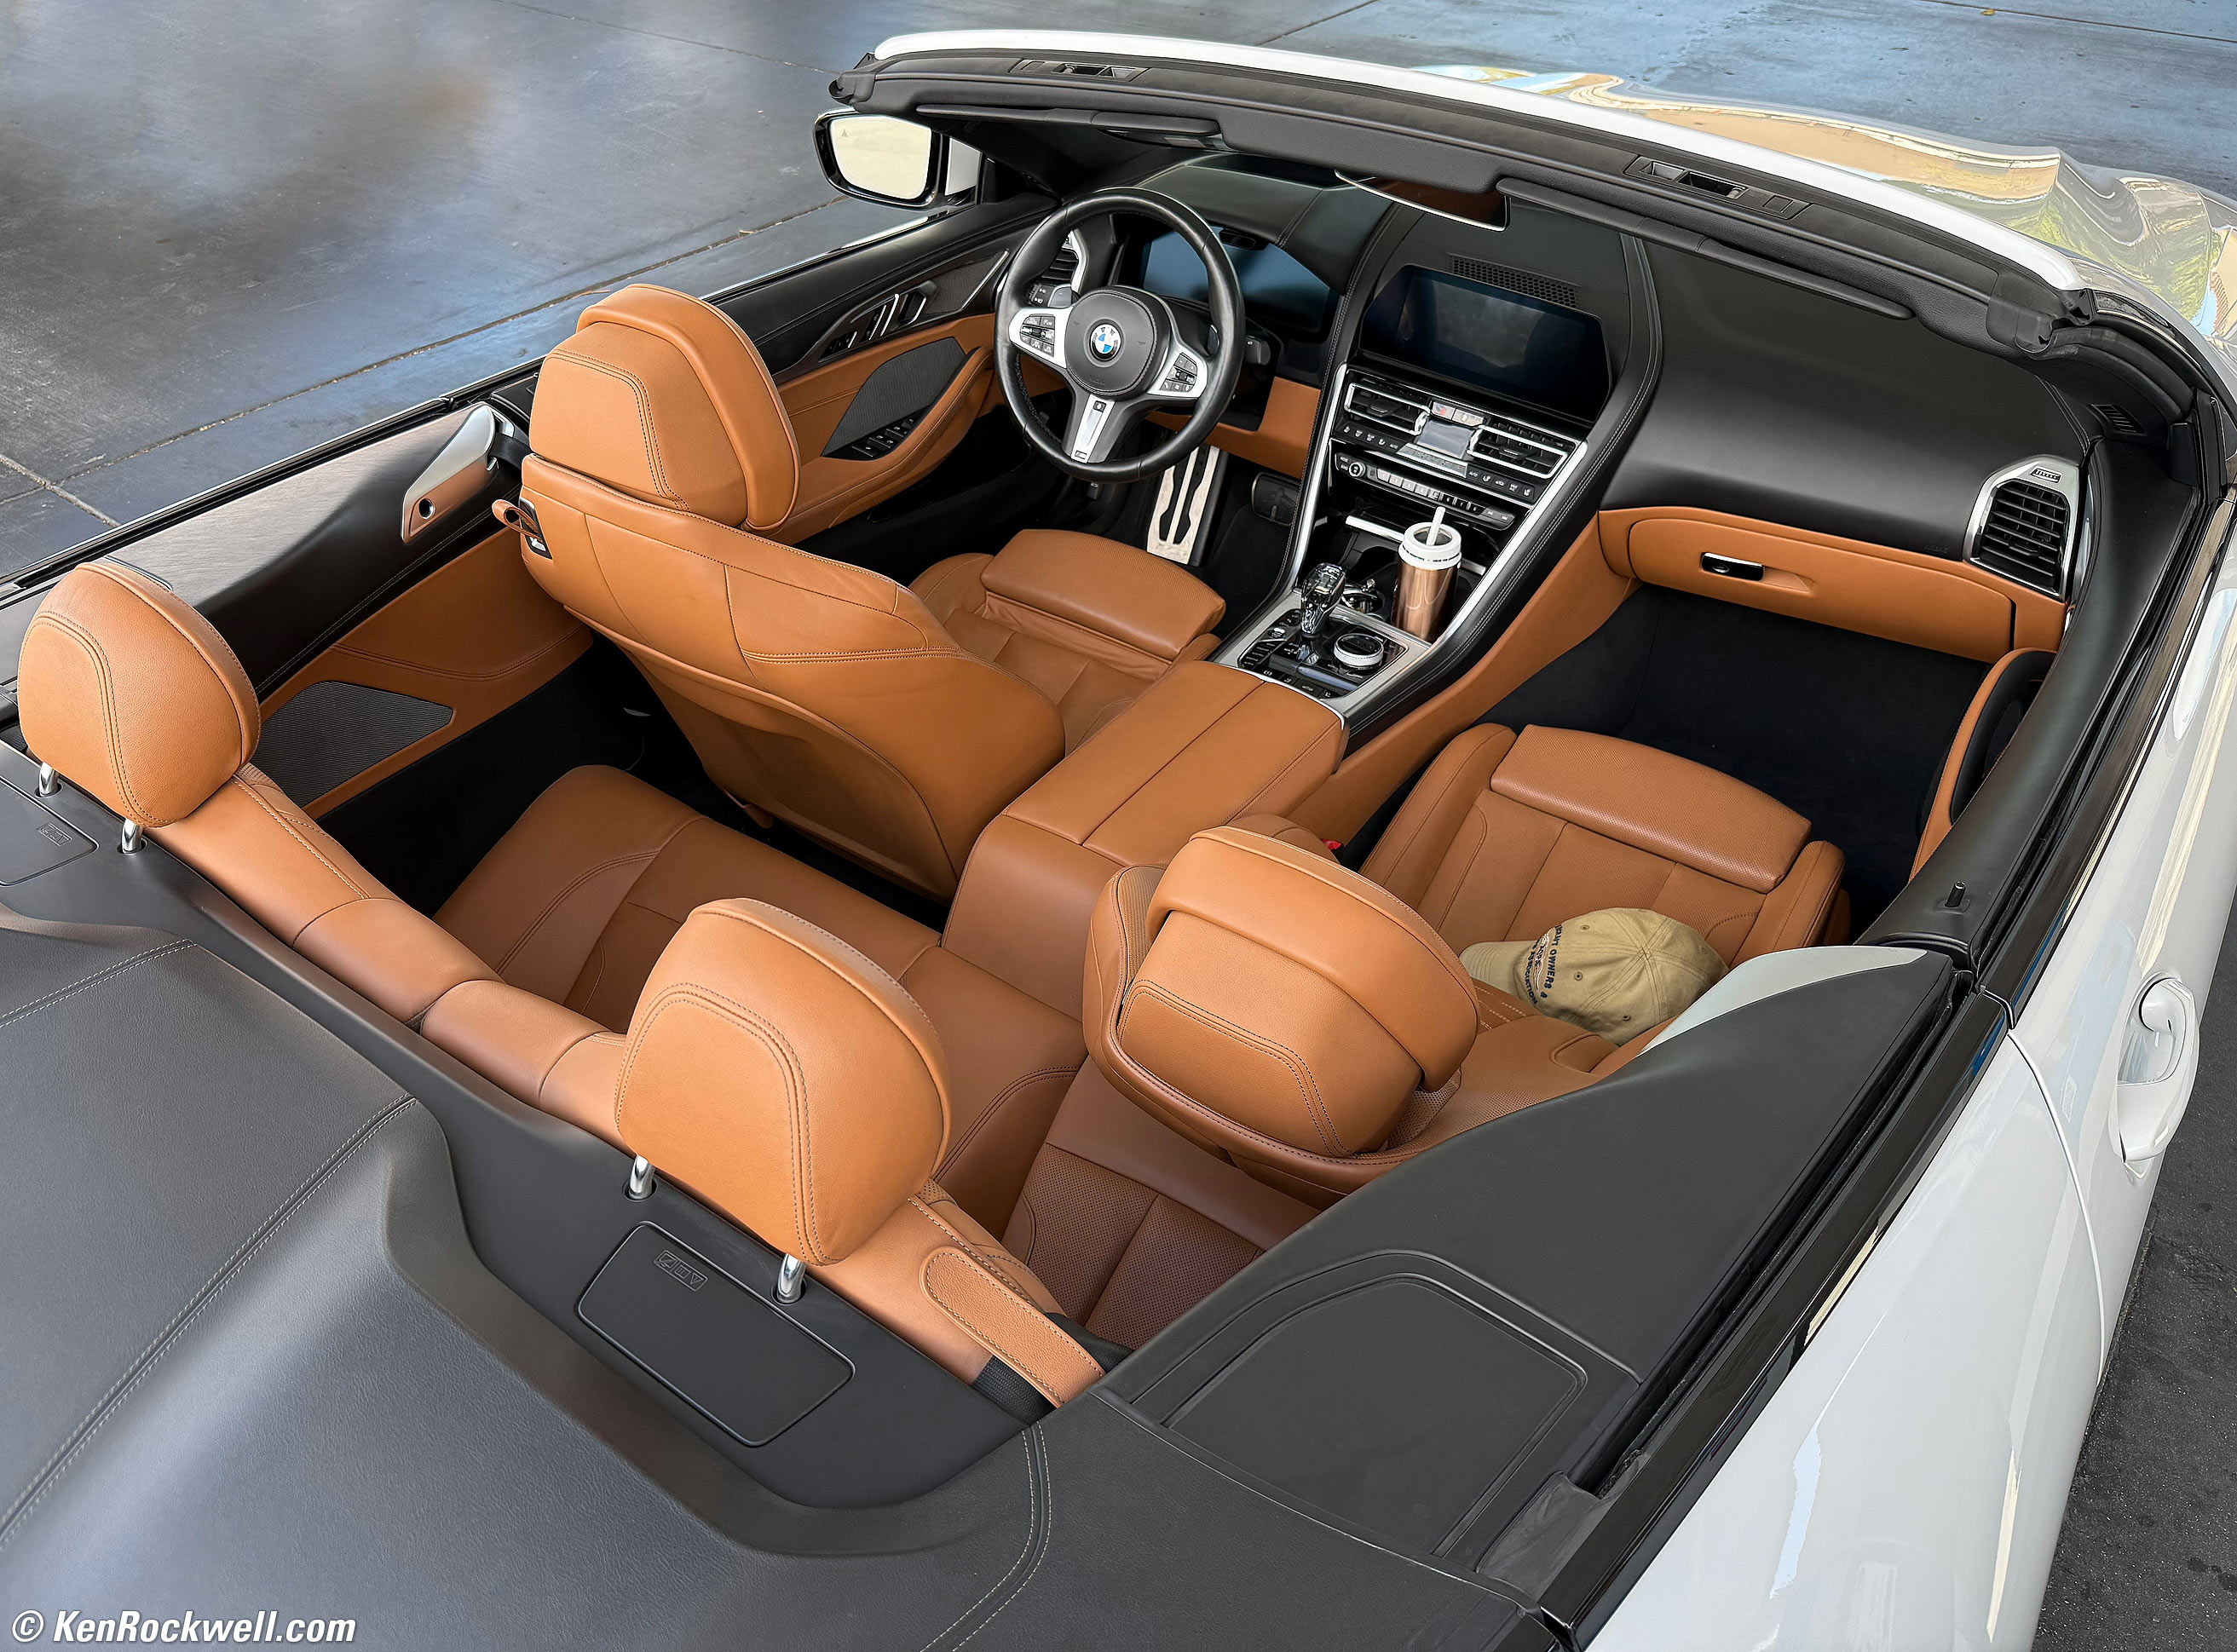
BMW /// M850i xDrive Convertible Interior in Cognac Merino Leather, Del Mar, California, 3:39 PM, Saturday, 26 July 2025. iPhone 16 Pro Max 1× (6.8mm actual or 24mm eq.) camera at f/1.8 at 1/321 at Auto ISO 100 (LV 10.0), Skylum Luminar Neo software to erase the other car and pump here at the gas station 😁. bigger.
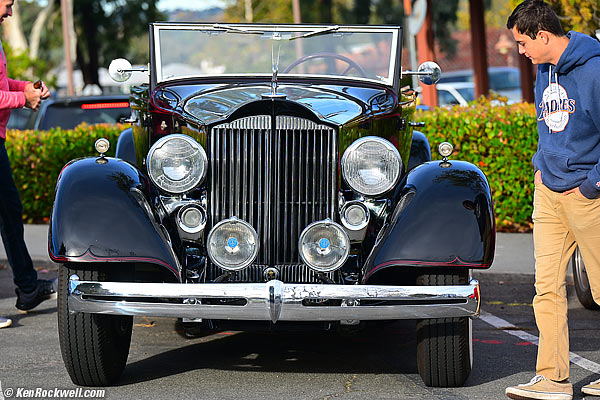
As shot. bigger.
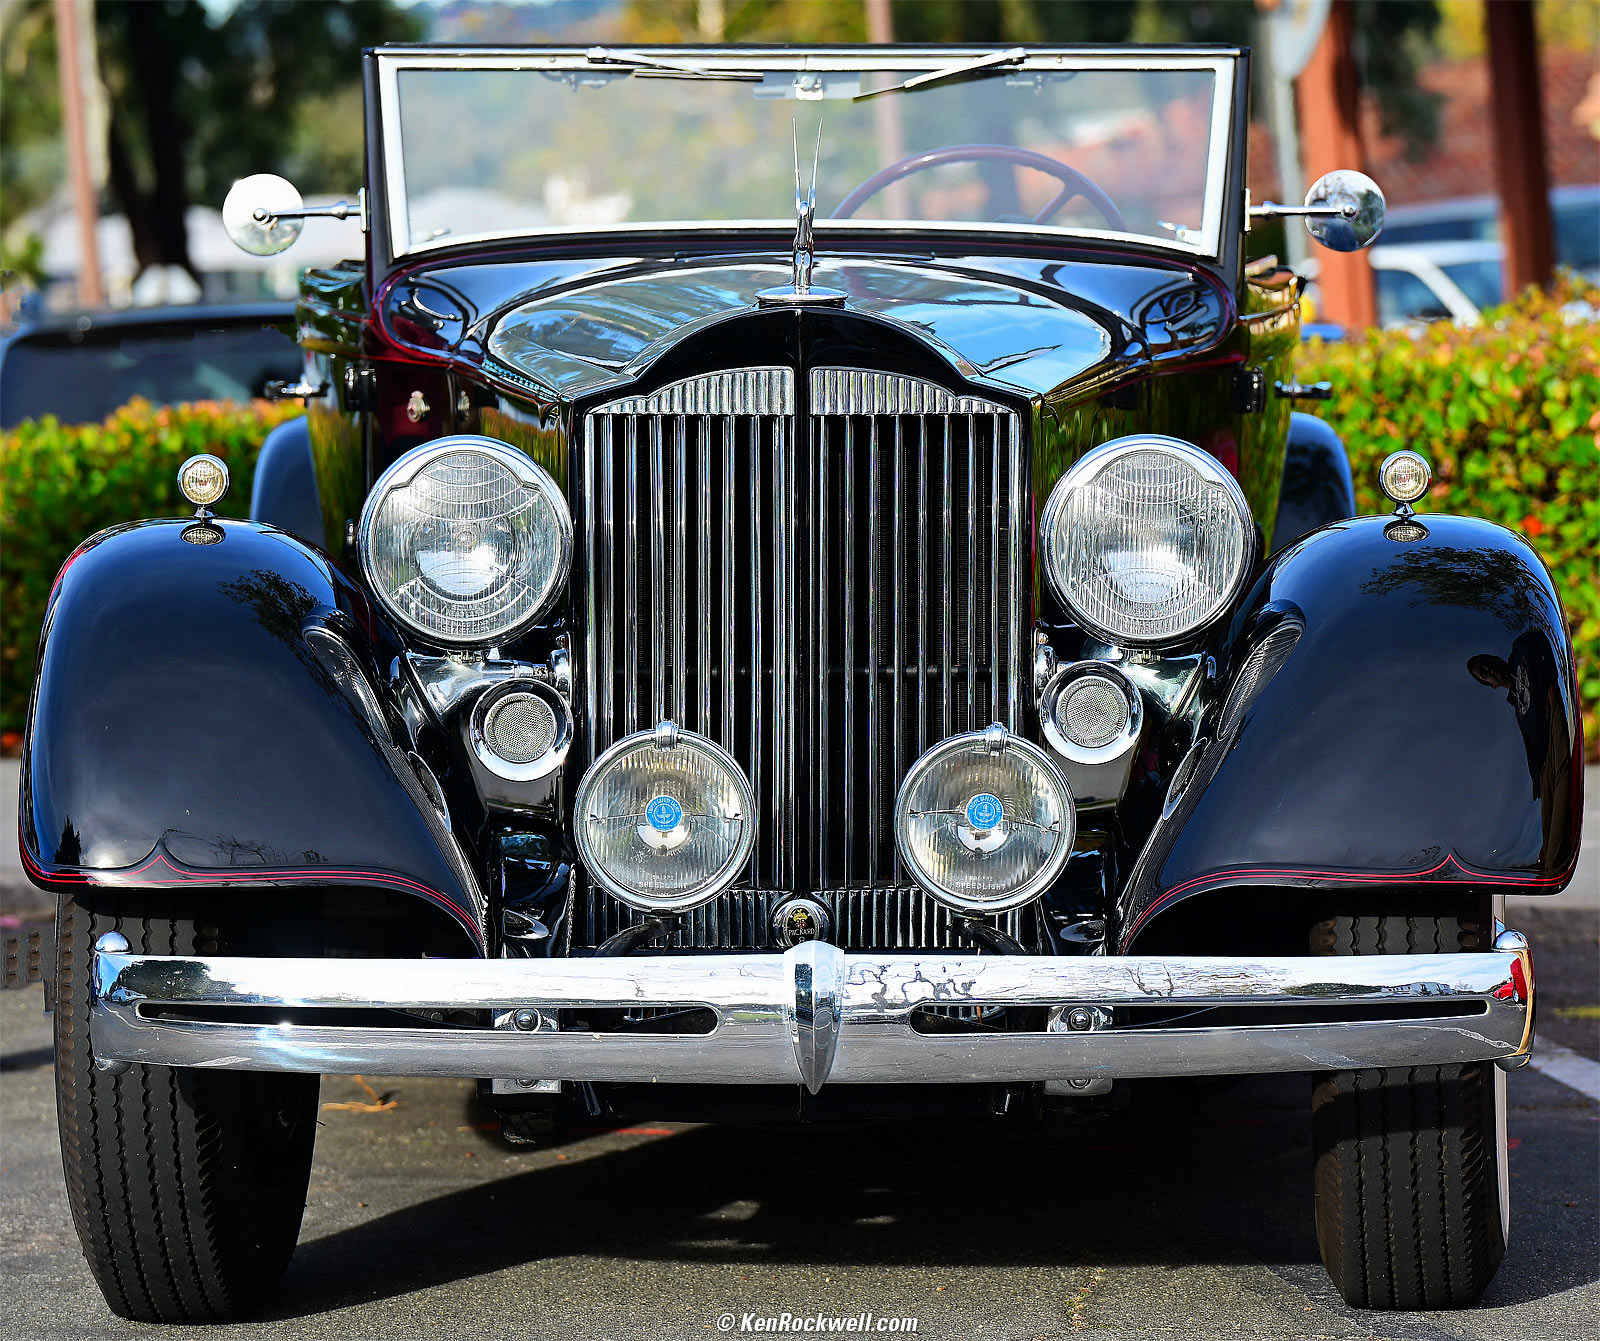
After Skylum Luminar Neo:
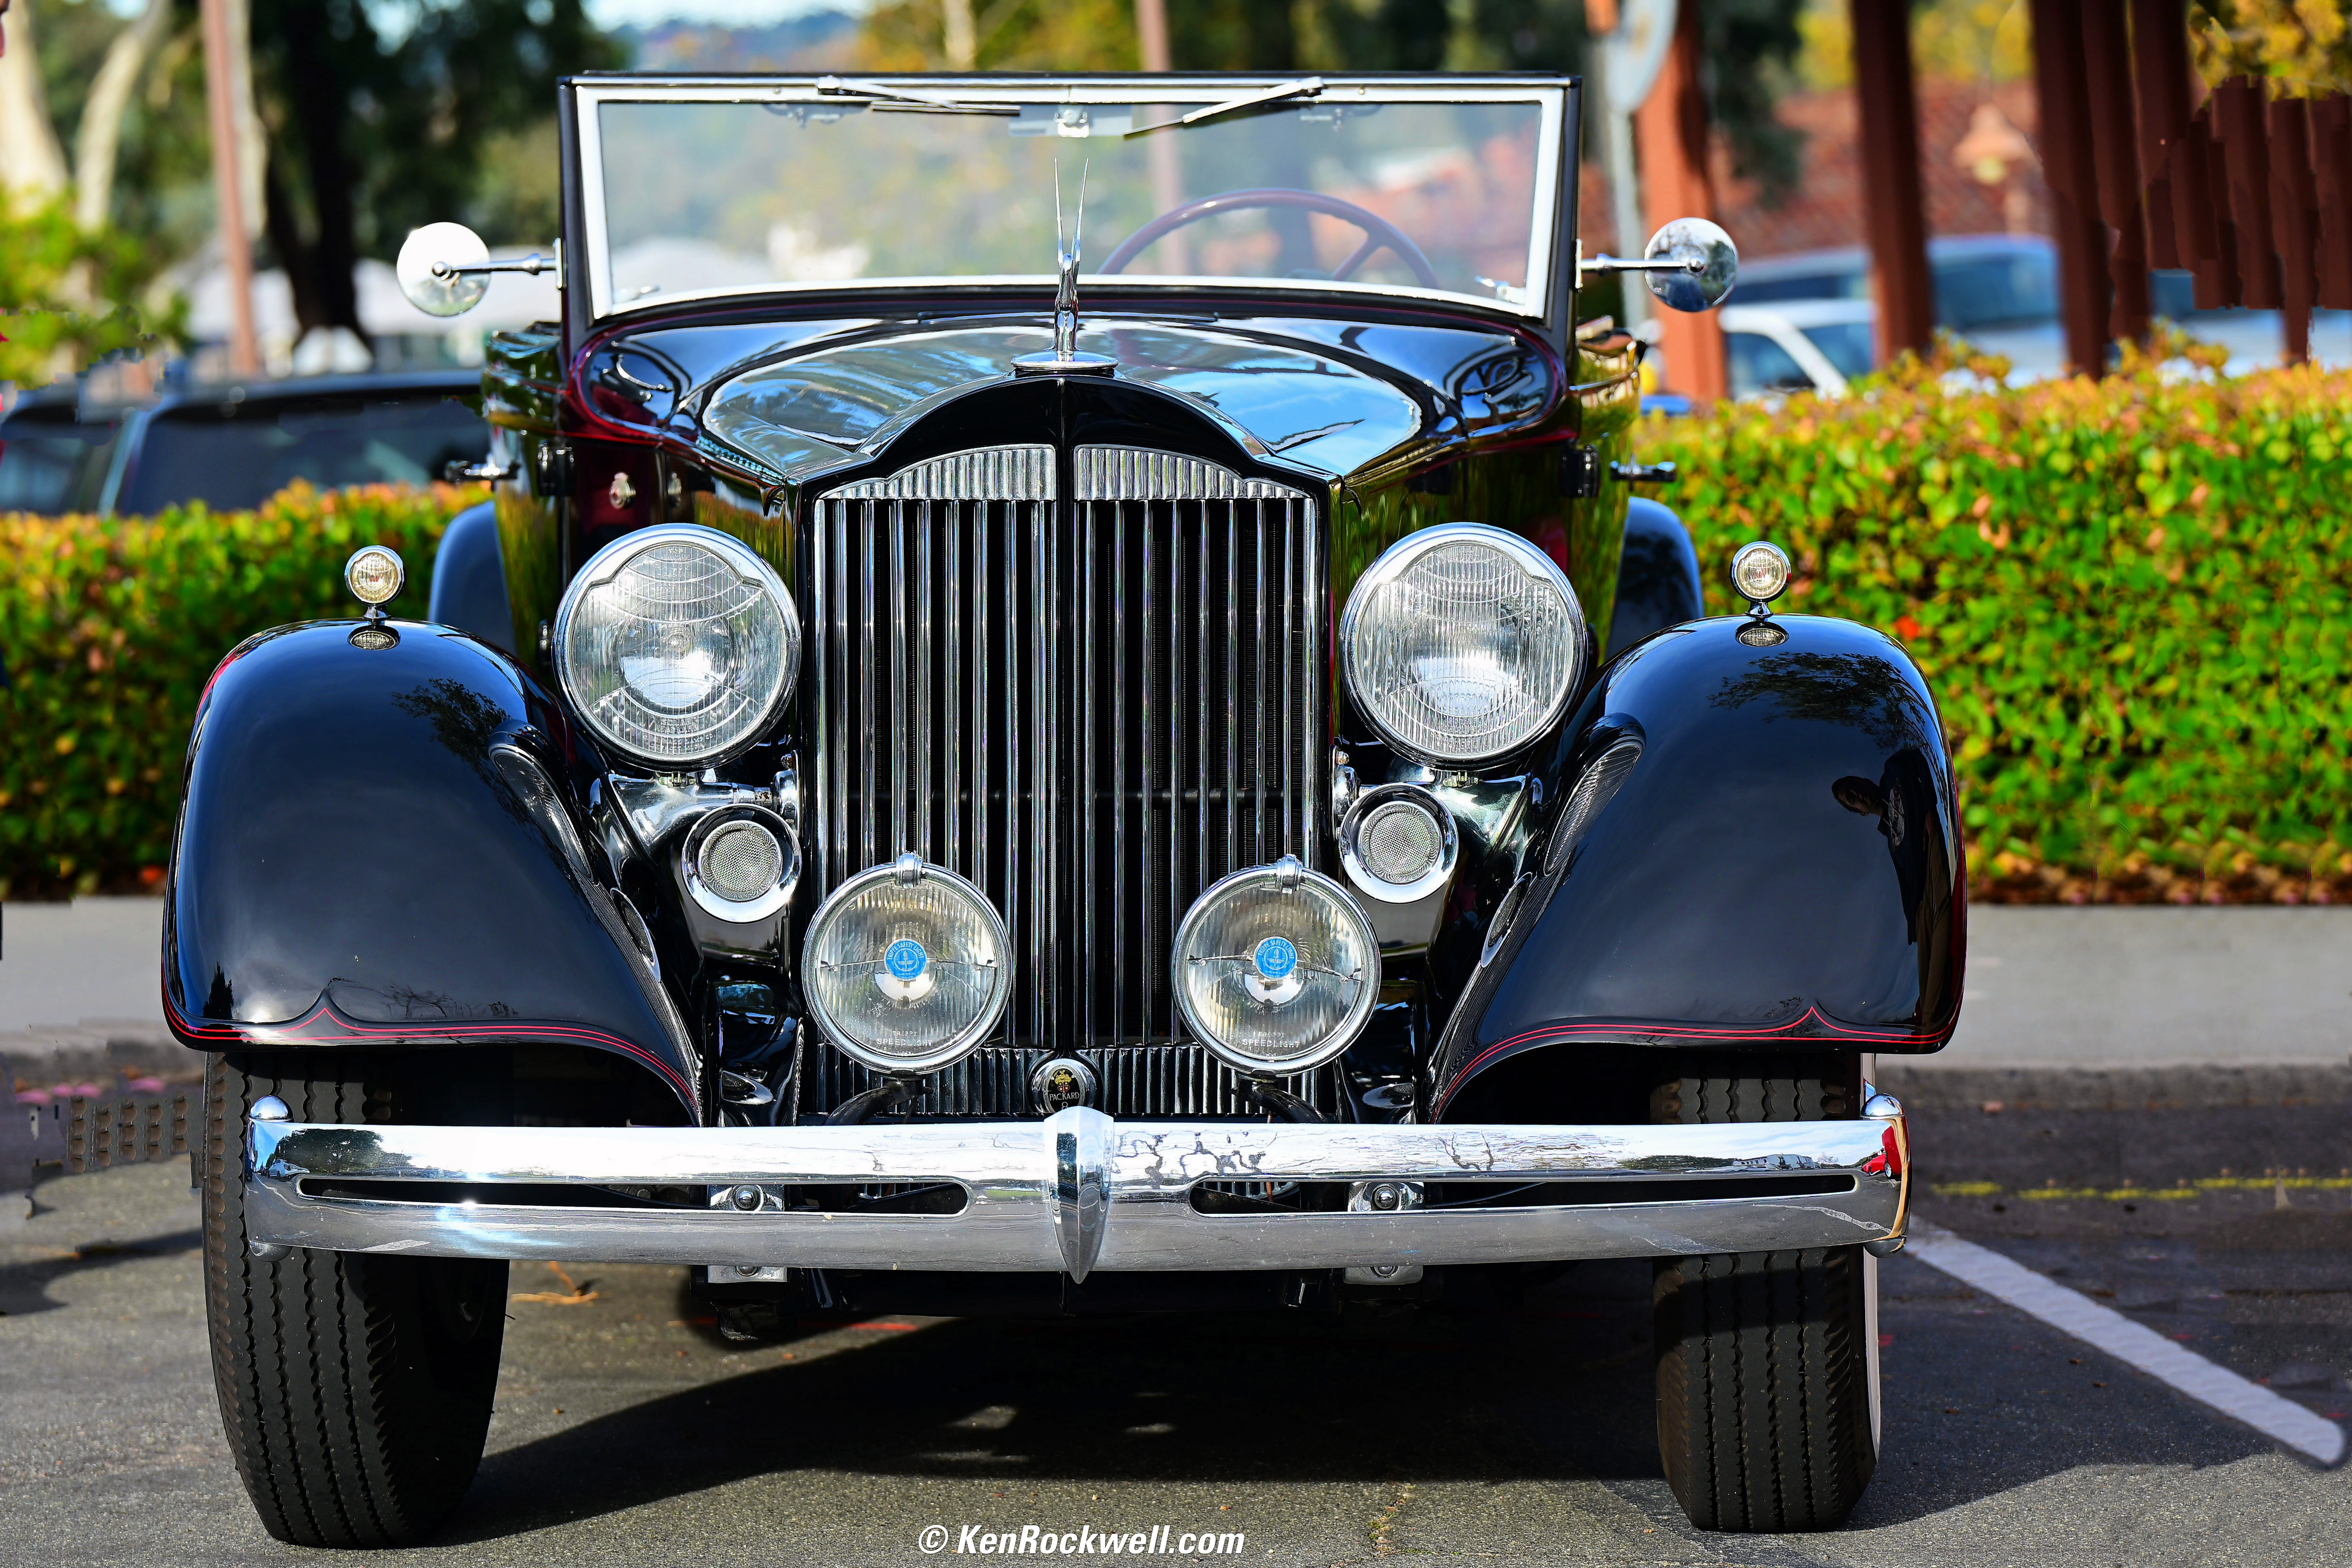
Packard, 8:52 AM, Saturday, 16 December 2023. Nikon Zf, Nikon Z 70-180mm f/2.8 at 125mm at f/4.5 at 1/320 at Auto ISO 100 (LV 12⅔), distracting elements erased with Luminar Neo's ERASE tool, dynamic optimization in Perfectly Clear (now sold as Radiant Photo). bigger or full resolution.
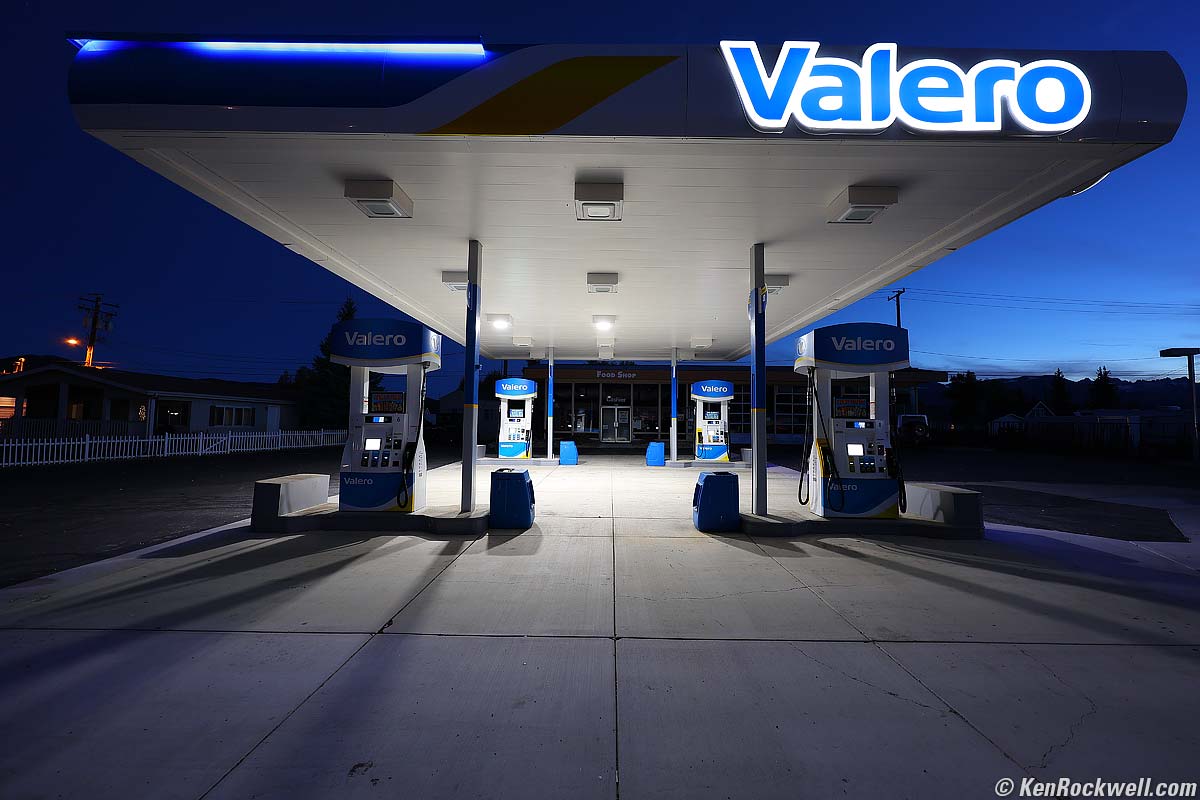
As shot. Note power lines and poles in the sky on the left and right, and all sorts of cracks and stains in the concrete. bigger.
After Skylum Luminar Neo:
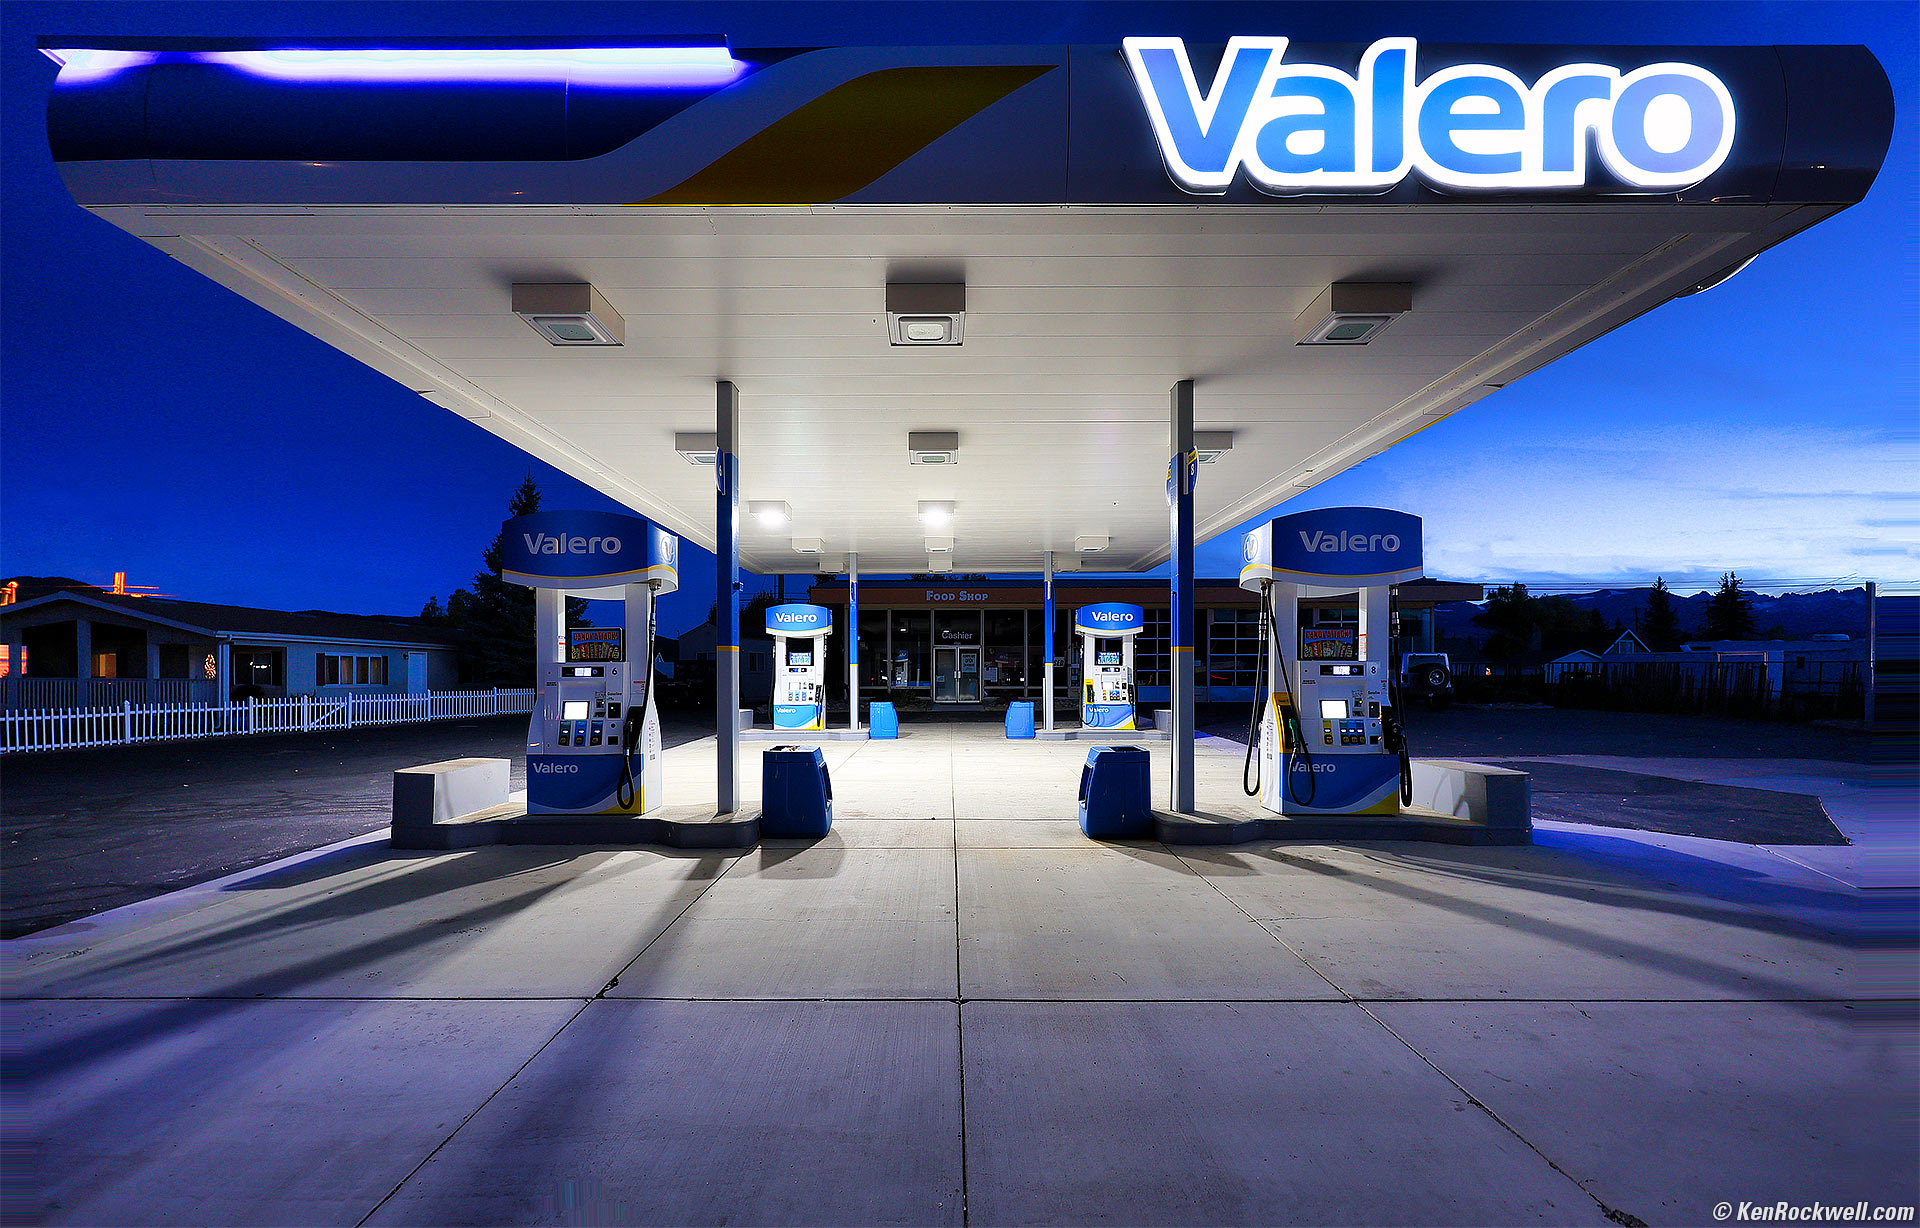
Valero Station, Bridgeport, California, 5:12 P.M., 12 October 2023. Canon EOS R6 II, RF 14-35mm f/4 L IS USM at 14mm, f/4 hand-held at 1/8 at Auto ISO 320 (LV 5.3), Skylum Luminar Neo. More tech details. bigger.
While Photoshop's Healing brush makes it easy to repair defects in the concrete, it's poor for removing things from a blank sky — for which Neo works great!
Also look how I was able, as usual, to bring up details in the dark on the left and right. I don't need no stinking raw or multiframe HDR; all I need is my one basic handheld JPG snap and Neo.
Portraits top

As shot. bigger.
Neo can blur the background with just one slider, automatically identifying what's me and what's the background, bravo!

Ken and Zoey. Apple iPhone 12 Pro Max 1× (5.1mm actual or 26mm eq.) camera at f/1.6 at 1/60 at Auto ISO 400 (LV 5¼). bigger.
I also made my eyes a little bluer, as simple as moving another slider. It's just as easy to change brown eyes to whatever you like.

Introduction top
Sample Images Introduction User's Guide Recommendations

I buy only from these approved sources. I can't vouch for ads below. |


Skylum Luminar Neo is one of several computer programs I use to make my images look awesome. Neo is my first choice for making ho-hum images explode.
Neo lets me go from plain to INSANE!!! in no time flat. If your imagination is as vivid as mine, Luminar Neo is a must-have. Neo is amazing for adding even more WOW! to my images. It works great with just my single JPG shots, bringing out loads of detail from dark shadows and recovering bright highlights just like multi-shot HDR used to do, and lets me make them blast your eyeballs when I want to. Luminar Neo is magical for making major improvements in otherwise dull images.
Neo lets me go from pretty good to Wow! in seconds, with just a couple of sliders. While Neo does a zillion things, I find my images usually need just a couple of tweaks and I'm done — you don't have to make it complicated.
Neo works both as a stand-alone program, as well as a plugin to Photoshop as I use it. I'll presume it also works with Lightroom, which is a more basic program I don't use.
I use Neo for adding major intensification and brilliance, removing significant distracting objects and adding vignetting to emphasize the subject.
I use Photoshop as my master editor for cropping, leveling, perspective correction, burning and dodging with adjustment layer masks, split-toning and the mechanics of resizing and format conversions.
Neo, like Photoshop, is a huge program with far more features than I will ever use. I'm just going to cover what I do use in Neo. Neo can use a lot of your computer's processing power and will consume a lot of memory while you're using it.
I also use Radiant Photo for basic image clarification. I use Radiant for more common images and portraits because it loads and processes faster, and is optimized to make images look "better" fast, rather than being a creative artist's tool for making major crazy changes like Neo. Radiant seems faster for automatic portrait retouching; it finds faces and makes them look better, all automatically with a preset suite of generally good portrait tools you don't have to tweak unless you want to.
Luminar Neo also does portraits, and is better for doing major changes like throwing backgrounds out of focus and changing eye colors. It doesn't take that much longer, and it's magic in how it can sort background from subject and defocus the background so well, so fast. Radiant is better if you want easy, automated people retouching, coming from the world of commercial photo finishing, while Neo is more manual and offers more crazy adjustments. Both automatically find faces. Radiant has preset optimum face corrections (which you can change) while Neo expects you to go in and select and adjust what you need individually. Ultimately I imagine a portraitist could make either tool do it all, but background blur seems to be unique to Neo and works with just a click.
I use both Neo and Radiant Photo, as well as Photoshop as my master editor, every day. Each program does different things better. I use Photo Mechanic to see everything I've shot and pick the best images, and that's all the software I need.
Software constantly evolves. In olden days Skylum made Aurora HDR and Luminar AI and I forget what else. Today these functions are included inside Skylum Luminar Neo.
This will continue to change in the future. The things I discuss will always be in there, but they may be called different things.
Neo is powerful and easy to use, but it takes vision. Exactly like a 50 caliber rifle, if you don't know what you're doing, the results can get ugly.
I'd get Luminar Neo directly from Skylum.
Luminar Neo User's Guide top
Sample Images Introduction User's Guide Recommendations
I'd get Luminar Neo directly from Skylum.
Vision
Photography is an art, not a science or the simple application of rules.
Like handing you a guitar, if you're not a talented guitarist, no way are you going to get any music out of it. Luckily photography is a much easier art to master than the guitar.
Photography is all about vision: your ability to imagine a final image in your mind's eye, and then use this and other software or methods to make whatever you got from a camera look like what you see in your imagination.
Every art is like this: you create the work in your mind, and then do whatever you have to to render your creation into a tangible form. If you can't see the final image in your mind, you're probably not going to get there, except by chance. If you have no vision, no amount of software twiddling will magically create art.
Presets
You'll see the PRESETS option selected at the top when you first open an image in Neo, and a slew of presets from which to select along the right.
I don't use no stinking presets; I know what I want and use the techniques I'm going to explain below to get it.
Therefore, the first tip for using Neo is that every time I open an image, I always click on EDIT towards the top, right next to PRESETS. For some reason my version on my machine requires a second click on EDIT to get to the screen with all the manual editing tools I use.
You can save your own presets, which are macros that can playback a series of actions that you might want to repeat on other images, but that won't work for creation. Every image I create demands different adjustments, so I find the ability to save my own presets saves no time, as I still have to tweak every setting in the preset differently for each image — the same work as just making the few adjustments I need manually.
Creation
Like sculpture where we keep chipping away until our work is finally set free from the stone, in photography we start editing and tweaking until our image is as we want it. Photography is much easier than sculpture because we can try different things, and if we don't like it, simply go back and try something else. Try that with granite!
While Neo has a slew of sliders and adjustments and capabilities, I use just a few. I save these six as FAVORITES, and then they're right on top along the right side of my screen.
To save your favorite tools as FAVORITES, just right-click on one, and select SAVE AS FAVORITE. To remove one from FAVORITES, right-click on it and select REMOVE FROM FAVORITES. Easy!
These are the only ones I save as FAVORITES. To use them, click one on the right side of your screen, and sliders will appear. If you don't see them, be sure you have TOOLS selected at the top of the items at the right side of the screen:
Enhance
This one tool magically amplifies colors and adds detail to highlights and shadows. It's a one-slider miracle!
Accent is Neo's main control.
The Sky Enhancer darkens the sky, if it detects a sky.
I never use it, but you can tap the MASKING option to apply this selectively.
Erase
By default, as soon as you select ERASE you can use your mouse to draw over what you want removed, which you'll see highlighted in red.
Click ERASE, and it may take a while, and it will erase those things.
Because the tool doesn't always get it right on the first try, I find it's better to use this tool multiple times with fewer items selected than to take a long time selecting everything and hoping to do this in one step.
If it doesn't get it right, cancel it and try again.
It can use a lot of computing power and memory crunching on this.
Color
Here's where I amp-up colors, if the ENHANCE tool hasn't already.
If 100 isn't enough, simply use the COLOR tool again and again!
Vignette
Vignetting lets me emphasize a subject by darkening the edges. Simply move the AMOUNT slider to the left.
I usually also lighten the center by clicking ADVANDED SETTINGS in the tool and sliding INNER LIGHT a little to the right.
Sky
This lets us replace boring skies with cool ones.
I don't usually mess with this, but you've seen how impressive it is when I do.
This isn't cheating. This technique is older than photography itself. Painters have always taken liberties with their skies. Photographers have been burning-in phony skies ever since the 1800s when glass plates were only blue-sensitive and couldn't capture a natural sky in the same photo as the ground. Back then photographers would burn-in fake clouds with different glass plate negatives of skies made with different exposures.
Simply select the Sky tool, pick the sky image you want to use, twiddle with the various options if you need, and you're good.
If you want to use one of your own sky shots, click the larger, named sky image in the tool, select All Skies, use your mouse wheel to go down to the bottom of the options and click the +, and there you go. You also can buy more skies from within Neo.
Neo is superb at replacing skies even behind complex subjects, not just with easy ridgelines.
Here's the cottonwood shot above with its natural sky:
And here it is after I dropped the "Galaxy 2" sky into it from among Neo's included skies:
Golden Cottonwoods, Bishop, California, 1:58 P.M., 19 October 2021. bigger.
Crazy, and you can see how well it works even with these diaphanous trees rather than a mountain in the foreground.
Supercontrast
This isn't "super contrast;" it's where we put highlight, shadow and midtone details back into our image.
This tool lets me get HDR results from just one JPG file, with no need for a series of images at different exposures. Bravo!
Select it, then:
The Highlights Contrast slider brings detail back into blown highlights.
The Midtones Contrast slider increases contrast in midtones.
The Shadows Contrast slider brings light and details into dark shadows.
The Balance sliders change the overall brightness of each of them.
Portraits
I don't use these often enough to put them up with my FAVORITES.
Find these options under PORTRAIT in the tools along the right side of your screen.
Here are the options I might use:
Portrait Bokeh
This is how I blurred the background here.
Simply click this option among the EDIT tools on the right, and move the Amount slider to the right to taste.
It identifies subject and background automatically, so all you have to do is move the slider!
Easy!
Face
Here's where you can reshape a face, as well as mess with the eyes, lips, teeth and even eyebrows.
Skin
Here's where you can smooth skin and tame shine and zits.
I'm sure you can figure out the rest.
Concatenation
You can use any of these adjustments multiple times.
I'll use the color option a couple of times if I need extreme saturation, and for more subtle adjustments you can call up an adjustment as many times as needed as you get closer to your final result.
Preview & Compare Before & After
Hold the backslash key ( \ ) to see your original image. Easy!
Editing your Edits
As you're working in Neo, tap the EDITS option above the tools on the right and you'll see all the changes you've made.
You can click on and alter any of these to taste, or selectively delete them before you hit APPLY, which applies all your changes to your image.
Once you hit APPLY to apply all the adjustments you've simply been previewing while in Neo, there's no way to recall or reproduce what you just did, however before you hit APPLY you can change everything about what you've been doing.
There is no "apply previously used settings" option to recall everything you just did a moment ago, or the last time you used it. I wish there was (hint, hint Vanelli & Co.). If you work an image for a half hour and suddenly think of something you want to do or change after you hit Apply, you can't start back with the original, apply what you just did, and then change something else or edit the sliders as you can in the EDITS option.
No worries, just re-open your edited image again in Neo, and have at whatever needs adjustment.
Recommendations top
Sample Images Introduction User's Guide Recommendations
I'd get Luminar Neo directly from Skylum.
I've used Neo as a secret weapon since 2021 to make my photos grab more eyes. It's not cheating, it's creative art. If you want to capture things exactly as they looked, just use your iPhone and don't mess with anything.
Of course I think everyone should use Neo, as well as use Radiant Photo and Photoshop, and of course use Photo Mechanic to see everything that's been shot and select the best images among them to edit and publish.
Of course we're all different, but these programs are what let me do what I do.
I'd get Luminar Neo directly from Skylum.
© Ken Rockwell. All rights reserved. Tous droits réservés. Alle Rechte vorbehalten. Alla rättigheter förbehållna. Toate drepturile rezervate. Niciun vampir nu a fost implicat în crearea acestei lucrări. Doe! Omnia jura reservata. Ken Rockwell® is a registered trademark.
Help Me Help You top
I support my growing family through this website, as crazy as it might seem.
The biggest help is when you use any of these links when you get anything. It costs you nothing, and is this site's, and thus my family's, biggest source of support. These places always have the best prices and service, which is why I've used them since before this website existed. I recommend them all personally.
If you find this page as helpful as a book you might have had to buy or a workshop you may have had to take, feel free to help me continue helping everyone.
If you've gotten your gear through one of my links or helped otherwise, you're family. It's great people like you who allow me to keep adding to this site full-time. Thanks!
If you haven't helped yet, please do, and consider helping me with a gift of $5.00.
As this page is copyrighted and formally registered, it is unlawful to make copies, especially in the form of printouts for personal use. If you wish to make a printout for personal use, you are granted one-time permission only if you PayPal me $5.00 per printout or part thereof. Thank you!
Thanks for reading!
Ken.